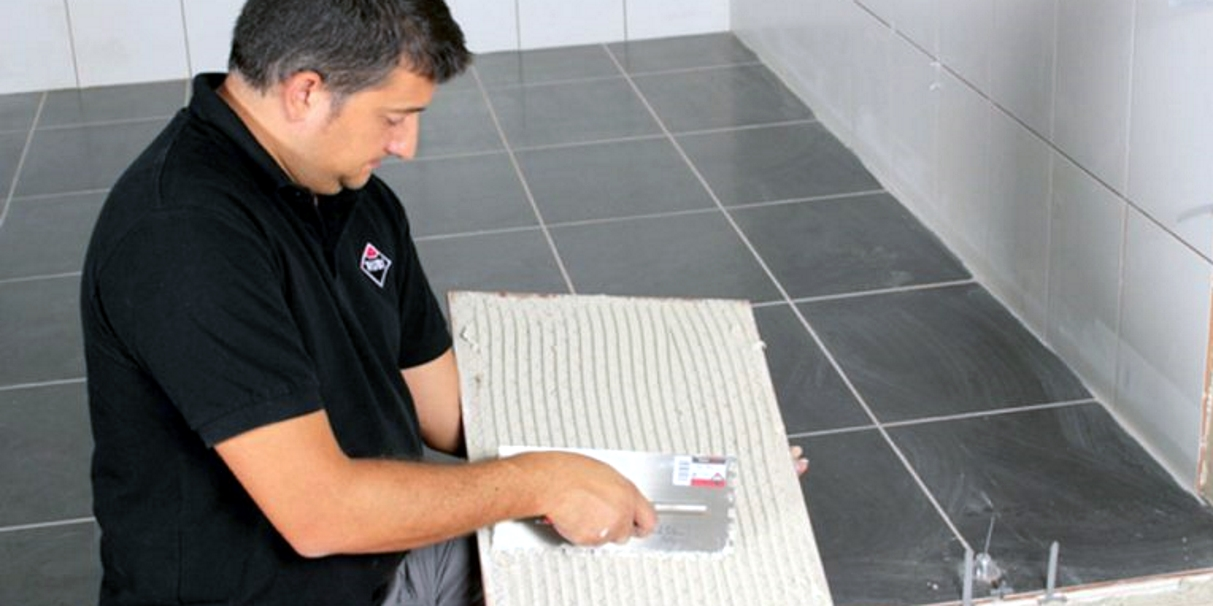
So, you’ve chosen your tiles, decided on your layout, bought your grout and adhesive and are about to start the task of installing your new wall or floor covering. You may have read countless guides on installing tiles or even taken advice from professionals but even so, there’s still one element of tiling that can leave even the most ardent of DIYer stumped and that’s which type and size trowel should you use to spread your adhesive? If this is one that’s left you scratching your head then read on as we’re about to some of the most common questions about tiling trowels so that you can make an informed choice on which type to use in your project…
How Many Different Types of Tiling Trowel Are There?
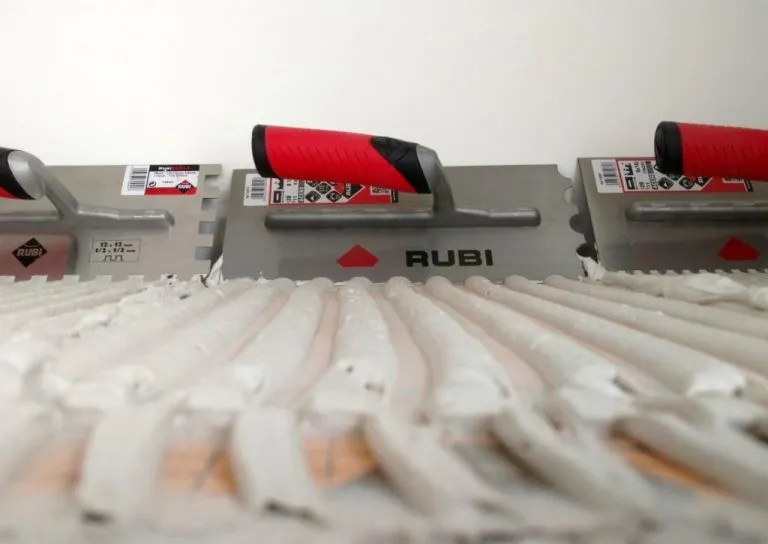
In simple terms, two; U-Notched Trowels and Square-Notched Trowels. Both types come in a range of sizes however (the size relates to how big or small the notches are, not the tool itself) and there is no standard trowel size for installing tiles – it all depends on the size and type of tiles you are installing. The key thing to bear in mind when choosing the right trowel to use is coverage (i.e. how much adhesive is left beneath the tile). We’ll cover this in more detail later on however.
How Are Trowel Sizes Measured?
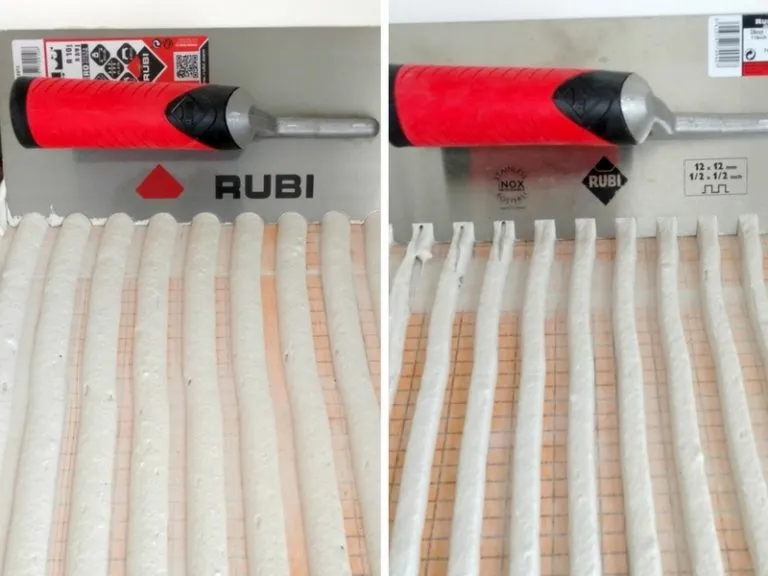
A trowel’s given size refers to the size and spacing of the trowel’s teeth. This measurement indicates how much adhesive the trowel will leave on the substrate when you spread it out. The shape and spacing of a trowel’s teeth determines how much is sandwiched between the tile and substrate once the tile is fully installed. Both square-notched and the U-notched trowels are measured in the same manner; the first measurement is the width of the notches (the distance between the teeth) whereas the second measurement is the depth of the notch.
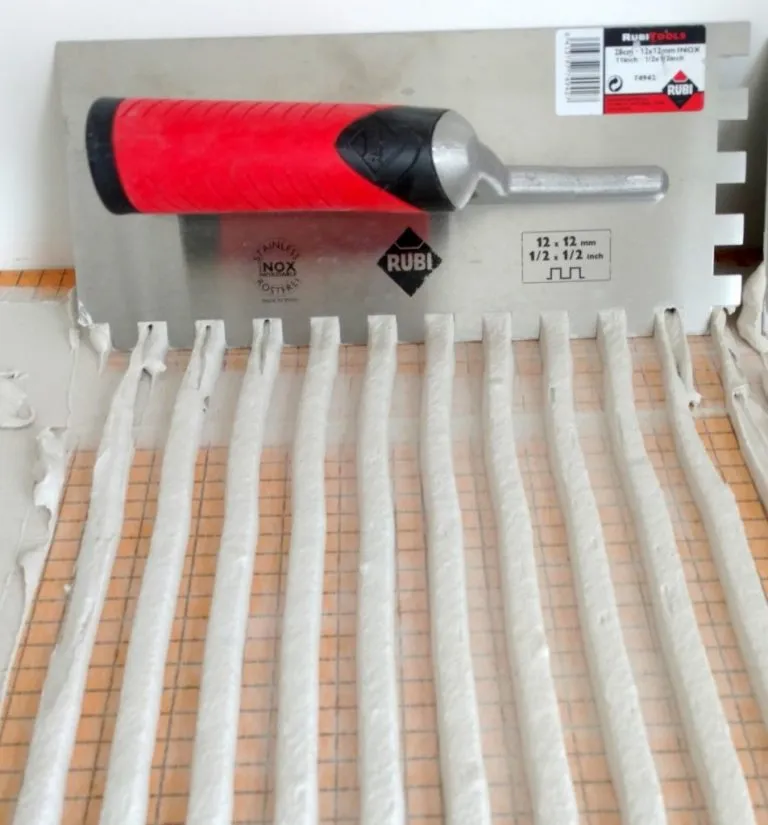
So for example, a 12mm x 12mm square-notched trowel will leave 12mm ridges of adhesive on the substrate with 12mm spaces between each ridge. If only one measurement is given on a trowel it means that both the ridges and spaces between them will be the same. U-notched trowels however generally have only one measurement. When spreading adhesive with a U-notched trowel it will leave rounded ridges on the substrate. The height of the ridges and the space between each ridge will be the size of the trowel. The width of each ridge will double the given trowel size.
Which Trowel Size Should I Use?
Determining which trowel size to use for your tile installation project depends on both the tile itself and the substrate being tiled on to. How flat the tiles and substrate are is of great significance – the less flat the tile is, the more adhesive you’ll need beneath it (which means opting for a larger trowel size).
The first step is to determine how much adhesive coverage is required beneath the tile in the finished installation. A finished installation generally requires a minimum of 2mm beneath the finished installation, so aiming for a 3mm minimum makes it easier to calculate the correct tile trowel size. There are two basic ways to determine which size of trowel to use: calculating the warpage of the tile and substrate or visual inspection:
Calculating Warpage
Warpage simply means the amount of variation from the plane (how ‘out of flat’ your tile is). You can easily figure this out by placing two tiles tile face-to-face and squeezing them together in one corner. If the tile is warped, the opposite corner will lie flat against the opposite tile. Measure the amount of space between the faces of the tile on the opposite corner then divide that number in half to get the amount of warpage.
If doing this results in say a 6mm space between the tile in the opposite corner, it means the tile is cupped by 3mm. You must add this amount to the minimum amount of adhesive you require beneath the tile in order to get proper coverage. So, let’s say that you want minimum 3mm bed of adhesive beneath a tile that is warped by 3mm; you should use a trowel that will leave a 6mm bed of adhesive beneath the tile (a 12mm square-notched trowel will accomplish the proper coverage in that particular example).
Visual Inspection
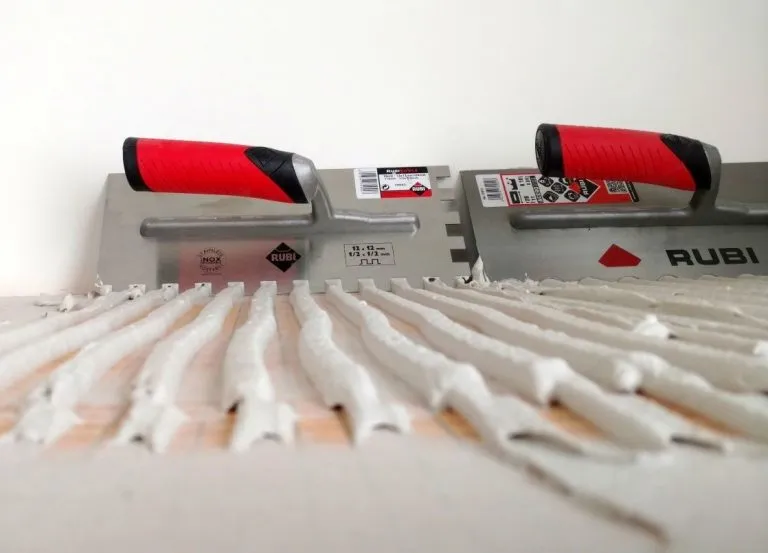
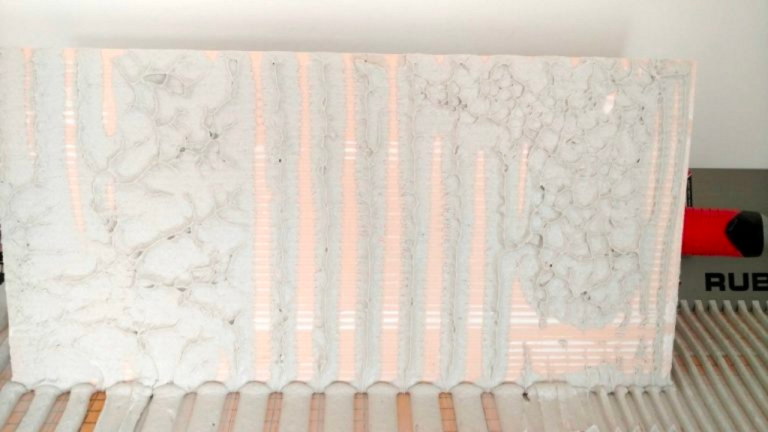
Visual inspection is exactly what it sounds like – you simply full embed the tile into the adhesive, removing it and then have a look at both the substrate and the back of the tile to determine whether the resulting coverage is sufficient.
The tile pictured above was pushed down only about halfway into the bed of adhesive. Notice the bed created using a 12mm square notched trowel (left) provides the most coverage with the bed produced using an 8mm square notched trowel (right) in a close second. The u-notch bed in the centre has even coverage, but note that a much larger notch is required to get the same level of coverage as the other two examples.
How Much Adhesive Will A Trowel Leave Beneath A Tile?
Proper adhesive coverage means a minimum of 85% total coverage beneath a tile for a dry area installation, and 95% minimum total coverage in a wet area (showers, wetrooms, etc.). To achieve proper coverage you need to use the right sized trowel. You can check whether the trowel used has provided the requisite level of coverage by installing the tile as normal, pressing it down into the adhesive, then pulling the tile up and checking the back. There should no longer be any trowel lines and you will see complete coverage of adhesive on both the back of the tile and the substrate.
A 6mm x 10mm square-notched trowel for example will leave 6mm wide by 10mm high ridges of adhesive on the substrate (with 6mm spaces between each ridge), whereas a square-notched trowel with the same size notch and teeth (i.e. a 12mm x 12mm), the bed of adhesive left will be half that measurement (6mm) beneath a flat tile over a flat substrate.
Fully embedding the tile into the adhesive bed will cause the ridges of adhesive to spread evenly into the spaces between the trowel lines. Since the spaces between the ridges have the same size as the ridges themselves, this will split the height of the ridges in half. So a 12mm x 12mm trowel will leave a 6mm high bed of adhesive beneath the tile, a 10mm x 10mm trowel will leave a 5mm bed of adhesive beneath the tile and so on and so forth.
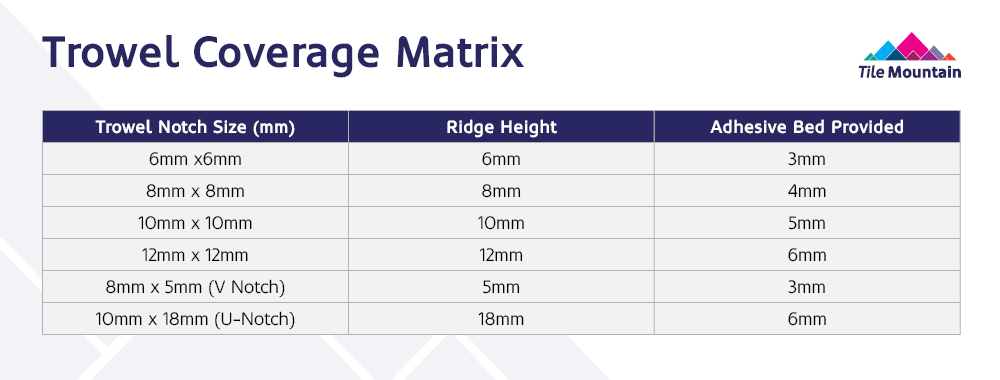
In the case of U-notched trowels, embedding the tile into the adhesive will leave a layer beneath the tile a little over 1/3 the size of the trowel teeth. So, a 10mm U-notched trowel for example will leave a 3mm bed of adhesive beneath the tile. See the table below for a breakdown of tile sizes and the coverage they offer.
If you’d like to find out more about installing all types of tiles then head over our Help Centre – it’s packed full of useful hints and tips covering all aspects of tiling including cutting, measuring, laying out, using spacers and grouting. You might also want to check out our Adhesive and Grout Quick Guides – they tell you all you need to know about choosing the right products for the job! And don’t forget – if you have completed a project using Tile Mountain tiles, tag us in your pictures on Instagram, @Tilemountainuk, we love seeing our products in your home!
Here at Tile Mountain, we not only have a huge range of tiles to suit every purpose, we also have a wealth of tiling knowledge gained from over 30 years in the tile industry, (which we’ll do or best to share with you across these very pages).
Whether you’re looking for the perfect tiles for your next home improvement project, are searching for some style inspiration, or simply need a bit of help and advice, you’re in the right place.