So you’ve completed your tiling work and it’s all looking wonderful – congratulations! But now you’re dreading potentially ruining that hard work by drilling tiles to install bathroom accessories, shelves, or other fittings. Fear not though as we’ve put together this step by step guide on how to drill through tiles that will ensure you do a great job and keep your tiles from cracking in the process…
Know Your Tiles
Before even thinking about drilling through your freshly installed tiles, make sure you know exactly what is is you’re going to be drilling through. Porcelain and natural stone tiles are a lot tougher than ceramic tiles, meaning that you’ll have to exert a little more effort to break on through to the other side. Not only that, you’ll also need a specialist drill bit that is designed to penetrate both the hard glaze and body material of porcelain.
Ensure You Have The Right Tools for The Job
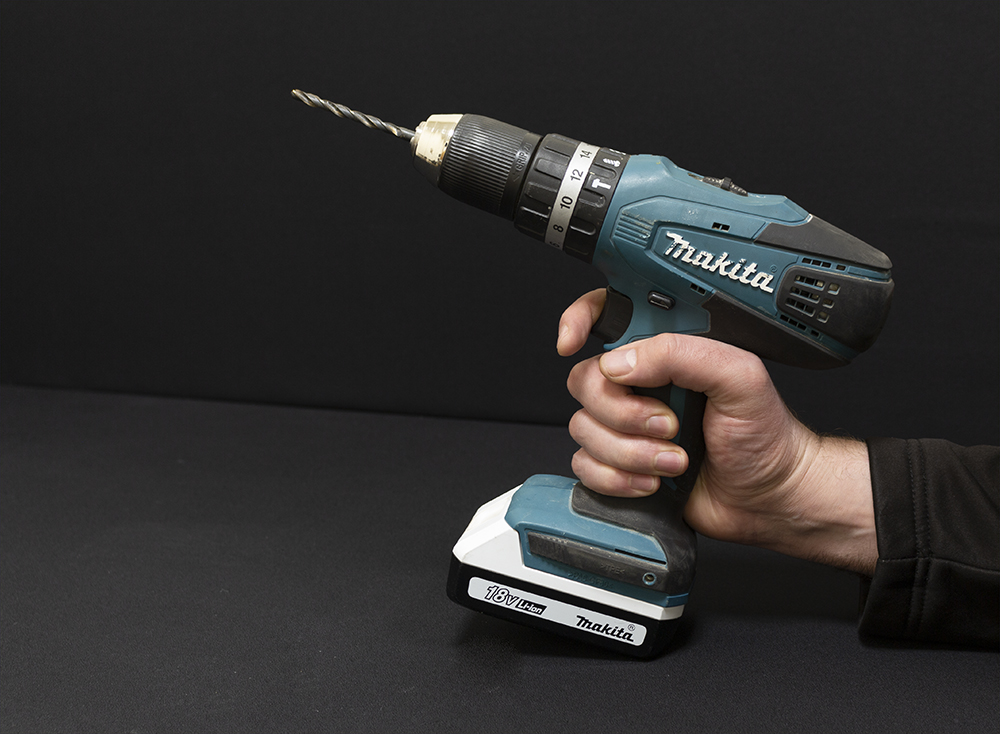
It goes without saying that a power drill is required when carrying out this task, but the most important element in successfully and effectively drilling through tile is the drill bit itself. You should never use an old or worn out drill bit – they’re not as efficient as brand-new ones. If you use an old one, it’s less likely to perform at optimum capacity and you’re more likely to damage the surface of the tile whilst drilling.
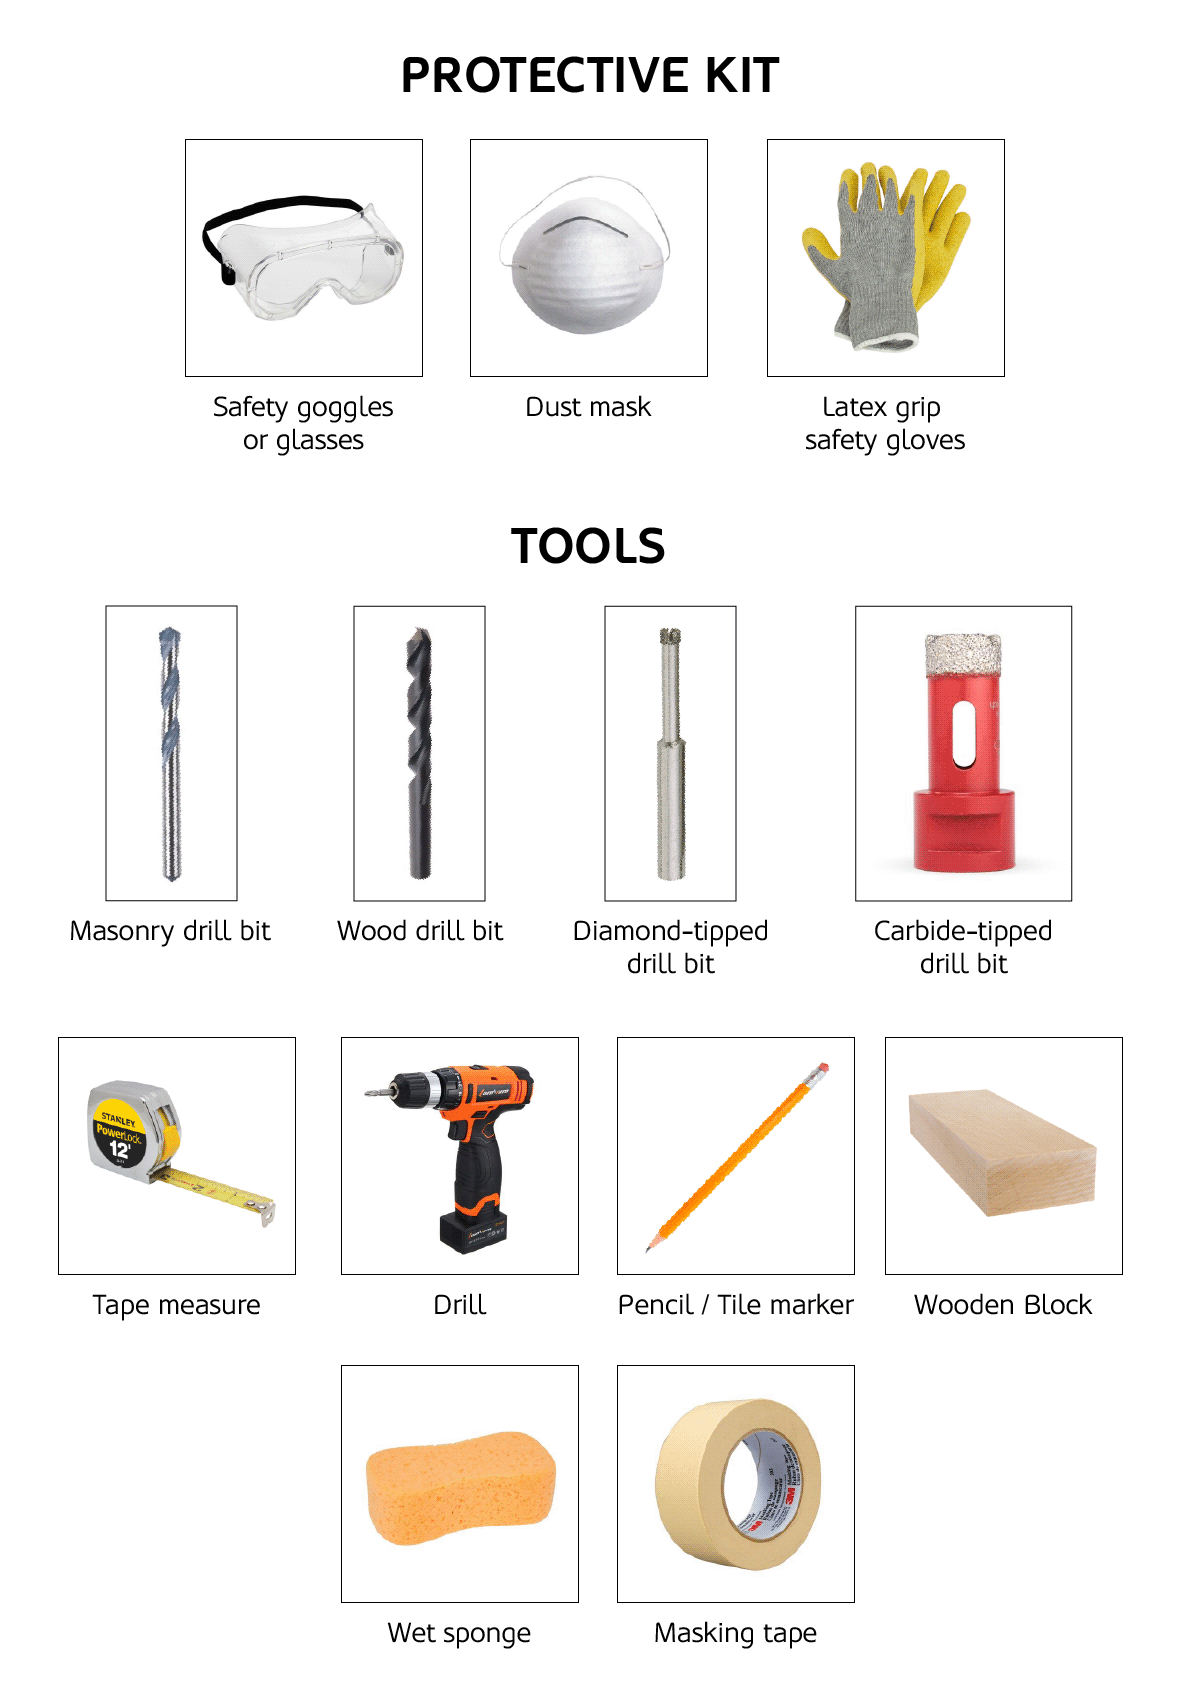
It’s also a good idea to invest in some safety goggles and a dust mask before drilling through tiles as depending on the density of the material being drilled, quite a bit of debris particles can be kicked up into the air. Latex grip safety gloves are always useful to have also.
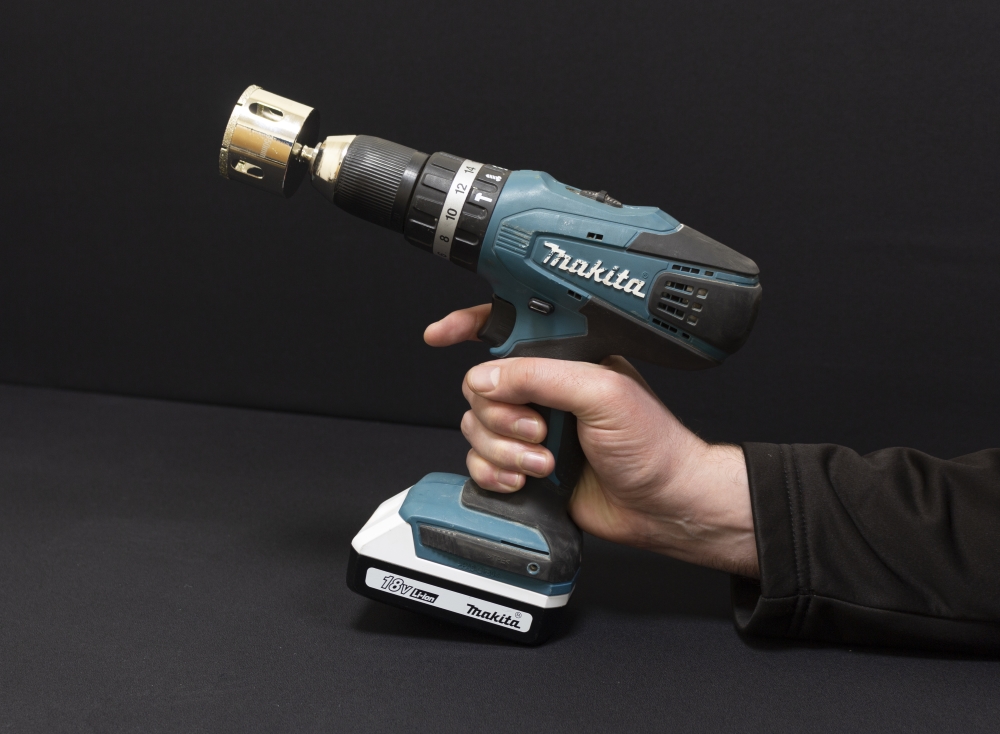
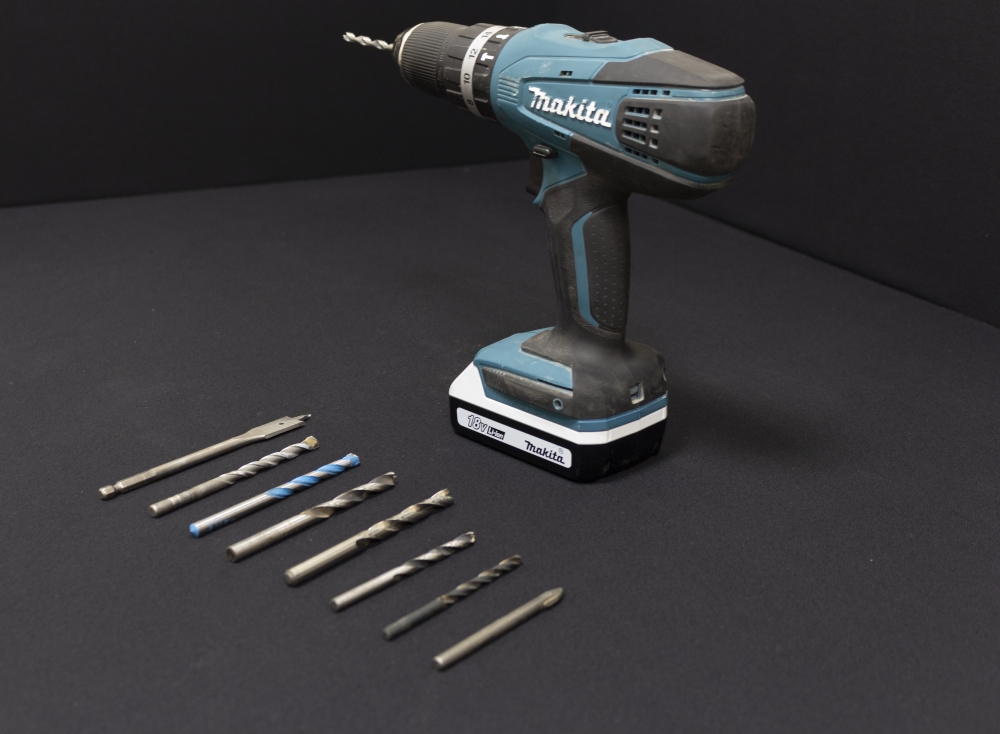
As mentioned earlier, drilling through tile requires a specialist drill bit – regular or even masonry bits simply won’t do the job as they’re not strong enough to penetrate tiles’ hard surfaces. Instead, you should opt for either carbide-tipped or diamond-tipped drill bits. Diamond tipped drill bits are the more costly of the two options but will stand up to the rigours of drilling through even the hardest tile surfaces and will not burn out as quickly as standard masonry drill bits.
Carbide-tipped masonry drill bits are the more common of the two and whilst they’ll do a perfectly serviceable job of drilling ceramic and all manner of glazed tiles, they are not recommended for use with porcelain stoneware. Harder materials such as porcelain, full-bodied porcelain, vitrified porcelain, and quarry tiles require not only a bit more elbow grease; you’ll need a diamond-tipped drill bit too.

Measure, Measure Again, Then Mark
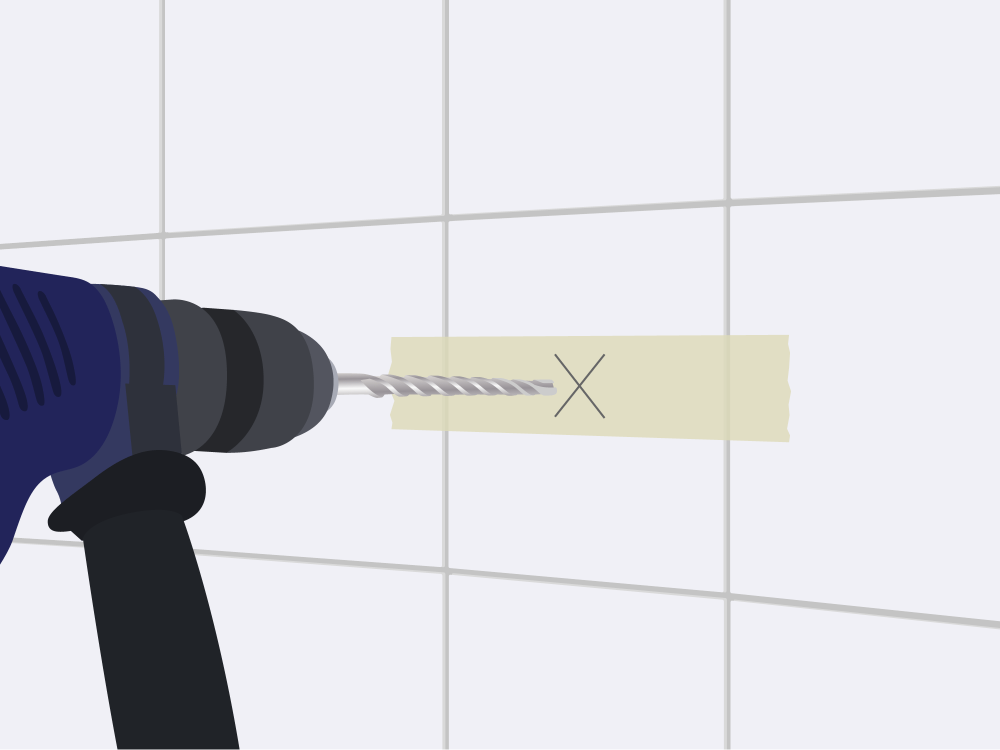
Anyone who’s attempted to drill through a tile previously will know that the surface glaze makes it difficult to o keep the drill bit steady on the surface when you start. You’ll need it to grip into the tile and not skid around the surface. To create some tension, consider using masking tape over the area where you’ll drill. Measure (and then re-measure!) the area you need to drill and mark with an X over the masking tape. This will provide a surface that will allow the drill to grip when starting to drill your hole.
If you have quite a few holes to drill, you may also want to consider creating a small template with a small block of wood. Simply bore a hole through the wood that’s the same diameter as the drill bit you’ll be using and place this over the area on the tile, using the hole as a guide for the drill by holding it in place with your free hand.
Special accessories called drill guides can also be used to increase accuracy when drilling through tiles. A variety of tiling tool manufacturers produce these and they usually come in the form of a plastic casing that is attached to the tile and then drilled through (much in the same way as the wooden block method described above).
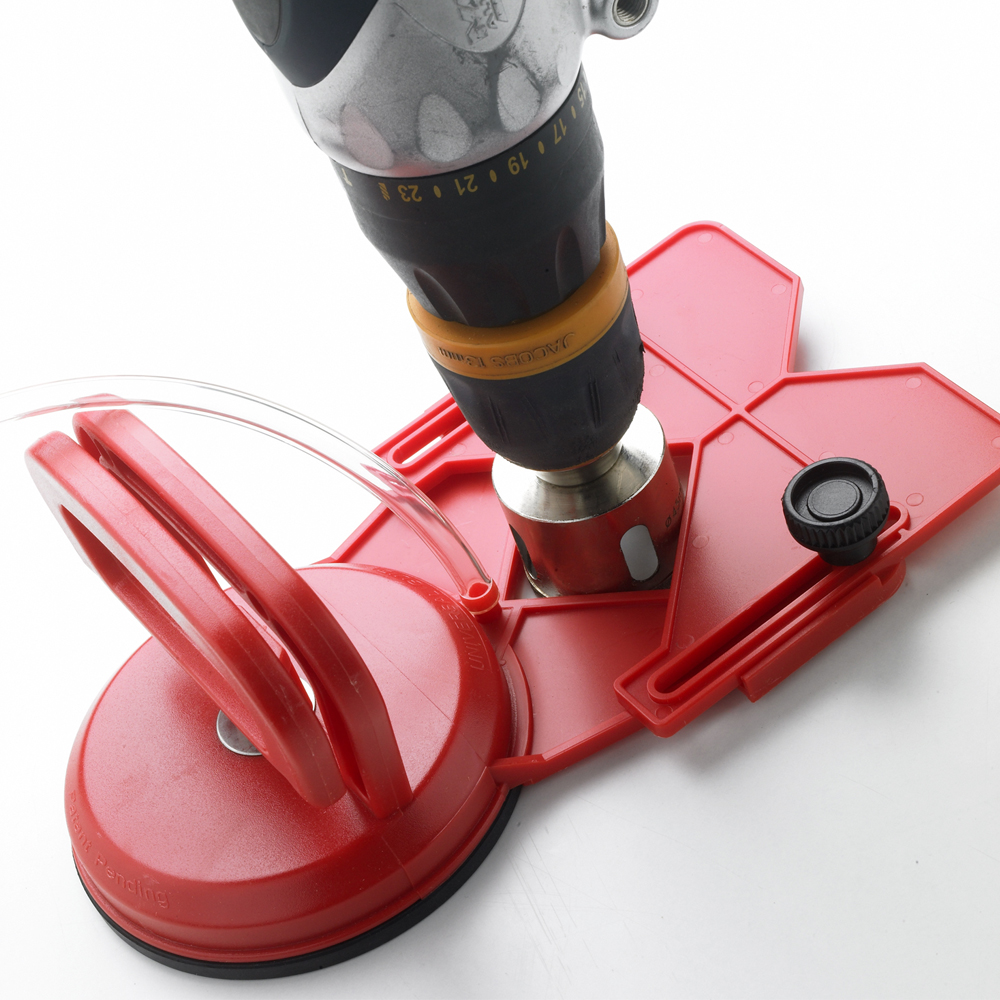
Other types involve a steel plate with guide holes that is attached to the surface to be drilled via a suction cup, allowing both horizontal and vertical holes of specific diameters to be drilled accurately. Whilst this type of accessory might involve a little monetary outlay, they can be used time and time again and so are a good investment if you are a keen DIYer.
Start To Drill Through Tiles
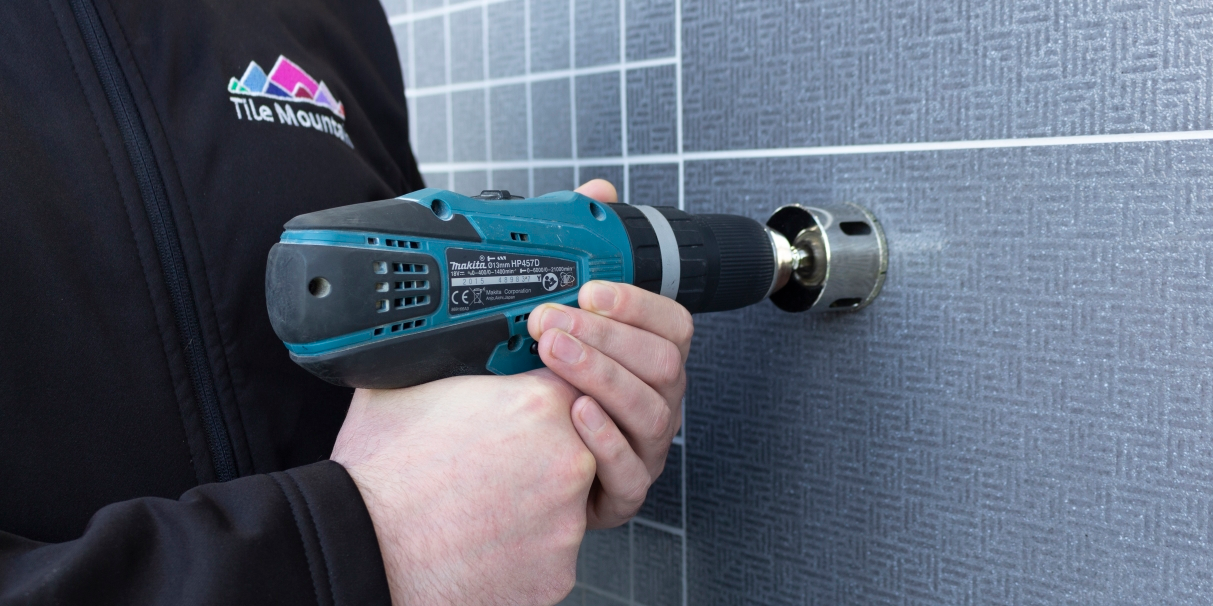
You’ve done all your prep, you’ve measured up, and you’ve got all the right gear – it’s time to start drilling! As we’ve already alluded to, tiles (especially porcelain and natural stone tiles) are really quite hardy and are designed to withstand all that domestic and commercial use has to throw at them. Whilst this is a good thing in general, it also makes drilling through tiles a pretty strenuous task if you don’t approach it with patience.
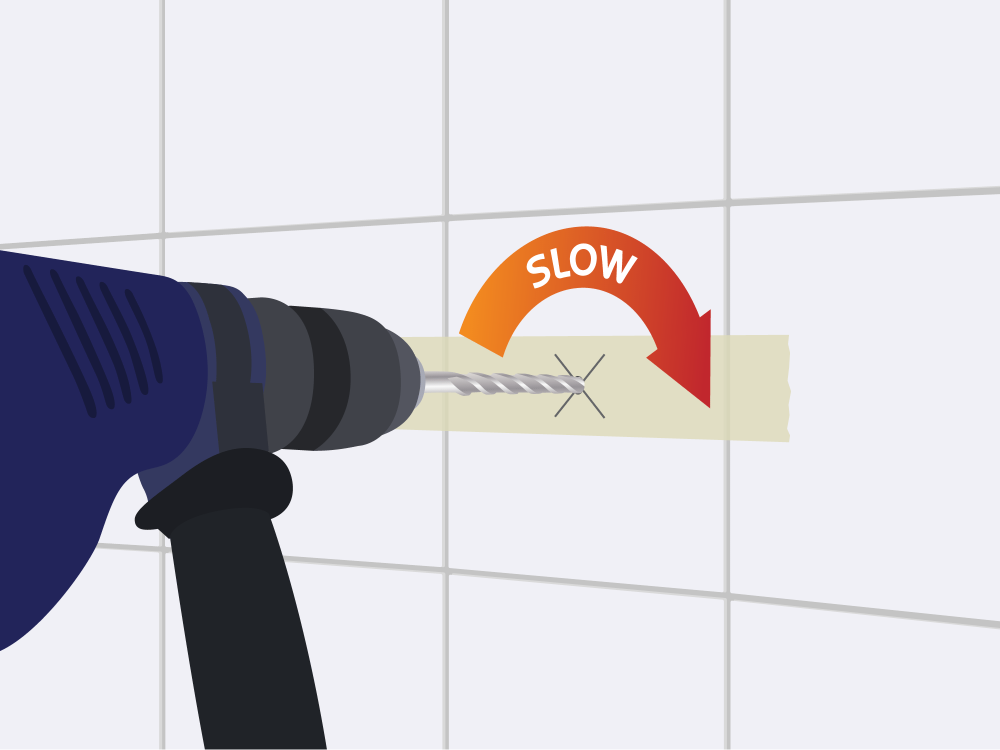
It might be tempting fire up your drill and go hell for leather to break through the glaze but this is a sure-fire way to overheat the drill bit and create vibrations that will most likely crack and ruin the tile. Take things slow and start on a low speed, applying even pressure until you have bored through the top layer of glaze. Once you’ve penetrated the initial layer you can then, you can gradually increase your speed and pressure as required (although not too much!) to drill through the tile to the wall.
Once you get through the tile and hit the wall surface, keep the drill slow and steady so as not to blow apart the wall as doing so may mean your wall anchor or rawlplug will not properly hold. You may want to change the drill bit to suit the material the substrate is constructed from.
Keep Your Bits Cool
The secret to successful tile drilling is to keep your drill bits cool. But how? We hear you ask. Well, rid your mind of images of ice cubes and small handheld fans because all you need to prevent your drill bits from overheating is a bit of good old H2o (that’s water, fact-fans). Simply wet a sponge and occasionally dab the bit with it to cool it down.
Alternatively, you can hold a wet sponge beneath the drill bit whilst it is in use – this will not only prevent the drill bit from overheating but will also catch dust and debris resulting from the drilling. If employing either of these methods however, be extremely careful not to expose the motorized section of the drill to water.
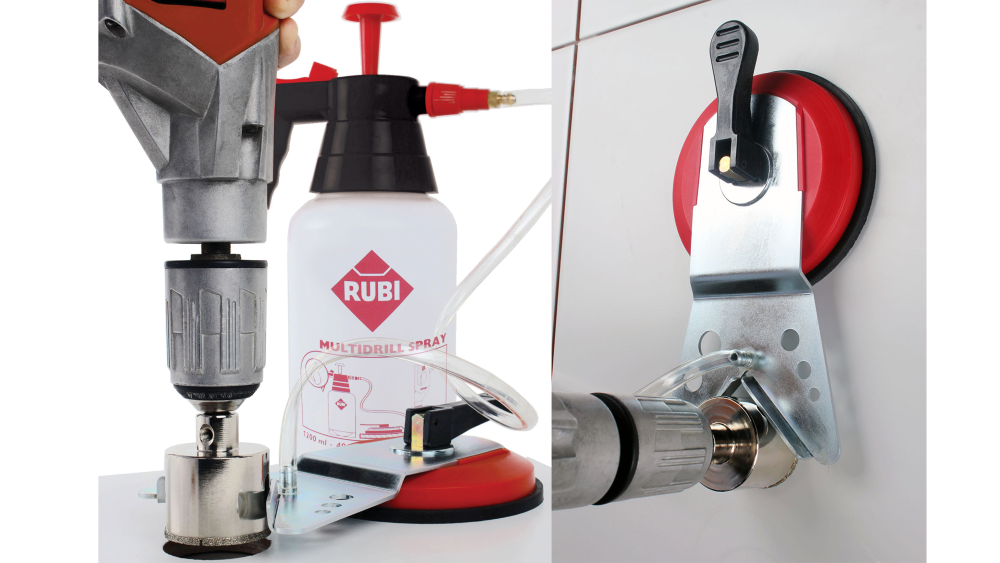
If you’re willing to splash a little cash then tools such as the Multidrill Spray System from leading tiling tools and accessories manufacturer Rubi include an integrated drill bit cooling system that works to keep the bit cool whilst in use.
This type of device comes in handy when using carbide tipped drill bits as they will stop as soon as they get too hot and need to be kept cool throughout. Diamond tipped bits will continue to work even when they heat, as long as you allow them to cool down periodically. The main thing to remember though if you want your drill bits to last is to keep things cool and don’t apply too much pressure.
Change Your Drill Bit To Suite The Substrate The Tiles Are Attached To
Once you get through the tile and hit the wall surface, keep the drill slow and steady so as not to blow apart the wall as doing so may mean your wall anchor or rawlplug will not properly hold.

It’s a good idea to change the drill bit to suit the material the substrate your tiles are attached to. So, if it’s concrete/stone you’ll want to use a suitable masonry drill bit, whereas fibre board or timber will require wood bits. Cement backer boards used behind tiles in wet areas such as showers and wetrooms can be drilled through using a standard drill bit or even the one you used to drill the tile.
It’s highly unlikely that tiles will have been installed atop of metal or alloys but there could be some metal struts or supports behind the substrate – if you need to drill into them then a standard high-speed steel (HSS) drill bit should do the trick. For stronger metals such as stainless steel or cast iron it’s advisable to opt for a black oxide or cobalt steel drill bit.
Key Takeaways
If you follow that advice then you’re well on your way to successfully drilling through tile. There are a couple of ultra-important things to to bear in mind and they are make sure you have the right drill bits, keep them cool, and go slow and steady! Drilling through tiles is not a race and the biggest quality you can have when performing this task is patience. Rush the job (and fail to prevent overheating) and you’re pretty much guaranteed to crack the tile you’re drilling.
Got any top tile drilling tips that we might have missed that you want to share? Leave us a comment or hit us up on Twitter, Facebook or Instagram and we’ll do our best to incorporate them into this article. If you have any further questions about drilling through tiles or any aspect of tile installation, call our friendly customer services guys on 01782 223822 and they’ll be happy to help.
You may also enjoy these posts on the Tile Mountain blog…
Here at Tile Mountain, we not only have a huge range of tiles to suit every purpose, we also have a wealth of tiling knowledge gained from over 30 years in the tile industry, (which we’ll do or best to share with you across these very pages).
Whether you’re looking for the perfect tiles for your next home improvement project, are searching for some style inspiration, or simply need a bit of help and advice, you’re in the right place.