How to Install a Mosaic Tile Border
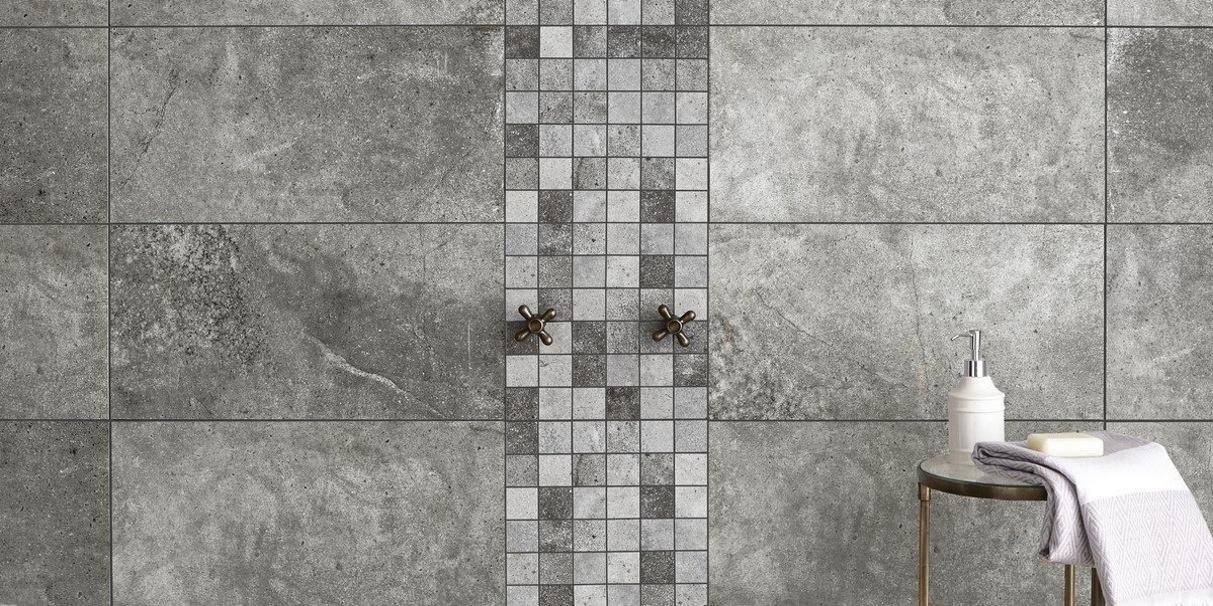
A stunning mosaic border can add a lovely element of interest in any bathroom or kitchen. Glass mosaics will add additional reflected light, a striking mosaic can add a punch of colour or contrast to plain tiles, and mosaic tiles in stone or pebble will bring a touch of the outdoors in.
When using mosaic tiles as a border accent, however, DIYers often come across a problem. Mosaic tiles are often thinner than standard larger tiles. So when laying your adhesive, you may find that setting the mosaic border in between standard tiles will create a gap between each set of tiles. If you used the same amount of adhesive over the whole wall, the mosaics will be further inset than the thicker tiles, resulting in a finished wall that is not flush.
Mosaics are also normally set on a mesh backing, making them flexible and easy to cut to size but this creates problems as it is often harder to use your hands to set the mosaics in place where different pressure on different individual tiles will cause them to set deeper into the adhesive than you’d like, creating an uneven surface.
An inexperienced tiler may find their mosaics tricky to install with a result that looks less than professional. Follow these tips though and your mosaic tile border will be perfectly set in between your standard tiles, creating a flush and even look for a professional looking finish.
Before You Begin
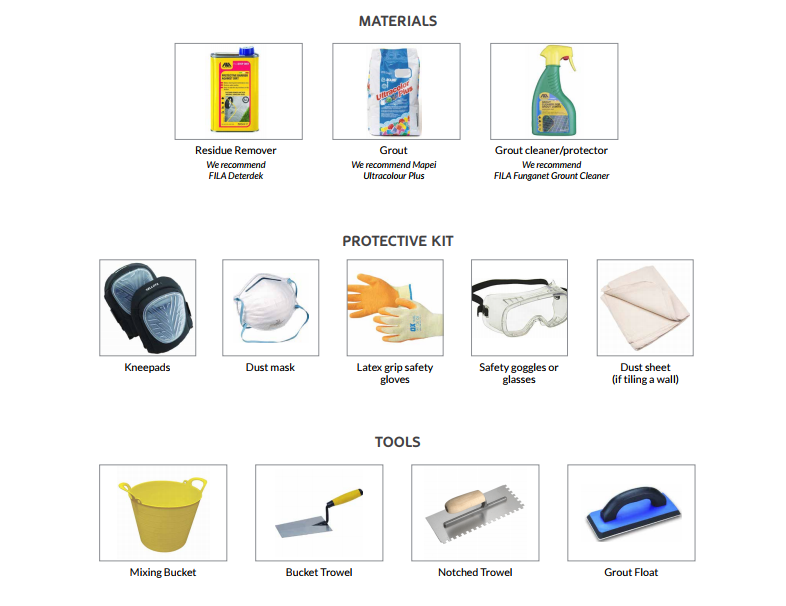
Ahead of starting any tiling project, it’s important to ensure that you have the right tools and materials to complete the job effectively. Below is a list of items that you should have before even beginning to think about installing a mosaic border.
Set Your Standard Tiles First
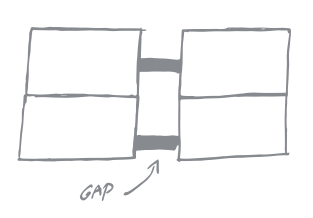 Now, in order for the mosaics to be flush with your other tiles, you need to build up the adhesive behind it. You’ll want to set your standard tiles first, allowing for the width and height of your mosaic border plus an additional 2mm border for the grout. Do not put any adhesive where the mosaics will sit just yet. Allow your thicker tiles to completely set before starting the mosaics.
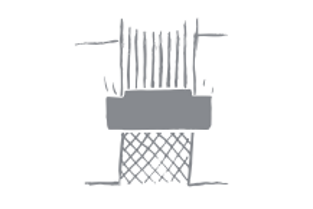
Create a Notched Tool
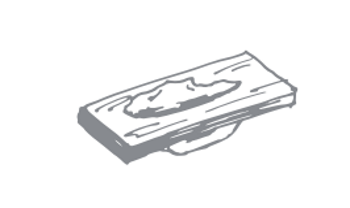
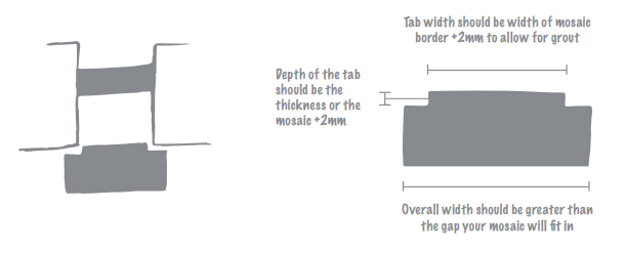 Next, you’ll want to create a T-shaped notched template out of a piece of wood or MDF that allows for an additional 2mm plus the depth of your mosaics. See the measurements above to create your notched tool specific to the size of tiles and border you are using.
Apply Your Adhesive
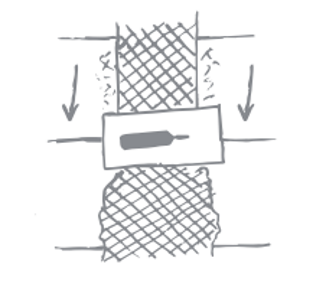
Pack adhesive into the gap you created in between the set of normal tiles so that the adhesive is flush with the normal tiles. Next, remove any excess adhesive from the wall.
Level The Adhesive
Using the tool, run along the bordering standard tiles so that the notch scrapes out the perfect amount of adhesive to set your mosaics. Allow this layer of adhesive to fully set.
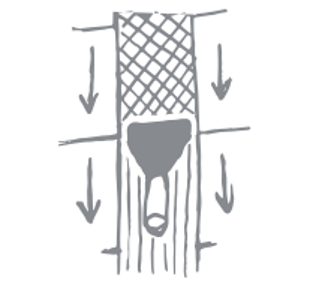
Once set, apply another thin layer of adhesive (around 2mm thick) into the gap.
Install Your Mosaics
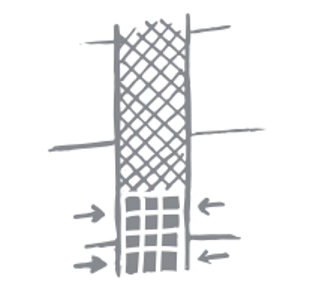
Lay your mosaics into the adhesive and press lightly with a flat tool so that they are flush with the original tiles. Leave to dry then grout your tiles and mosaics in the usual fashion.
Grouting
Using a bucket trowel, mix the grout in accordance with the manufacturer’s specific instructions and then place a liberal dollop onto your grout float. We recommend Mapei Ultracolour – it comes in loads of exciting colours and has anti-mould properties too!
Use the float to apply the grout to the joints between the tiles. The rubber side of the float is used to press the grout into the joints. Ensure you wipe away any surplus grout from the surface of the tiles using a sponge as you go.
Cleaning and Finishing
When all the joints are filled with fresh grout, wipe the surface down with a sponge and cold water. Leave the the grout to set for around 5-10 minutes the give the surface another wipe with a sponge and cold water to remove any grout residue from the surface of the tiles. Remember to keep cleaning the sponge throughout so that you’re not just spreading the grout around.To remove stubborn grout residue, we recommend Fila Deterdek Residue Remover.
To finish off, use a clean, soft cloth polish the faces of the tiles once the grout is dry. For that extra sparkle you can use Fila Fuganet Grout Cleaner.
To download this rather useful guide as a PDF, just click the bar below:

Here at Tile Mountain, we not only have a huge range of tiles to suit every purpose, we also have a wealth of tiling knowledge gained from over 30 years in the tile industry, (which we’ll do or best to share with you across these very pages).
Whether you’re looking for the perfect tiles for your next home improvement project, are searching for some style inspiration, or simply need a bit of help and advice, you’re in the right place.