The thought of tiling your own walls may be daunting prospect, but with the right preparation and by using the right tools, it’s a lot more straightforward than you may think. If you’re a bit daunted by wall tiling then don’t be as we’ve created this handy guide that covers everything there is know about how to tile a wall! You can use the buttons below to skip to the bit you’re interested in or simply scroll to read the whole lot.


.
Before Laying Your Tiles
Before you start, make sure the surfaces you’ll be working on are clean, dry and flat. If you’re tiling over wallpaper, strip it back to the plaster and fill in any holes or cracks. Check the new plaster is dry before you start, bearing in mind it can take at least two months to set properly, and use Mapei Primer G to prime any porous surfaces.
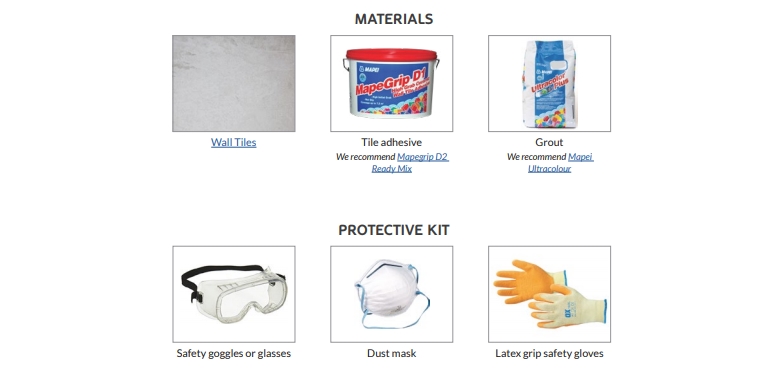
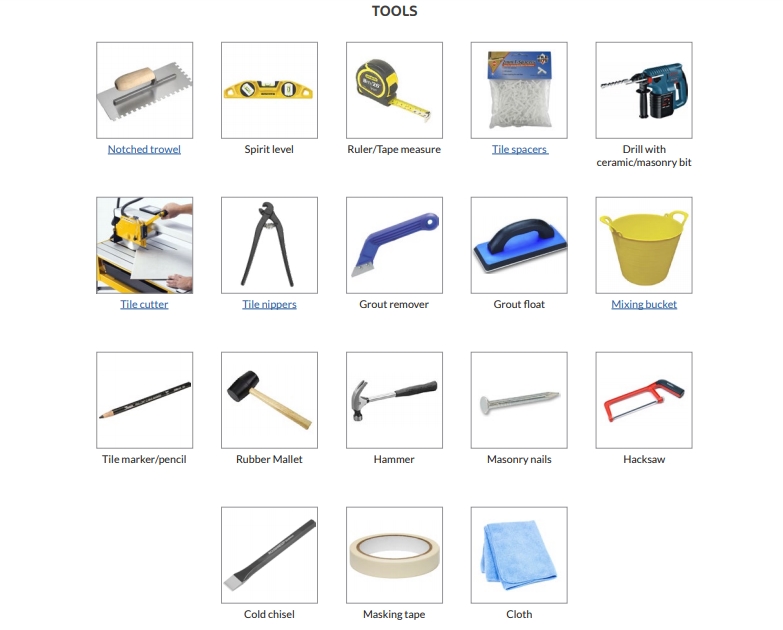
As with all DIY jobs, proper preparation and your safety come first. Below is a list of materials, protective gear and tiling tools you’ll need to get the job done in a safe way and to a high standard:
Wall Tiling Preparation
How many tiles do you need?
The first step is working out how many wall tiles you need, and to do that, you have to calculate the area of the space you’ll be covering. Measure the height and width of the space then multiply the figures.
Be sure to factor in the area of any doors, windows or cupboards and subtract this from the total. To save confusion, it sometimes helps to knock up a quick sketch with all the dimensions written down.
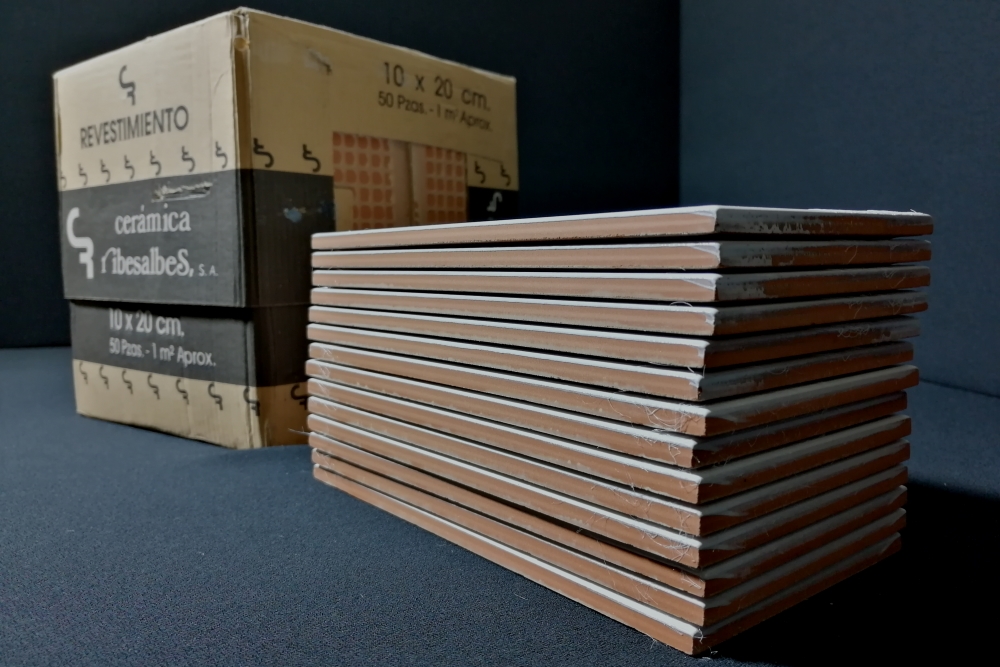
Once you’re sure of the maths, you can go ahead and buy your tiles. Most ceramic tile packs cover a square metre, but we’d recommend having around 5-10% extra just in case.
Getting Started
It’s always advisable to start tiling your grid in the centre of the wall, as it’s easier to make sure your pattern is symmetrical. It also means any half-tiles you may need can go at the end of each row and will be of matching size. While it’s tempting to begin in the corner, it may leave you with wonky rows and a messy finish by the time you’re done.
Create Your Design
As we mentioned earlier, establish your vertical rows from the middle of your space. You can find this simply by measuring the height and width, and marking the middle with a pencil.
A gauge rod is a smart way to help you with your row and end tile size. We recommend using a 50mm x 25mm piece of wood, although any will do, with a length of around 1.8m depending on the size of your wall.
Lay out a line of tiles with space between them, then line up the batten edge with that of your first tile. Mark each tile and gaps on the rod with a pencil and number them. This way, it’s easy to see how many you need in each row.
Step 1
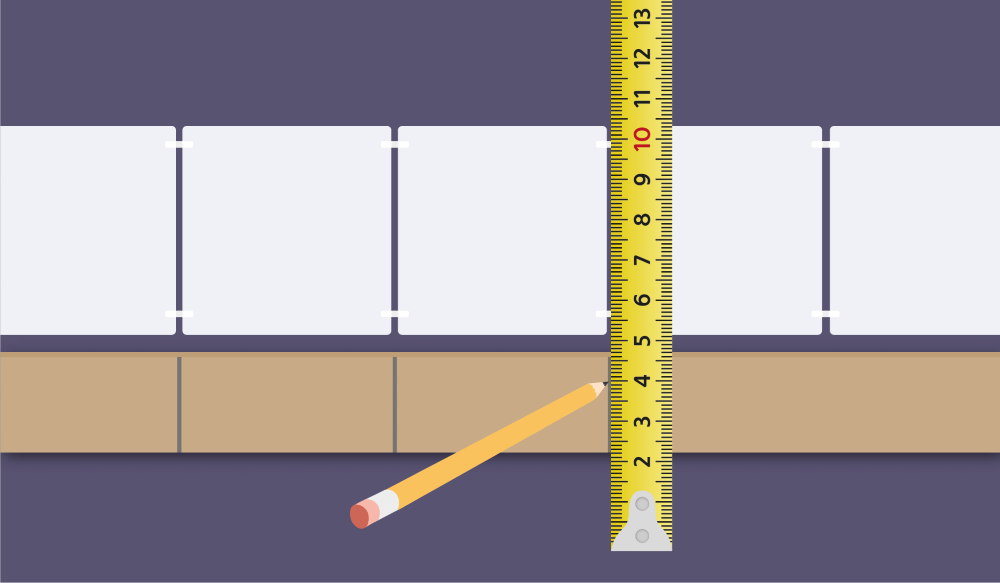
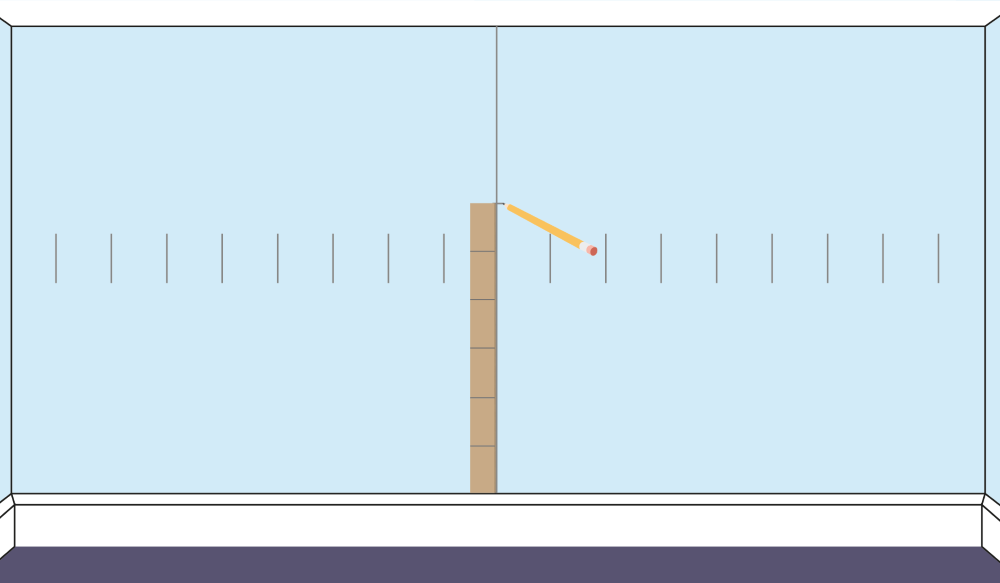
Hold the gauge rod in line with the centre of your wall and mark the tile positions across it:
 Step 2
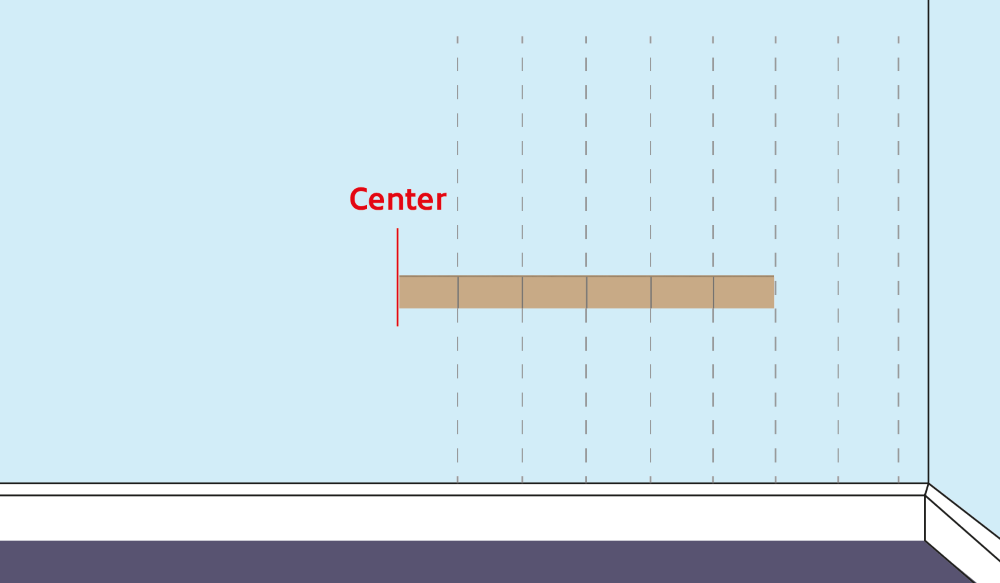
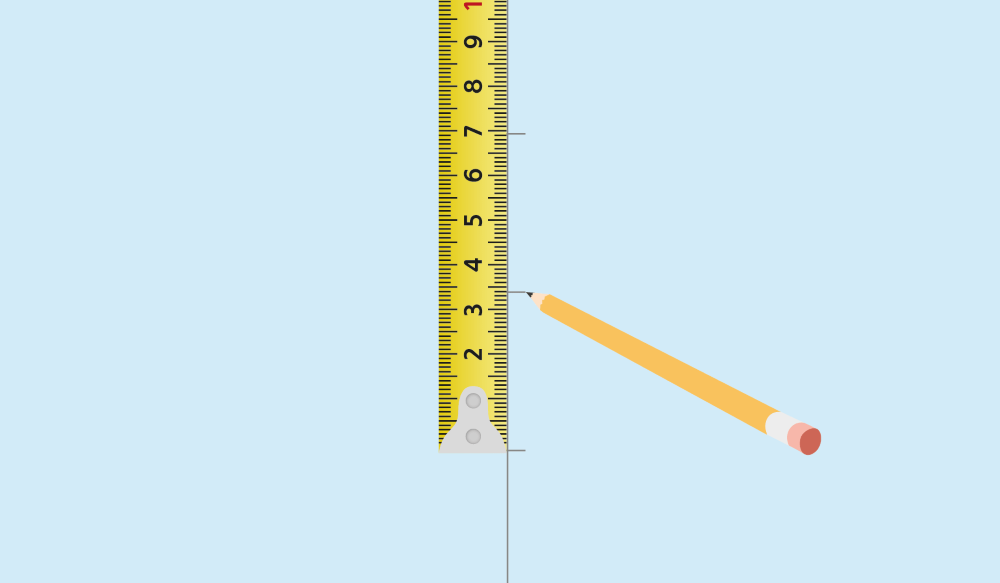
Once you reach a corner, check if the last tile needs to be cut in order to fit. If less than half a tile will be needed we suggest adjusting your starting position, as larger tiles look much better when finished:
Step 3
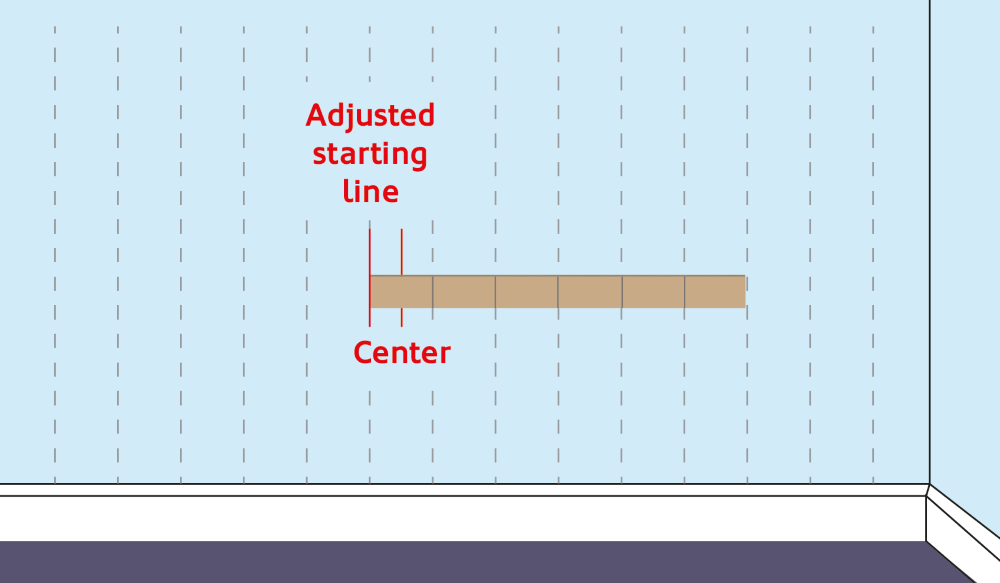
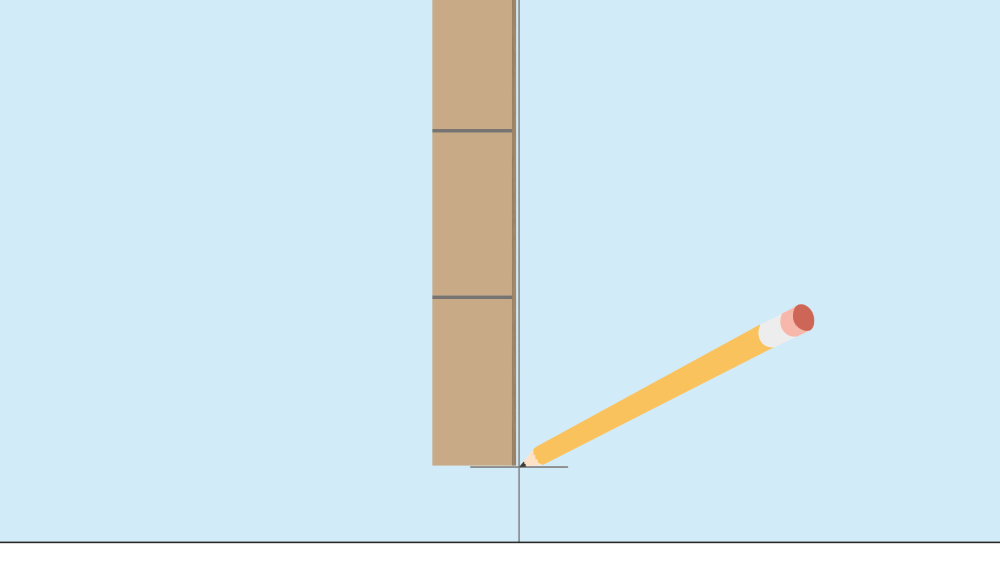
If you do need to move your starting point, line up the rod at the original mark and make a new one halfway between two tile marks. This should mean your end tiles you need to cut will be more than half a tile wide, and that your centre line and centre tile now match up:
Step 4
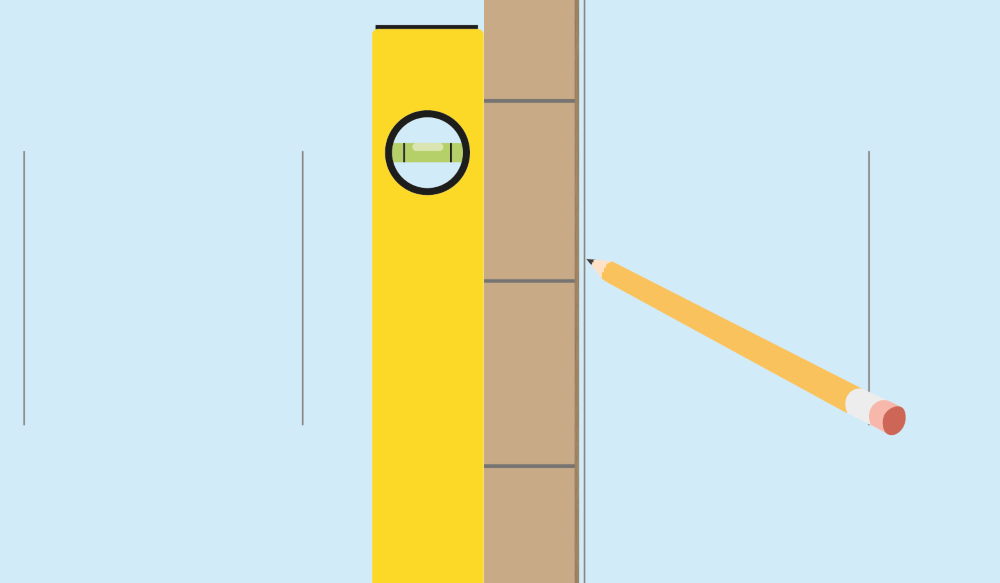
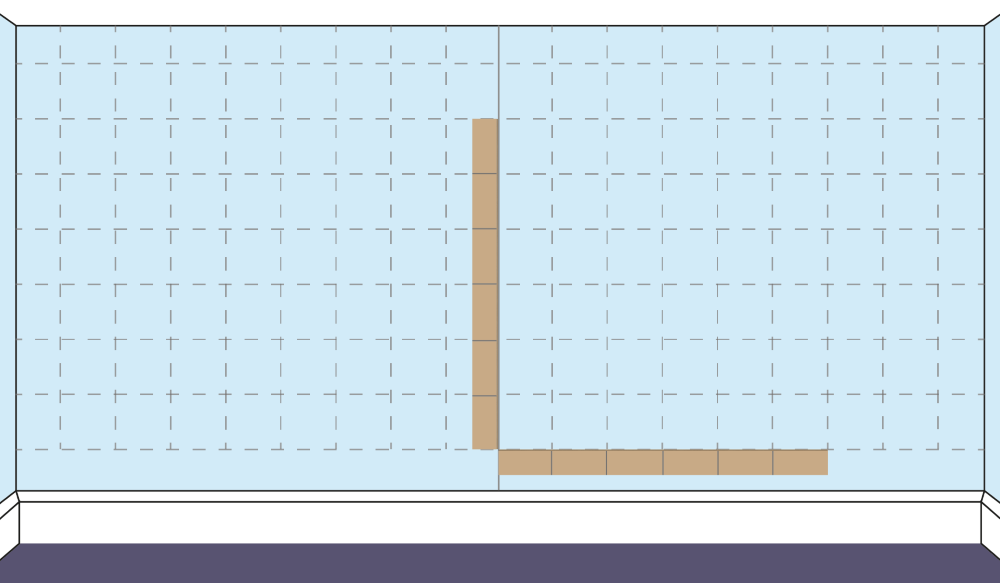
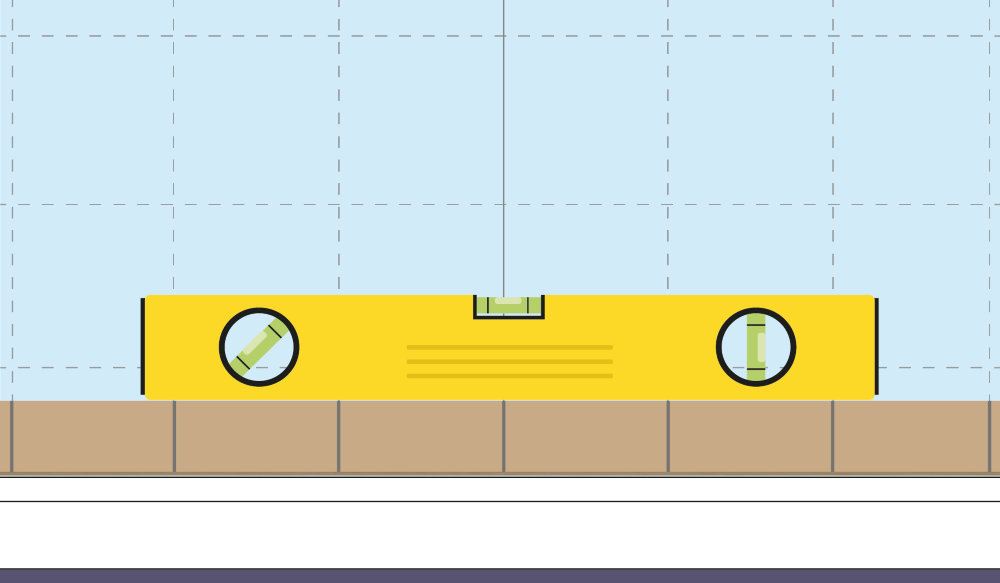
Hold the gauge rod against your new mark and, using a spirit level to make ensure it’s straight, draw a line from side to side:
Creating Horizontal Rows
Once you’ve established your vertical rows, it’s time for the horizontal ones. We recommend using wooden battens secured to the wall as a guide, as they’ll also help prevent slippage while the adhesive is setting.
Step 1
Align your gauge rod, vertical line and skirting/floor, then pencil mark alongside the rod’s top tile mark. Do this all the way up the wall following the vertical line until the rod touches the ceiling. With any luck, the wall and rod lines will match up and you won’t have to cut any tiles for the top and bottom rows. If not, simply halve the distance between the wall and rod marks and, as with the vertical rows, make sure it’s more than half a tile wide. If they’re less than half a tile’s width, just use the next mark down on the rod:
Step 2
Measure the distance between the two wall marks and add another halfway between them:
Step 3
Hold the gauge rod clear of the skirting/floor then align one if its marks with the one you’ve just made. Make another mark level with the foot of the rod.This will be where your horizontal row starts. Using a long straight edge and spirit level, draw a line across the wall from the mark:
 Step 4
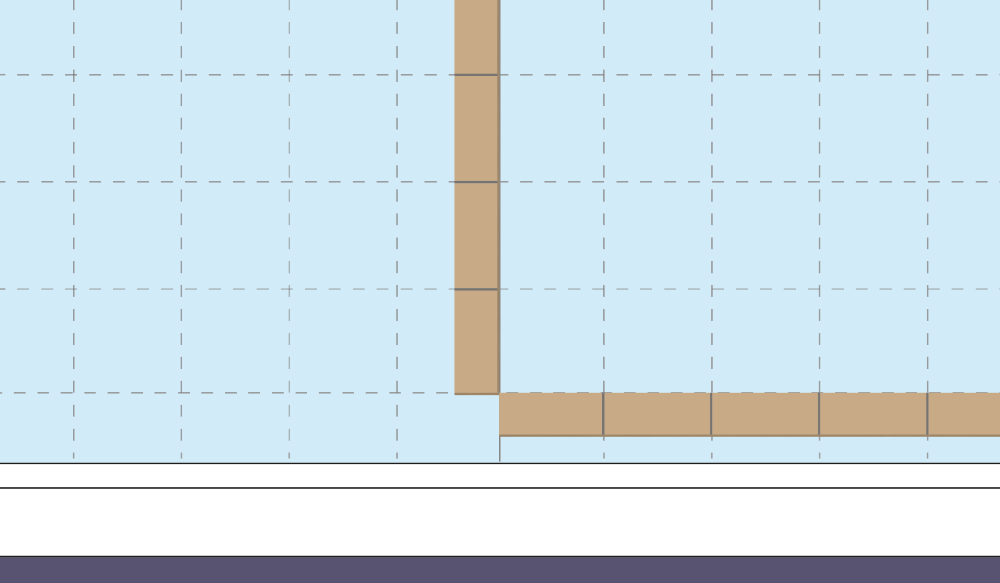
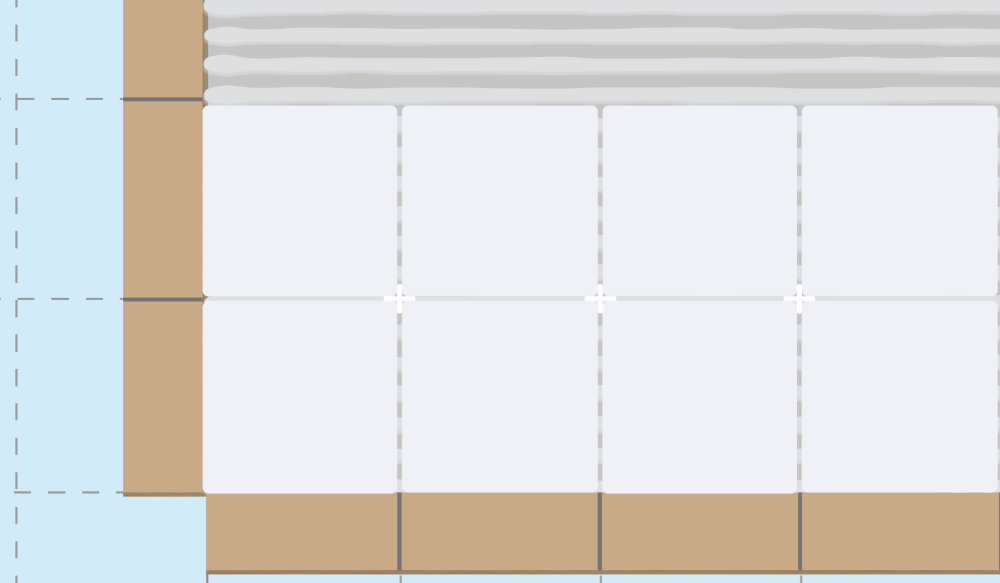
Check behind the wall for any cables or pipes, then nail your 50mm x 25mm batten. Its top edge should be aligned with the horizontal pencil line, and should be straight. Then use another batten for the vertical line. It’s a good idea to leave the batten’s nail heads sticking out slightly as they’ll be easier to remove later on:
Part-Tiling A Wall
If you’re only part-tiling a wall a top horizontal row full of whole tiles makes for a much cleaner finish, so we think it’s really worth investing some time to get it right.
Step 1
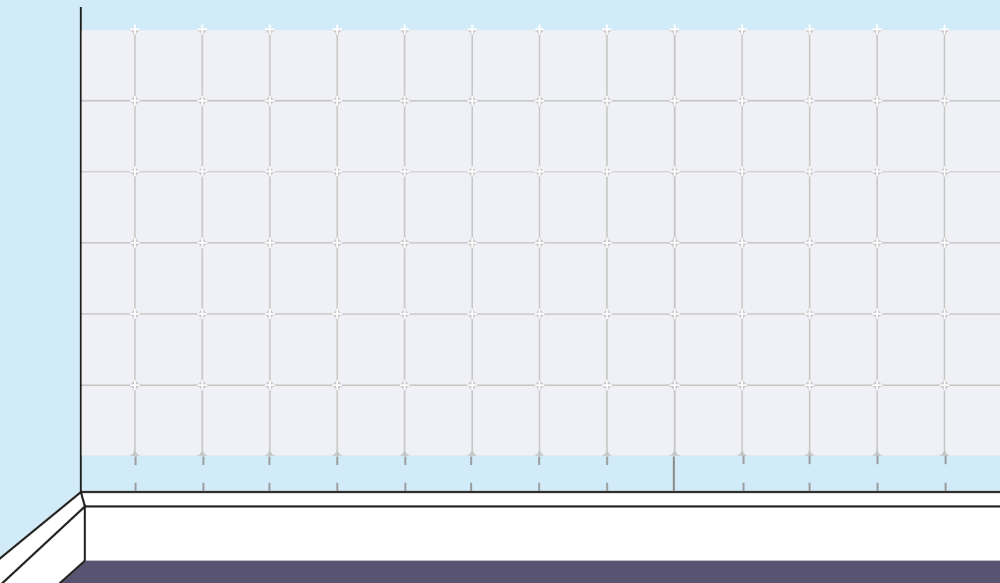
Use a gauge rod to work out the position of the lowest horizontal row, then mark the top row’s position on the wall:

Step 2
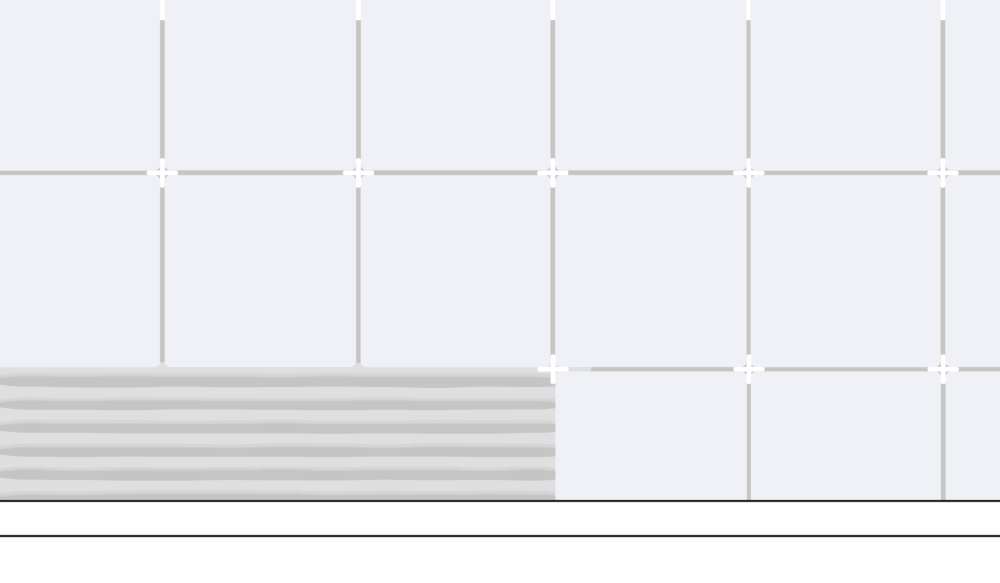
Fill the gap between your bottom row and skirting/floor with cut tiles. Remember, you don’t want them too small, so move your top row if they’re less than half a tile:
Step 3
If you don’t like the idea of cutting tiles and would rather avoid it, check to see if the skirting/wall is even. Use a long, straight batten, levelled with a spirit level, to find the lowest point. If it’s straight, you can use it to align your tiles instead. If not, it’s time to get cutting those tiles!
Fixing Whole Tiles To A Wall
It’s really important to start laying your field tiles so the faces are level. If any are uneven, remove them and either add or remove adhesive so they all sit flush.
Bevelled or rounded glazed edge tiles usually mean you won’t need corner trim. Tile the first wall right up to the edge of your space then do the same for the return, allowing the corners to overlap. Be sure to leave a gap for grouting, too.
Step 1
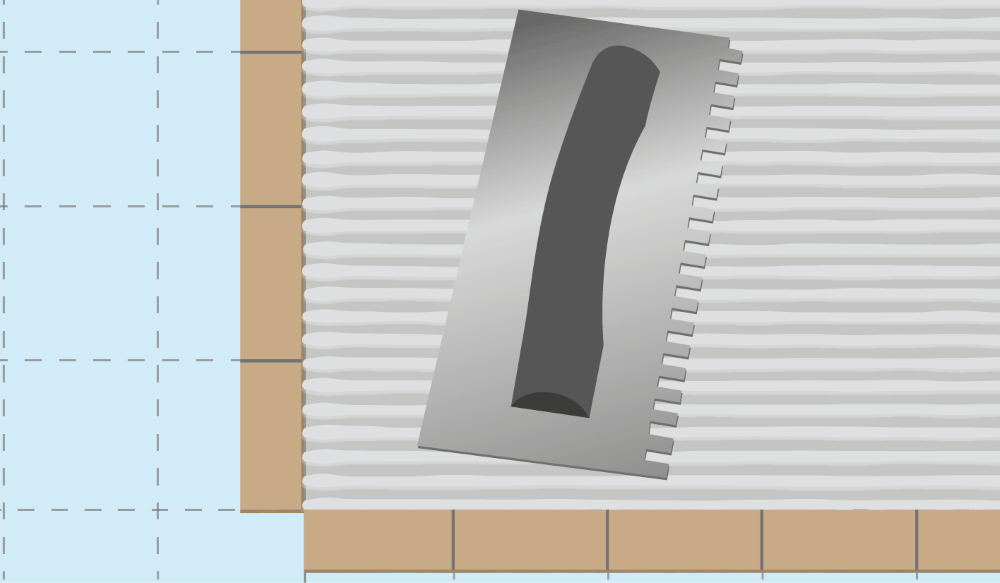
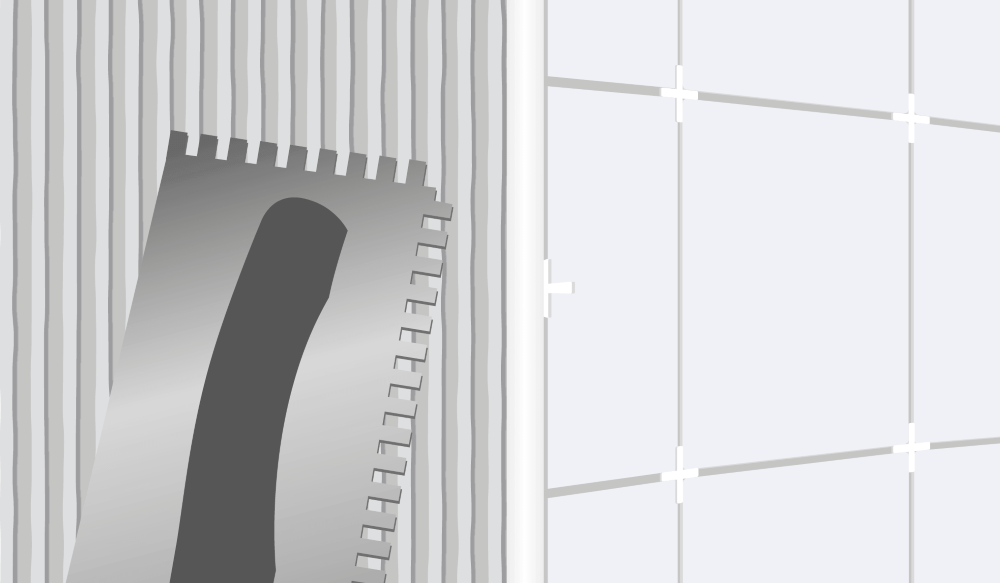
Starting in the corner of your two battens, scoop up and apply some adhesive to the wall using your notched trowel. Then with a notched trowel, work away from the vertical batten in horizontal strokes holding the blade at around 45°. We’re looking for good ridges here, as they mean an equal amount of adhesive behind the tiles and a better chance of them being straight. Work around one square metre at a time so the adhesive doesn’t dry out:
Step 2
Apply the first tile to the corner where your battens meet so its edges are against them, and press its centre firmly to the wall. Add the tiles above and beside it, being sure to leave a gap between them:
Step 3
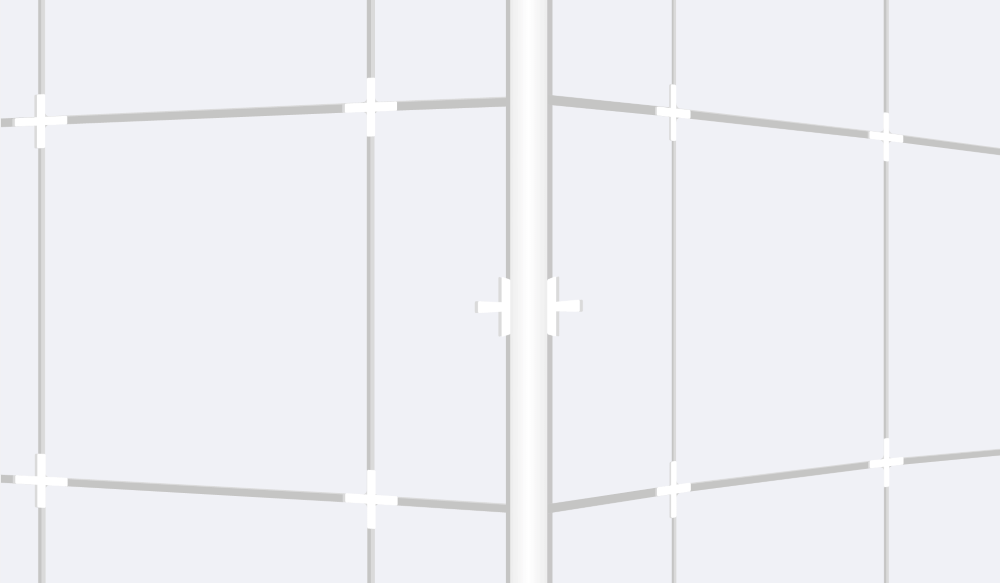
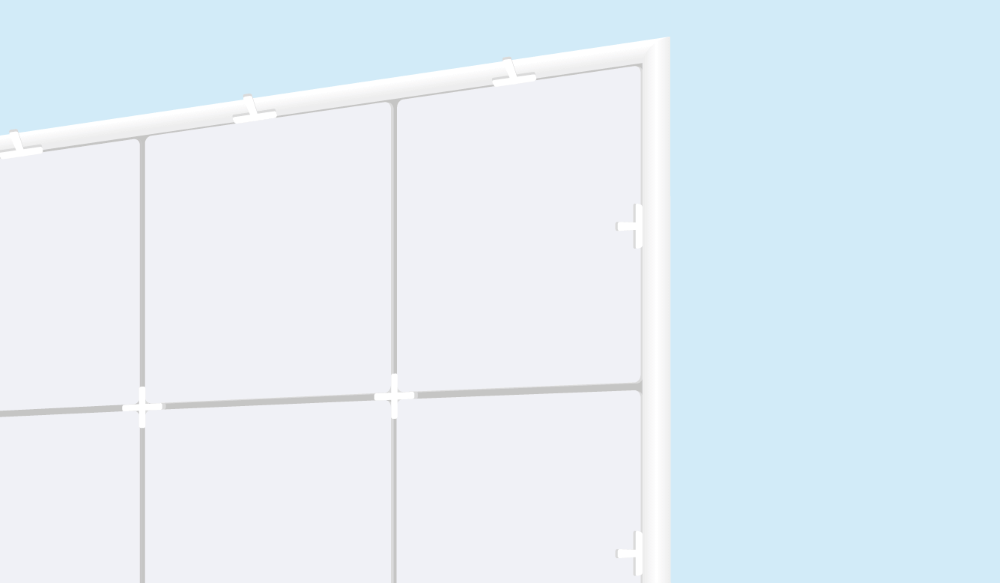
Add tile spacers to these gaps and adjust the tiles where necessary. Push your spacers in firmly to make for an even grout and easier joints later on:
Step 4
Continue adding tiles until you’ve covered all the adhesive, then carry on the process for the rest of the wall. Wipe any excess adhesive from the tiles using a damp sponge as you go – it’s difficult to get off once it’s dried:
Step 5
Remove the vertical batten and scrape off any excess adhesive that may have escaped from under the tiles. Then finish off the wall with the cut tiles needed for the gaps:
Tiling Internal Corners
Step 1
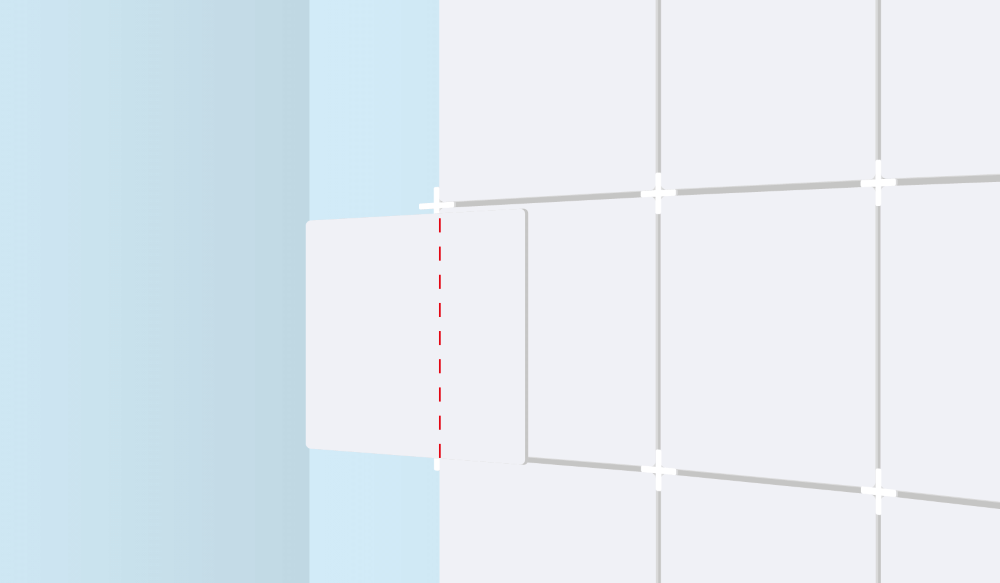
The easiest way to measure for cutting is using the last whole one in the row – hold a tile over it, place another against the wall, and then mark they overlap in felt tip pen. Otherwise, simply take separate measurements at the top and bottom of the space and cut the tile to fit:
Step 2
Check the cut tile fits properly in the gap and adjust with a tile file if needed. If you’re going to tile the next wall as well you don’t need to be totally accurate here, but remember to leave enough room in the corner for grout if you’re only tiling one:

Step 3
Apply adhesive to the back of your cut tile using the narrow end of a notched trowel. Put it in place so it’s level, press to secure it, and use joint spacers to keep the gaps if needed:

Step 4
Once you’ve finished your first wall, repeat the process for the next one. Always strive for the neatest grouted joint possible where the two walls meet. This can be the difference between it looking scrappy and a job well done:

Tiling External Corners
For a neat finish on your external corners, corner trim is a must. It comes in a range of colours and materials (anodised aluminium is popular) and sizes and helps protect your edges from knocks and chips.
Step 1
Cut your corner trim to the right length using a hacksaw, then apply a strip of adhesive to the return wall and press it in. Align the trim with the tiles from your first wall leaving room for grout later on: Vertically apply more adhesive to the return wall with a notched trowel, taking care not to loosen or knock off any tiles from the other wall:
Step 2
Repeat the process from the first wall, working away from the corner trim and remembering to leave room for grout. Use spacers to help you adjust the tiles should
you need to, and ensure the distance between tiles stays consistent. Double-check the trim hasn’t moved and readjust if needed once you’ve finished:
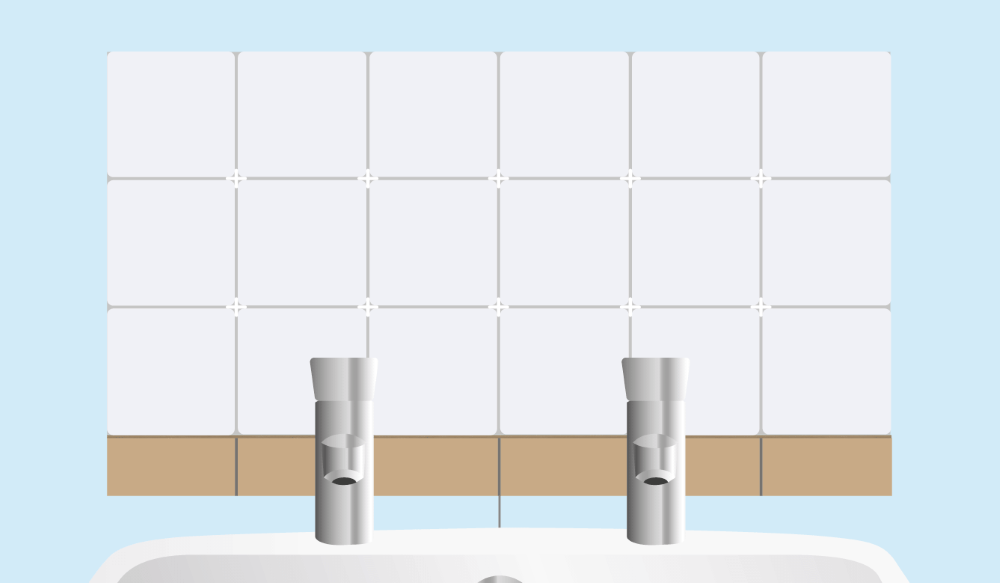
Tiling A Splashback
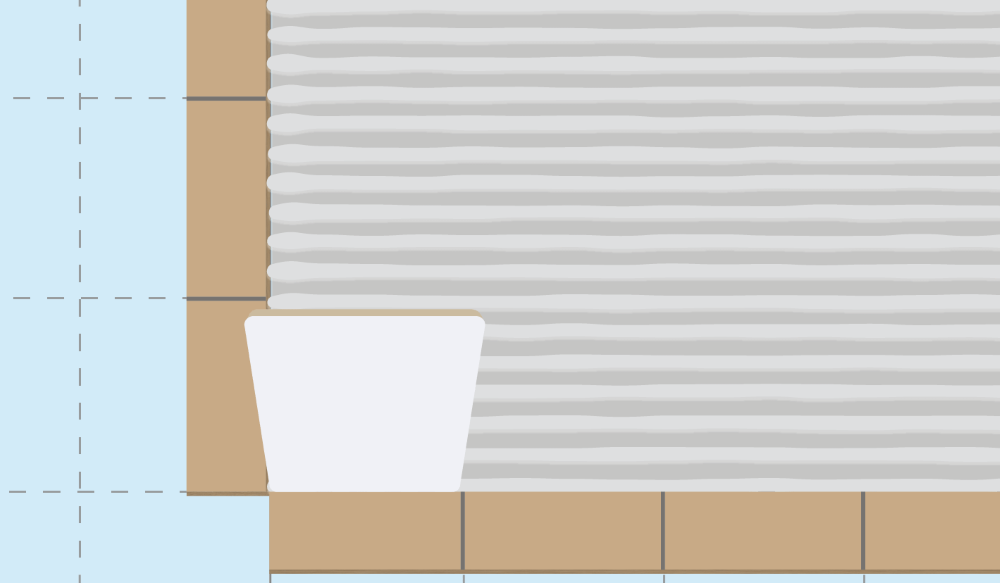
Tiling a splashback will depend almost entirely on the shape of your basin. If there’s a straight or even slightly curved back, measure the wall’s depth in multiples of whole tiles. A more pronounced curved means you’ll need to cut tiles to fit and allow for a row of half-tiles closest to your basin. If there’s only a slight curve, or the edge is totally straight, you can lay the first row level to it without having to cut tiles. We suggest using either cardboard or paper spacers to guide you while the adhesive dries, which can then be removed and the join filled with sealant.
Step 1
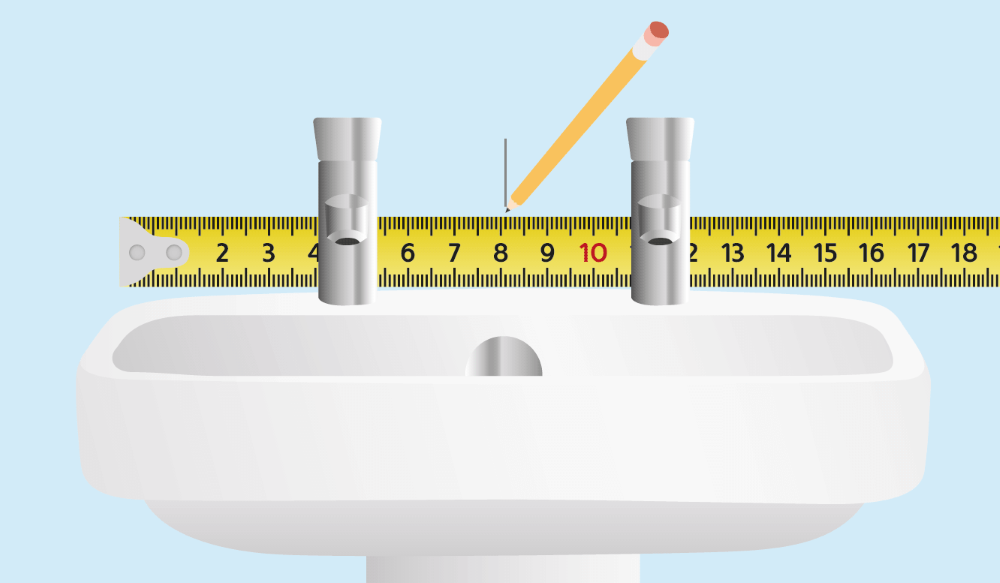
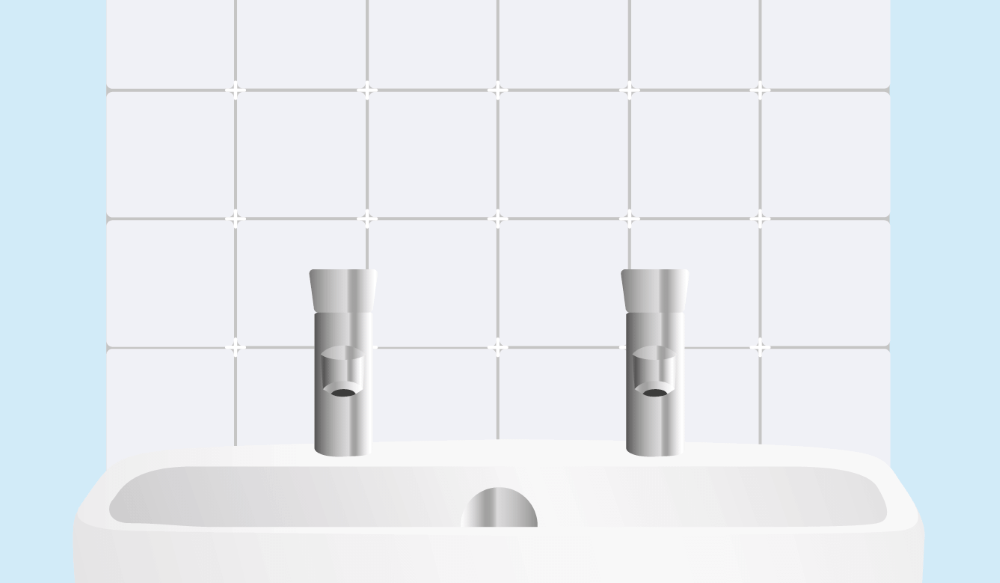
Measure the width of your basin in whole tiles then mark the centre point on the wall:
Step 2
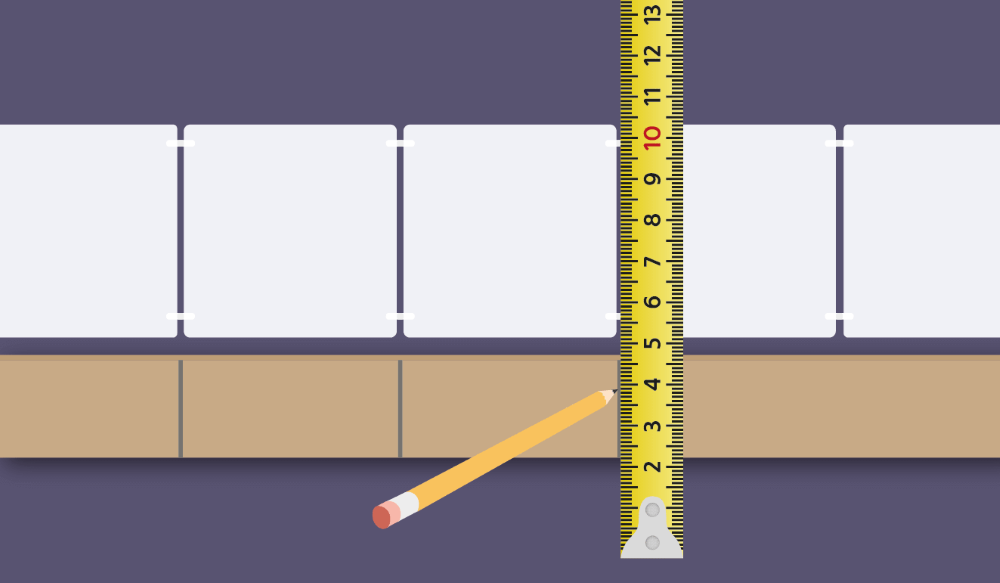
Lay out a row of tiles and include spaces and edging strips at either end. Cut a wooden batten to the same length and mark the tile and join positions on it. This will be your gauge rod, as well as your lower batten for any half-tiles:
Step 3
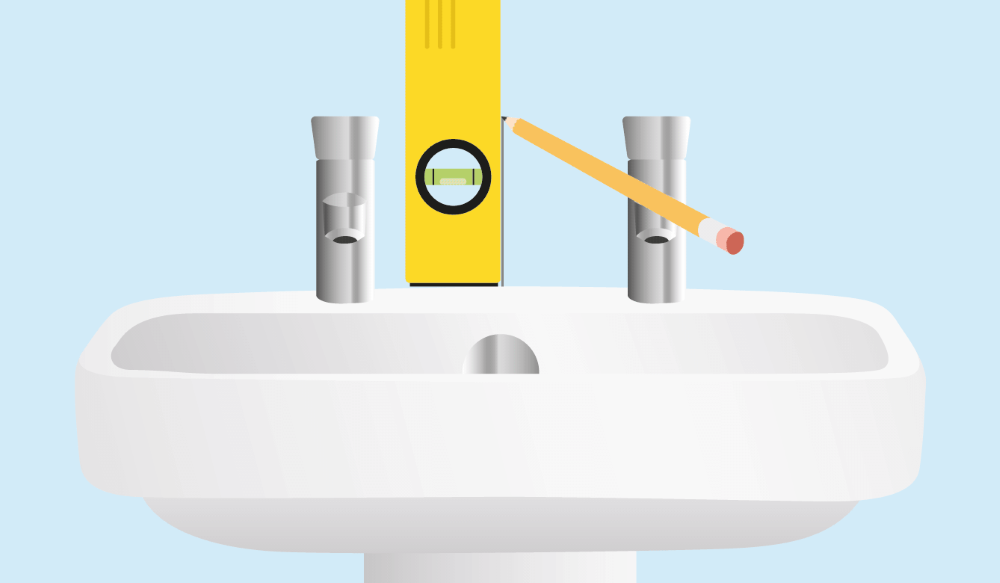
Draw a vertical line from the centre point up the wall using a spirit level:
Step 4
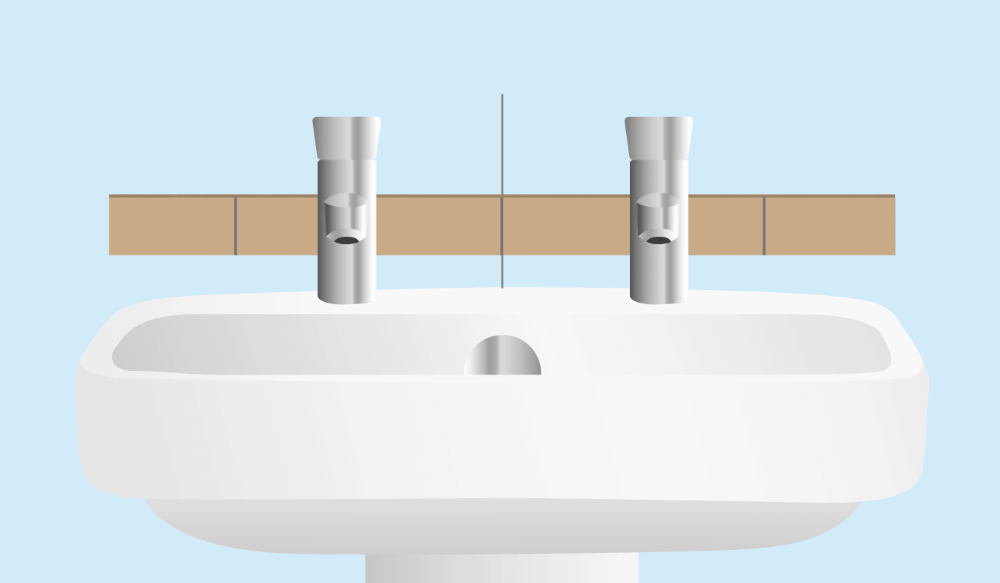
To cut the bottom row of tiles, fix the batten to the wall with 50mm masonry nails in the centre of the vertical line. Check it’s straight using
a spirit level. If you’re uncertain, the upper edge should be around half a tile’s width from the top of the basin:
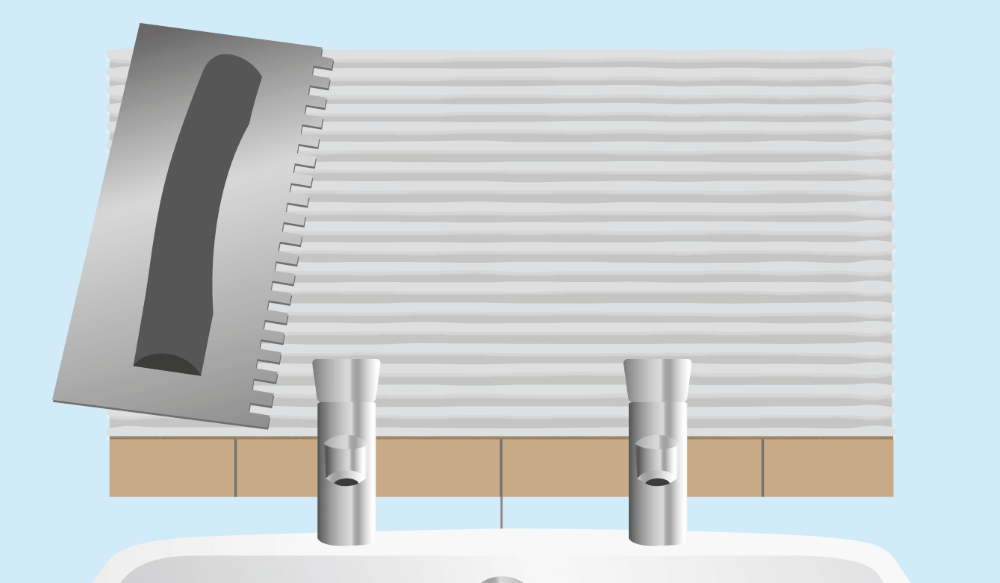
Step 5
Apply the adhesive evenly to the area with a notched trowel. If you’re uncertain, the upper edge should be around half a tile’s width from the top of the basin:
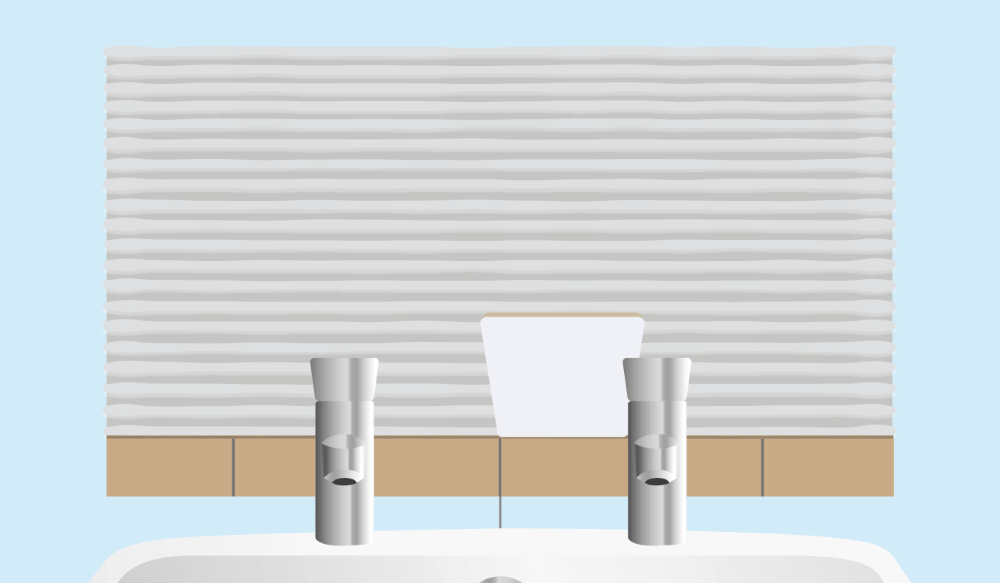
Step 6
Start in the middle and attach your first tile in line with the batten’s marks. Once you’ve finished that row, continue above it fitting spacers as you go:
Step 7
Use a damp cloth to wipe off any excess adhesive:
Step 8
Apply matching glazed trim to the upper and side edges, then mark and cut it to the right length. Cut the corners to 45° and refine with a tile file for a particularly smart finish:
Step 9
Once your edges are applied, remove the batten and measure the gap below. Cut your tiles to fit, remembering to allow for sealant between the sink and tiles. Then
when the adhesive is dry, apply the grout and seal the bottom gap:
And there you have it! If that doesn’t answer your questions about wall tiling then we don’t know what will. if you’re still left wanting more however you can always watch our useful How-To videos featuring TV handyman Craig Phillips or visit the Help Centre section of our website for more helpful hints and tips. To download this guide in PDF format, click the button below:

Here at Tile Mountain, we not only have a huge range of tiles to suit every purpose, we also have a wealth of tiling knowledge gained from over 30 years in the tile industry, (which we’ll do or best to share with you across these very pages).
Whether you’re looking for the perfect tiles for your next home improvement project, are searching for some style inspiration, or simply need a bit of help and advice, you’re in the right place.