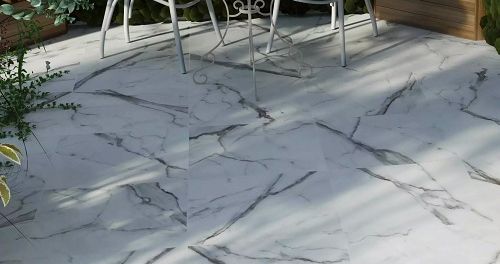
Outdoor slab tiles have become massively popular in recent times and it seems as though DIYers across the nation can’t get enough of them. This is perhaps in part due to the fact that 20mm thick porcelain slabs offer cheaper replications of genuine timber, natural stone, brushed concrete, sandstone and all manner of other sough-after flooring types, but also due to the relative lack of maintenance required compared to the materials they replicate.
However, whilst Outdoor Slab Tiles are appealing for reasons of both aesthetics and convenience of upkeep, some people are put off installing them by the need to create a concrete screed base (and the time period required to allow it to fully cure). If that sounds like you then read on as we’re about to show you how to install outdoor slab tiles directly onto a hardcore base thanks to a new product called Rock-Tite™ Exterior Porcelain & Stone System from leading adhesives and grout manufacturer Norcros.
What Is The Rock-Tite™ Outdoor Slab Installation System?
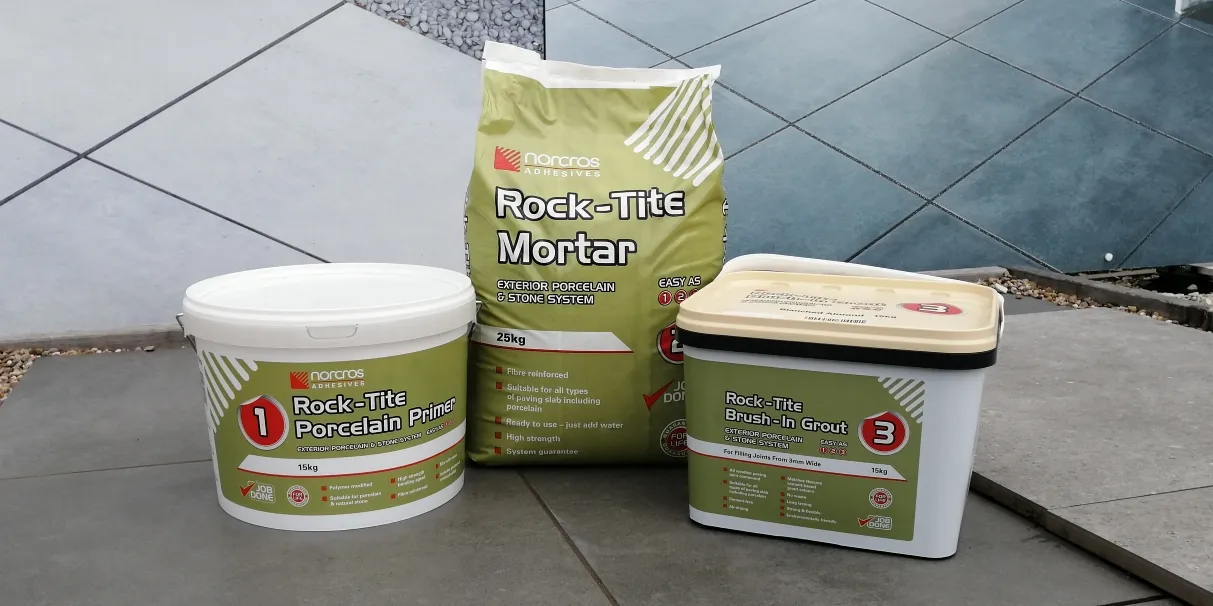
In the simplest of terms, the Rock-Tite™ Exterior Porcelain & Stone System is a bundle of three specially formulated products designed to be used together in order to install 20mm thick porcelain outdoor slab tiles directly onto a hardcore base, saving you the hassle of creating and waiting around for week or so for a concrete screed to dry. The three products are:

Norcros Rock-Tite™ Porcelain Primer
A fibre-reinforced, polymer modified cement-based primer designed to improve adhesion and bond strength when applied to the underside of porcelain slab tiles and other low-absorption types of paving. Norcros Rock-Tite™ Porcelain Primer is easy to use and suitable for use in both internal and external settings. Mixing and application is super-simple also thanks to the included graduated mixing bucket!
Norcros Rock-Tite™ Mortar
Norcros Rock-Tite™ Mortar is fibre-reinforced, sand:cement mortar specifically designed for bonding concrete, natural stone and porcelain paving slabs to both hardcore and solid bases. It’s ideal for installing porcelain outdoor slab tiles and other forms of stone paving in both domestic and heavily trafficked installations. Mixing and application is incredibly simple – the mortar only requires the addition of water and contains the specially formulated Rock-Tite™ additives to improve performance, workability and freeze/thaw resistance of the mortar mix.
Norcros Rock-Tite™ Brush-In Grout
A cement-free brush-in permeable jointing compound designed for filling joints from 3mm wide, Norcros Rock-Tite™ Brush-In Grout takes all the hassle out of grouiting concrete, natural stone and porcelain slabs that have been laid onto a solid permeable base using Norcros Rock-Tite™ Mortar. It can be applied in most weather conditions down to a temperature of 3°C and is incredibly simple to use too – just wet your newly laid slabs, evenly scatter the grout across the joints and then brush into place with a broom and allow to set!
How To Install Outdoor Slab Tiles Directly Onto A Hardcore Base Using The Rock-Tite™ Outdoor Slab Installation System
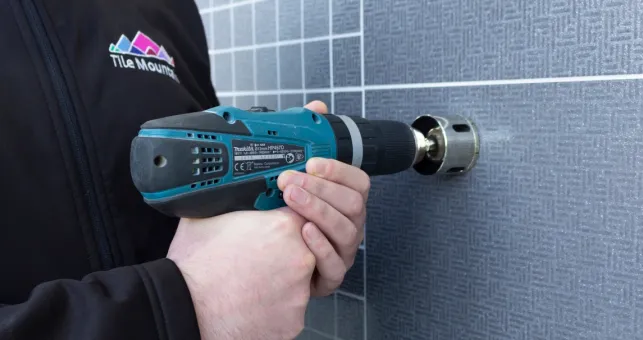
Ahead of starting any tiling project, it’s important to ensure that you have the right tools and materials to complete the job effectively. Below is a list of items that you should have before even beginning to think about installing outdoor tiles:

As is the case with any floor tile installation project (interior or exterior), you should always dry lay your tiles ahead of fixing with adhesive to ensure that you have the correct number of tiles and to work out any cuts that may be required. Once you’re done with all that though, follow the steps below to install your tiles directly onto a hardcore base…
Preparation

Dig out the area to be tiled making sure it is stable and to an approximate depth of 200mm.
Compact Type 1 or MOT grade hardcore to 100 – 150mm depth making sure it is well compacted, rigid and stable.
Apply Rock-Tite Porcelain Primer™ to the back of the Outdoor Slab Tiles and allow to dry. Brush or roller are the best methods of installation.
Mix ratio: 1.6ltr – 5kg
Working time: 60 mins
Drying time: 10 – 15 mins
Coverage: 5kg – 7m2
Laying

Set out the area to be tiled using a horizontal level line and a second sloped line to create a fall, as set
out in the following step.
The tiles should fall away from any property at a ratio of 25mm over a 1.5m length.
Lay the previously primed tiles into a solid bed of Rock-Tite™ approximately 25 – 80mm thick.
Mix ratio: 3.75ltr – 25kg
Drying time: 24 hours
Coverage: 50mm – 0.3m2
25mm – 0.6m2
Brush-In Grout

Wet the surface of the tiles and keep them moist throughout. Make sure the joints are between
3 – 25mm, cleam and dust free.
Brush the Rock-Tite Grout into the joints at 45° using a long handled brush. Keep applying until the
joints are filled and void free. Don’t allow the surface to dry out.
Compact the joints and finish them with a jointing tool, if voids appear refill and refinish. Brush off
any excess grout.
Cement free, no mixing required
Working time: 20 mins
Drying time: 24 hours
Coverage: 600x600x25 – 8mm – 12m2
450x450x25 – 8mm – 8m2
So there you have it – your step by step guide to in stalling outdoor slab tiles directly onto a hardcore base using this ingenious product from adhesive and grout aficionados Norcros. if you’re still not keen on getting messy with mortar or simply don’t want to fix your exterior tiles down permanently then you could always opt for Adjustable Support Pedestals. For more info on what they are and what they do, check out our handy guide.
Here at Tile Mountain, we not only have a huge range of tiles to suit every purpose, we also have a wealth of tiling knowledge gained from over 30 years in the tile industry, (which we’ll do or best to share with you across these very pages).
Whether you’re looking for the perfect tiles for your next home improvement project, are searching for some style inspiration, or simply need a bit of help and advice, you’re in the right place.