
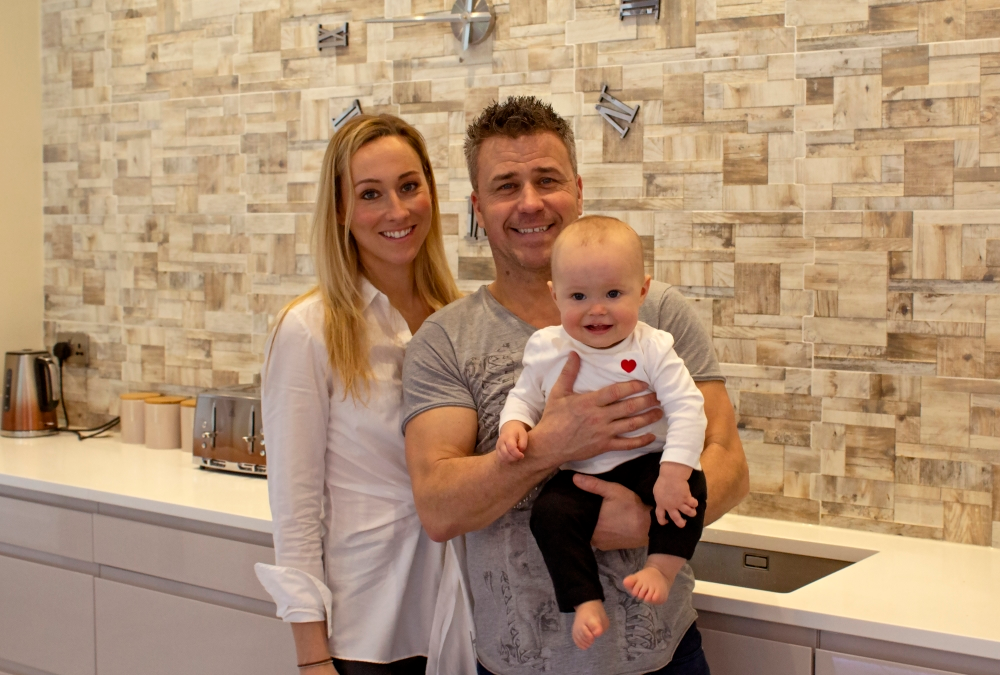
It’s the end of the month and that can only mean one thing…it’s time of another instalment of Tile Style Profile. This month’s feature however is a very special edition featuring none other than our very own tiling expert, Mr DIY himself, Craig Phillips! We caught up with him and his lovely wife Laura (a.k.a Mrs DIY) to chat about their extensive Dream Build project that has seen the couple plan and build their very own ultra-modern des res from scratch…
The Dream Build has clearly been a labour of love and after more than three years in the making, it’s finally come to fruition. Before we get on to the important business of talking tiles, can you give us a bit of background as to how the whole project came about?
It’s been a dream for over 20 years really. It took four years to find a suitable plot of land not just for building our dream house but also for building a workshop/studio, 2.5 years of planning, and we finally got started in winter of 2017. We worked a total of 49 weeks on the main build but had to stop throughout the winter period due to weather, planning our wedding and taking our honeymoon taking us to May 2018. We then carried on from May 2018 until Laura gave birth to our daughter Nelly in March 2019.
Tiled surfaces are clearly a big part of the interior design scheme within the Dream Build – was using these materials something that you had in mind from the off or did your style choices evolve along with the project itself?
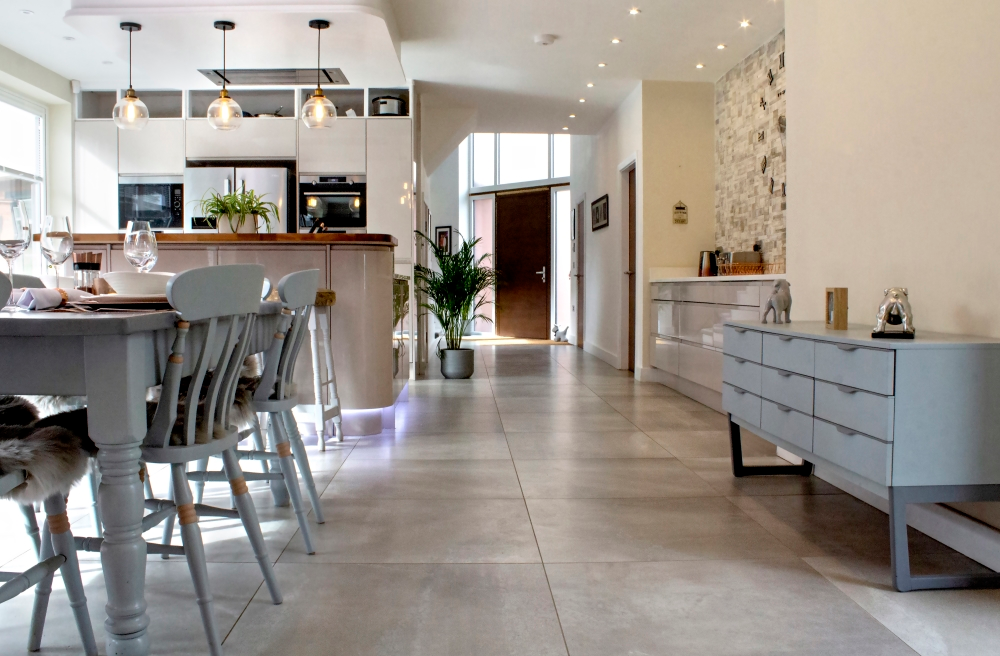
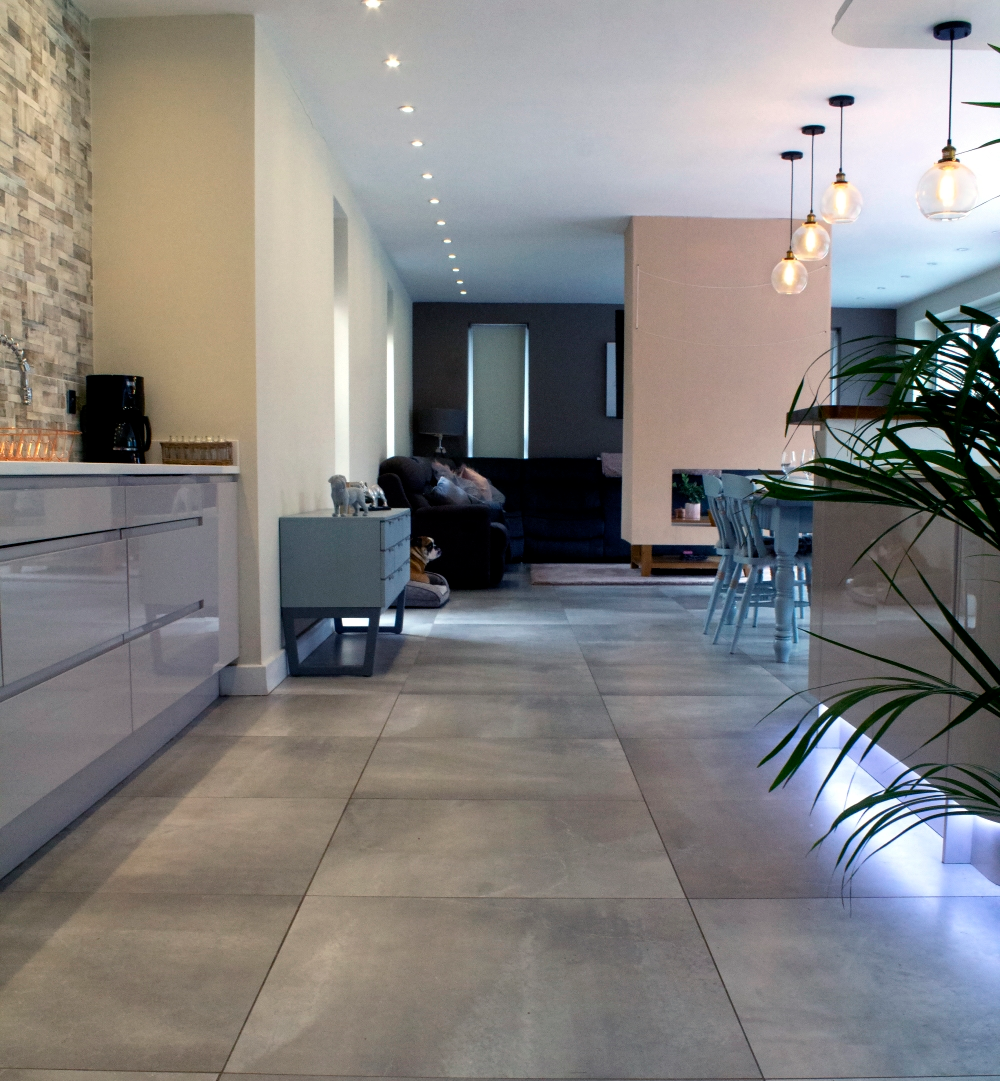
Due to the size of the house we always knew the ground floor – being relatively open plan throughout and spanning 220sqm – that carpet was never an option! We always had our hearts set on a porcelain tile that provided a concrete finish effect and so opted for the Advance Grey floor tiles throughout the ground floor.
The open-plan lounge/kitchen area, along with the four bathrooms (and a few other auxiliary spaces) all feature tiles quite heavily. Was your choice of decor & colour scheme influenced by the tiles you chose for these rooms, or did you pick the tiles to fit in with a style you’d chosen for the rest of the room(s)?
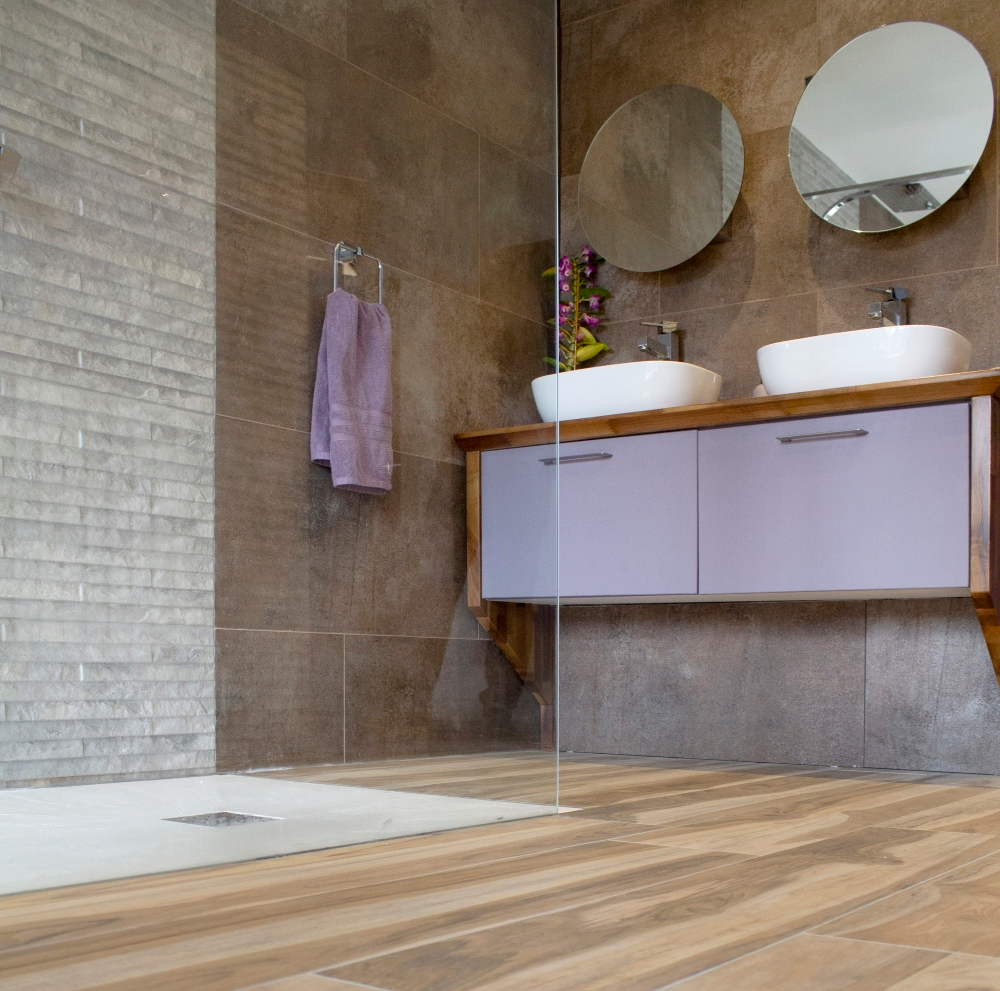
With having the four bathrooms we aimed to do each bathroom with a different style. We didn’t necessarily start off with a design in mind but we knew the size and layout of each bathroom and we knew what bathroom furniture we wanted too, so we went to Tile Mountain Stockport and spent a few hours there searching through the wide choice of tiles, then brought the samples back to offer them up to see how they complimented each room.
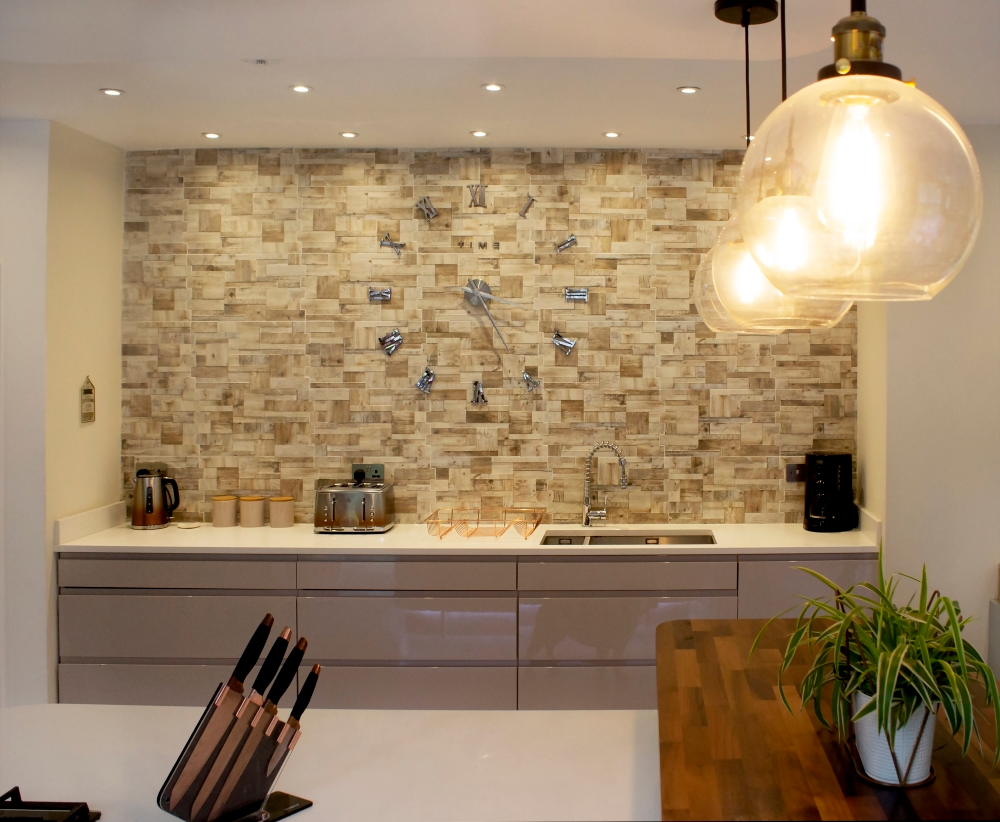
In terms of the kitchen, only one section of the wall was being tiled so we wanted to ensure this made a bold statement. For this particular feature wall we chose a porcelain tile, finally deciding on the Pallet Grey wall tiles. Measuring in at 560x310mm these tiles are quite large and we loved the way the tiles interlocked too, something that is very different to every other tiles used elsewhere in the house.
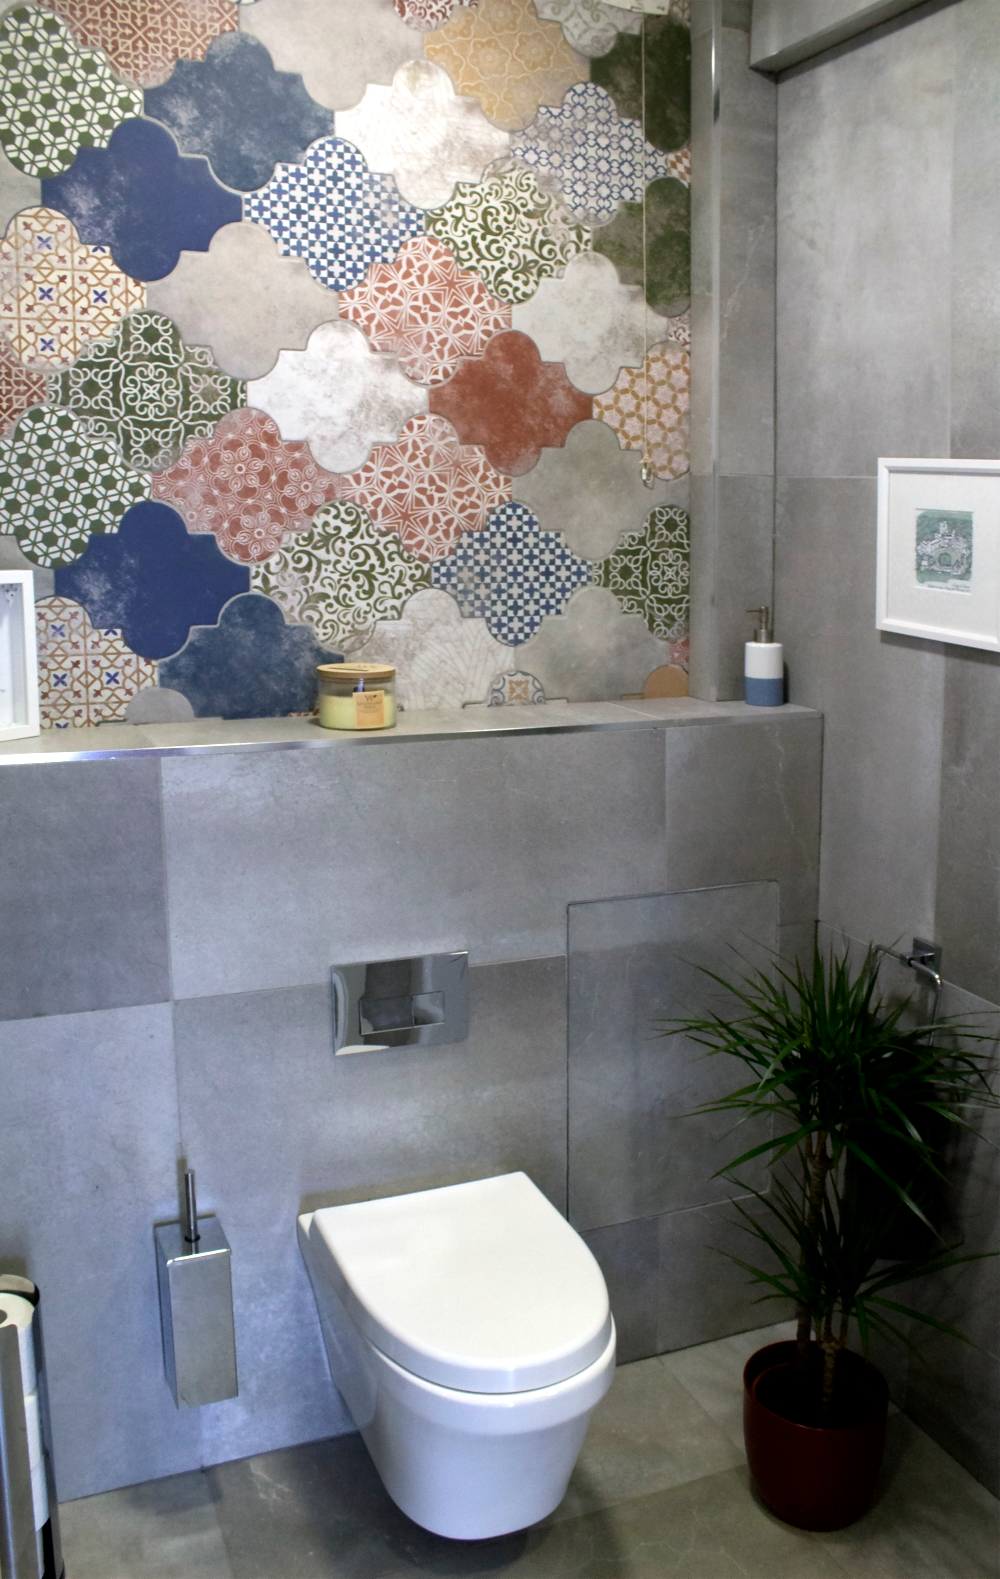
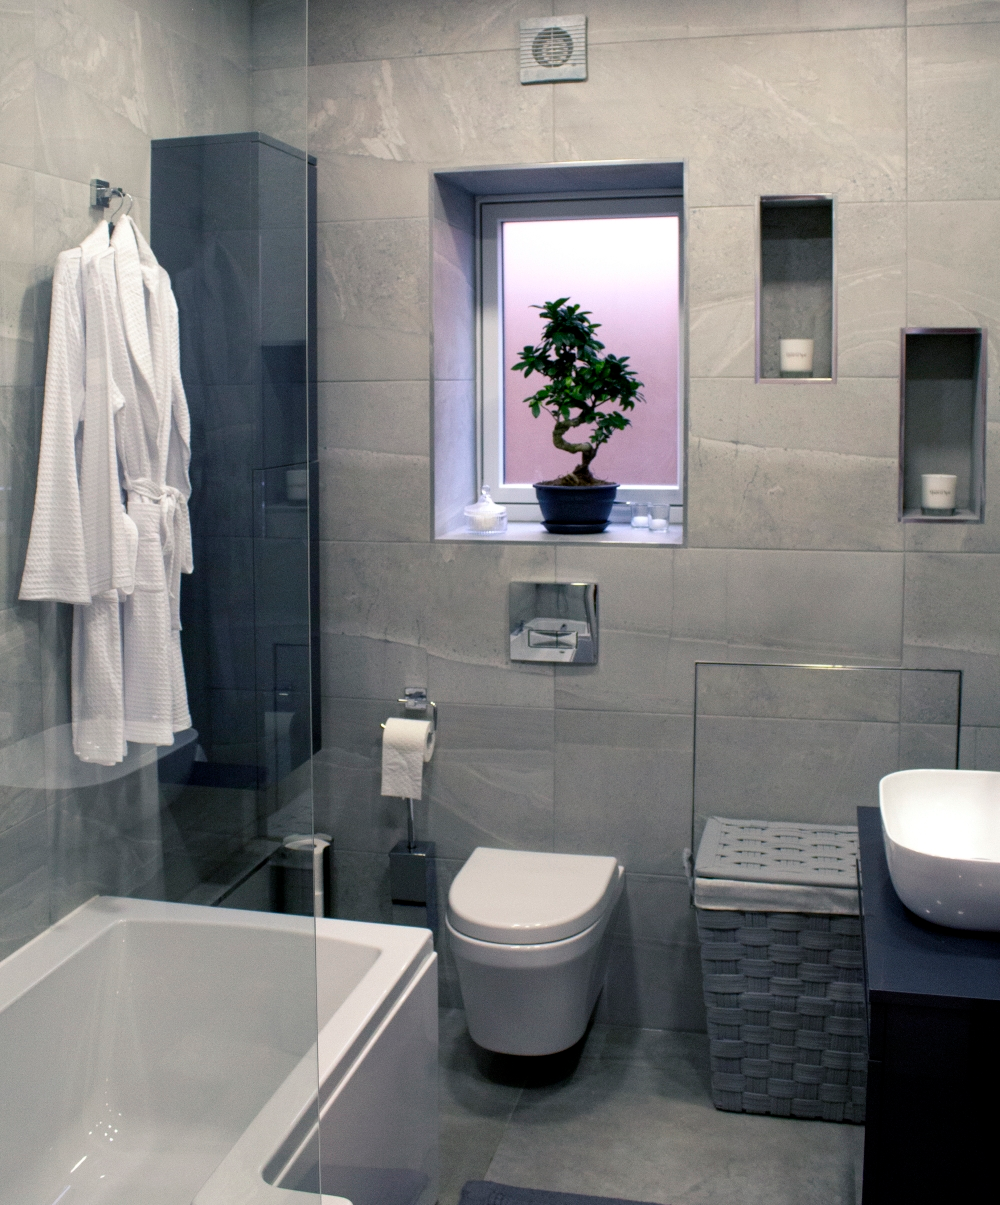
We also added a feature wall in the cloakroom bathroom using Riga Patchwork – these quirky tiles certainly seem to be the most liked and commented on by our guests! In our master bedroom we have an adjacent en suite separated only by a large head broad – the shower is situated in the centre of the en suite where we have created a feature wall using the Yosemite Grey Split-Face wall tiles, flanked by Etna Lava tiles on the walls either side of the shower cube. The feature wall layout and design is mirrored on the rear of the headboard/partition to match and the whole area’s aesthetic is pulled together with the wood effect Woodland Natural tiles on the floor.
What made you decide that the tiles you chose were the right tiles for the specific areas within the Dream Build project?
It can often be difficult choosing tiles that you know will work in the house, especially when you are looking at a single tile in a showroom. That’s why for us it was vital that we brought them home, placed them in the rooms to fit and see what they felt like with natural light before making a final decision. Once all rooms were done though it certainly reinforced our design decisions!
How long did the project take to complete and, although both of you are very capable DIYers, were there some tasks you couldn’t do without bringing in specialists?
As mentioned above it was around 49 weeks full time work creating the structures to make the building air and water tight, then there was hundreds of hours after Laura gave birth spent completing snagging, fixtures and fittings and the final finishing touches. It was a very big project and a lot of hard work we can tell you but in the end it was all worth it.
What part of the project was most difficult and why?
Project managing a complex build on this scale along with managing builders whilst simultaneously running other business proved to be most difficult! This added to poor weather conditions and Laura’s pregnancy meant that this was the hardest project we’ve completed to date but by far the most rewarding now we finally live in it and can enjoy as a family.
Do you have any further decorating projects lined up, either as part of the Dream Build or elsewhere?
The next main job is the driveway of the Dream Build. This stands at 575 sqm, all drains have been fitted underground along with over 500 tonnes of recycled crushed stone. The existing house that originally stood on this plot was also crushed up onsite and spread beneath the driveway. Also, we plan to develop further the land we built our own workshop/studio which allows us to shoot our own DIY videos (and will soon host live DIY courses too – classes can be booked via our website mrandmrsdiy.tv !).
What advice would you give to people considering undertaking a similar project?
A reliable and experienced project manager who has worked on similar structures is essential, as is extensive research and references from trades you will be using. Also, we’d advise to obtain fixed contract prices for set tasks where possible. In areas of construction you are planning to do yourself, do as much research as possible – my How-To videos for Tile Mountain and the ones over on the Video Gallery section on our website are especially good for expert tips and advice!
In relation to the previous question – is this advice applicable to those undertaking much smaller scale projects as let’s face it, not everyone will have the time, resource or skills to build a huge house from scratch!
Whether you are building a house of any size, just an extension to your existing house, or partly rebuilding, we’d advise to do as much research as possible around the tasks you’ve identified and get as much knowledge as you can from people with trades knowledge that you trust before you start. Also, if you do have to draft in specialists, make sure you choose your team carefully.
What would you say to people who are thinking about buying tiles from Tile Mountain?
The experience as a whole was fantastic! The knowledge the staff in store have is second to none and the helpful advice provided along with the wide range of products available made the overall experience smooth and simple. The great value on offer also allows Tile Mountain to meet everyone’s budget too.
Finally, what’s next on the horizon for Mr & Mrs DIY, both personally and in terms of your DIY adventures?
All eyes this coming year are focused on our newly launched Mr & Mrs DIY classes, new online videos, and building up our Instagram and Facebook channels to provide helpful and informative content to DIY enthusiasts across the globe!
If you’d like some helpful hints and tips on all manner of tiling tasks then check out our series of How To videos featuring Craig. Or if you want to go one step further you can book a workshop with Craig and Laura over at mrandmrsdiy.tv/workshops/
You might also enjoy these posts on the Tile Mountain blog…
Here at Tile Mountain, we not only have a huge range of tiles to suit every purpose, we also have a wealth of tiling knowledge gained from over 30 years in the tile industry, (which we’ll do or best to share with you across these very pages).
Whether you’re looking for the perfect tiles for your next home improvement project, are searching for some style inspiration, or simply need a bit of help and advice, you’re in the right place.
