
So, you’ve done the requisite research, decided on the type of Engineered Wood Flooring you want to install, read up on how exactly to install it. But have you thought about the tools you’ll need to make the project go smoothly? Our rather handy How To Install Engineered Wood Flooring guide provides comprehensive instructions on how to fit this most aesthetically pleasing of flooring products, but if you don’t have all the tools and materials outlined there then read on as we bring you the five tools you absolutely can’t do without when it comes to installing this type of flooring…

Tape Measure
As the fabled tradesman’s saying goes: “Measure twice, cut once”, and never has that idiom been so true when it comes to installing engineered wood flooring! Get yourself a trusty tape measure and be sure to accurately measure any cuts required and mark them out ahead of taking them to the table saw (or hand saw if you’re feeling particularly energetic).

Table Saw or Hand Saw
Engineered Wood is a sturdy beast that is made up of a genuine hardwood top layer that is bonded to a plywood base to create a solid structure. As such, it cannot be cut with a trimming knife as LVT or Laminate can be – you’re going to need a saw of some sort! Obviously, an electric table-top saw will make the job easier but engineered wood can also be hand-cut accurately without much stress (providing of course you have a serviceable tenon saw that’s in good condition!).

Mallet
Fitting any kind of flooring that has a click joint system is going to require a bit of the old banging in order to press the joints together. We heartily recommend using a rubber mallet to do this as the rubber coating will not damage the planks as you’re hammering the joints into place should you miss the tapping block. A standard wooden mallet will do the job if you don’t have a rubber mallet to hand – just be sure to hit the tapping block and not the wooden planks!

Tapping Block
The first of two handy tools that are essential for a successful engineered wood flooring installation is a Tapping Block, available to purchase separately as part of our Real Wood Installation Pack. This nifty piece of kit is used when ensuring individual planks are pushed together – simply place over a joint then use your mallet to steadily tap onto it to secure the joint into place.
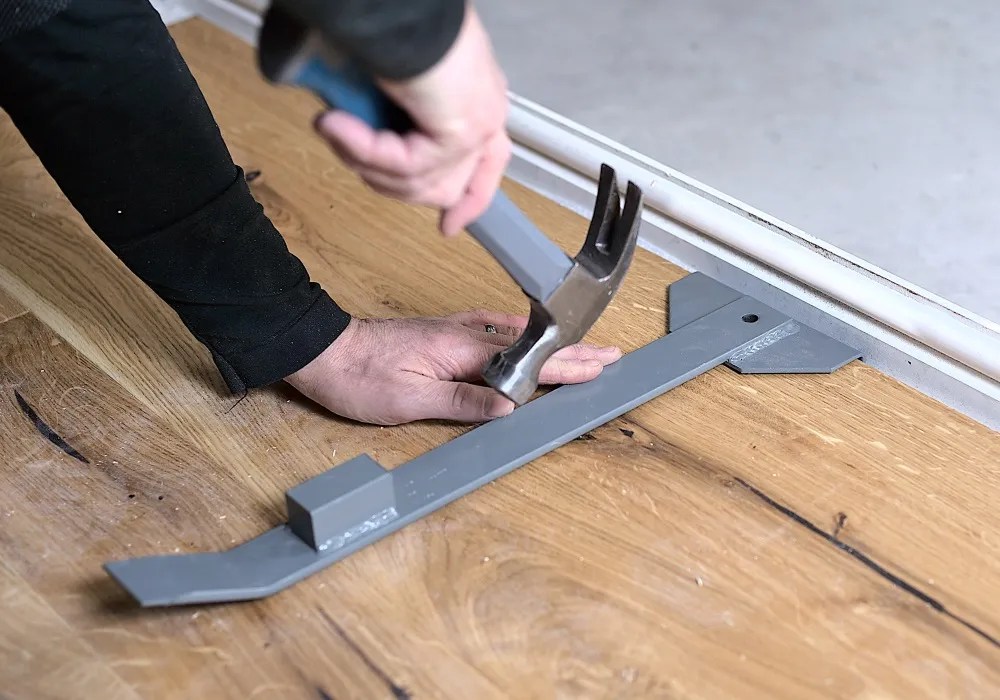
Pulling Bar
An ingenious device, the pulling bar helps you get to those hard to reach places such as where a piece of flooring buts up against a wall and in which the tapping block won’t fit. This weirdly shaped bit of metal simply slots into the gap between the edge of your plank and any obstacle and is then tapped to pull the plank snugly up against its neighbour and secure the joint in place.
Hopefully, this article has given you all you need to know about the essential tools needed to effectively Engineered Wood Flooring and explains the various methods involved.
If you’re considering updating a bathroom or another high-moisture area, you might prefer something more water-resistant. Explore our range of LVT Bathroom Flooring for designs that combine style, durability, and waterproof performance.
Here at Tile Mountain, we not only have a huge range of tiles to suit every purpose, we also have a wealth of tiling knowledge gained from over 30 years in the tile industry, (which we’ll do or best to share with you across these very pages).
Whether you’re looking for the perfect tiles for your next home improvement project, are searching for some style inspiration, or simply need a bit of help and advice, you’re in the right place.


