So you’ve decided on laminate flooring? Great choice! Now for the installation process. Here at Tile Mountain, we want to make sure that your laminate flooring is beautiful and functional, so we’ve made a handy guide to get you started on your newest DIY project.
Tools & Materials Required:
- Laminate flooring
- Hand saw
- Set square
- Moisture detector
- Rubber mallet
- Claw hammer
- Tape measure
- Pencil
- Pulling bar
- Spacers
- Tapping block
- Spirit level
- Underlay
- Duct tape
Step 1: Preparing Your Floor
Before you start to roll out your underlay, you’ll want to ensure that the area you’re working on is properly prepared. Vacuum the area to remove any debris, ensuring that it is clean and dust-free and removing any screws that might be poking out of the surface.
Finally, place your spirit level around all areas of your floor to check to see that it’s as level as possible with no more than 3mm height variation over 1m in length.
The underlay will only cover minor imperfections, so ensure that your subfloor is as level as it can be.

Variety Cool Brown Oak Laminate Flooring 8mm | Tile Mountain
Step 2: Underlay
Make sure that you are purchasing the correct type of underlay so that it is suitable for the flooring you are using.
There is a large selection of underlay to choose from, the most common being:
- 2mm clear underlay (no protective membrane)
- 2mm silver underlay (protective membrane)
- 3mm gold underlay (protective membrane)
A protective membrane will provide a barrier to stop moisture from getting through to the flooring.
Always make sure the colour side of your underlay is facing down towards the ground.
Starting in one corner of the room, place the underlay flush up against the skirting board and roll it out until it meets the other side.
Use scissors or a trimming knife to remove the excess underlay and tape off the edges for a temporary hold.
Line the edge of the second piece up to the first one, ensuring that they don’t overlap.
Continue this process until you reach the last part of the room.
Make sure that the last piece of the underlay is pressed up tightly against the skirting board, trim it down to size and then run a continuous piece of tape where the two edges meet.

2mm Clear Underlay | 2mm Silver Underlay | 3mm gold Underlay
Step 3: Laying Your Planks
It is important that you choose where the first part goes carefully, as this will dictate where the rest of the planks go throughout the room.
When working from side to side laying the planks, bear in mind that the last plank, closest to the wall, must comply with the amount per the manufacturer’s recommendations.
Additionally, when you get to the end of the room, the width of the last row must exceed the amount per the manufacturer’s recommendations.
If you are looking for a staggered effect, then you can start with the first plank in the corner of the room and work from there, with each offcut piece at the end of the room being transferred to the start of the next row.
Alternatively, you can measure the length of the room and find the centre point to give a more symmetrical appearance to your flooring.

Barcelona Light Grey Oak Laminate Flooring | Tile Mountain
Begin by placing the first plank in the middle of the room, working outwards towards the edges and trimming any excess off at the end.
For the second row, find the centre of the plank and level this up to the edge of the middle planks in the first row.
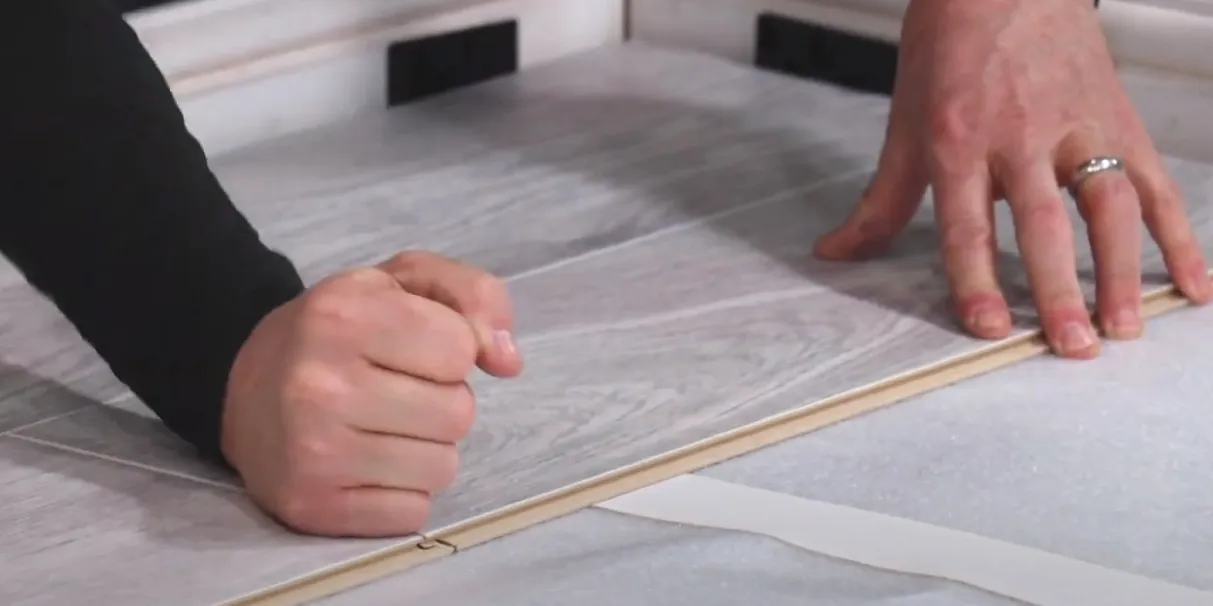
Make sure to place the spacers around the edges of the room, to ensure that there is the recommended expansion gap between the walls and the flooring – this is to ensure that the flooring is not damaged by changes in the temperature of the room.
Use the tapping block to gently fit the pieces together, and the pulling bar at the edges if necessary.
It is likely that the last board, closest to the wall, is going to need to be cut down to the size of the remaining gap.
This can be done by measuring the gap using a tape measure, marking the cut-off point on the last plank with a pencil and ruler, and cutting the excess off.
Alternatively, you can turn the last plank upside down and press it up against the wall across the gap.
Allow the last plank to sail over the existing panel that’s fitted into place and mark the last plank on the back, side and across the front for where you would need to cut.
The planks are easy to cut using a hand saw, however, an electric saw will make the job a lot faster.

Boscage Classic Oak Design Laminate Flooring 10mm | Tile Mountain
Step 4: The Final Row
Take a measurement of the width of the gap and mark on the last planks where they will need to be cut.
When cut, these will fit together just like the last pieces, however, you may need a pulling bar to fit them into place.
Lastly, remove all the spacers around the edges and cover the expansion gap with a scotia bead.
If you’re working on other rooms in your home and want a waterproof flooring option with a similar natural look, take a look at our LVT Bathroom Flooring range. It combines realistic wood and stone designs with water resistance, making it ideal for bathrooms and moisture-prone areas.
Here at Tile Mountain, we have a range of accessories to help you complete your DIY project! We’d love to see your self-installed laminate floors – show them off on Instagram and tag us @tilemountainuk.