Black spots are generally a mix of lichen, and sometimes mould or mildew spores, that blow in from nearby trees, shrubs, and leaf litter and take hold in the small pores of porous stone. Rather than sitting on the surface the way general dirt does, they root down into the stone itself, which is why they survive a normal wash and why scrubbing the surface alone rarely shifts them for good.
Porous natural stone, Indian sandstone in particular, is far more prone to this than porcelain or dense concrete paving, since its surface has more of the small pores lichen needs to establish itself in. Shaded, damp areas of the patio are usually affected first and worst, since that’s exactly the environment lichen thrives in, and it’s a big part of why the problem shows up on so many patios after a typically wet, overcast British autumn and winter rather than during a dry summer spell.
A north-facing patio, or one tucked behind a garage or a tall garden fence, a common layout on plenty of UK terraced and semi-detached plots, will usually pick up black spots faster than a south-facing one that gets a proper amount of direct sun and has more time to dry out between downpours.
Safety gear and preparing the area
Before you start, treat this as you would any other job involving a strong cleaning chemical, because most effective black spot treatments are considerably stronger than a general patio cleaner.
- Wear protective gear. Rubber gloves and eye protection are worth putting on before you open any bottle, along with clothes you don’t mind getting splashed.
- Protect nearby plants. Thoroughly soak any grass, borders, or pots close to the patio with clean water before you start. A wet plant is far less likely to be damaged by accidental chemical overspray or runoff than a dry one.
- Clear the area. Move furniture and pots off the patio and sweep away loose leaves and debris so the treatment can reach the stone directly rather than sitting on top of surface litter.
Step 1: Pre-wash without blasting the spots directly

Give the patio a general clean first, on a low or wide fan setting if you’re using a pressure washer, to clear loose surface grime before you treat the black spots themselves. The one thing worth avoiding here: don’t aim a high-pressure, narrow jet directly at the black spots hoping to blast them off. Doing that can drive the lichen’s spores further down into the stone’s pores rather than removing them, which is a common reason people find their black spots come back thicker after a jet wash than before it.
Step 2: Apply a chemical black spot treatment
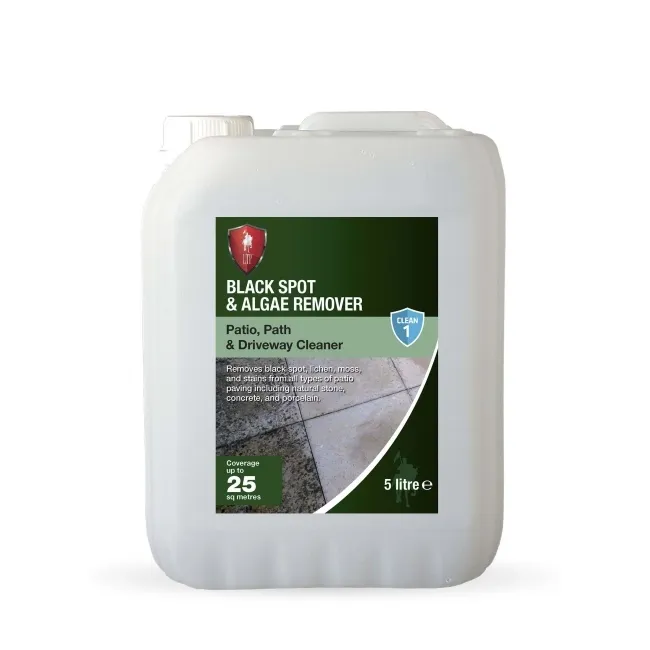
For anything beyond a light, fresh patch, a dedicated chemical treatment is the more reliable option, and it’s the product most people searching for a fix are actually looking for.
Most commercial patio black spot removers, including Tile Mountain’s own LTP Black Spot & Algae Remover, rely on a strong biocide (commonly a form of sodium hypochlorite, essentially an industrial-strength bleach) to break down the lichen. A few points worth knowing before you buy or mix anything:
- Always follow the specific product’s own dilution instructions rather than a generic ratio, since strength varies between products and between how a manufacturer expects it to be used on different stone types.
- Patch-test an inconspicuous area first, particularly on natural stone. Cleaning industry professionals have warned that acid- or bleach-based cleaners can etch or discolour some stone surfaces, so it’s worth confirming the product is safe for your specific paving before treating the whole patio.
- A small amount of washing-up liquid added to the mixture acts as a surfactant, helping the solution spread evenly and cling to the surface rather than running straight off, which is particularly useful on a sloped patio.
- Apply it with a watering can or garden sprayer rather than a pressure washer, pouring or spraying it on rather than blasting it in, so the chemical has a chance to sit on the surface rather than being immediately washed away.
Step 3: Agitate, dwell, and keep it damp
Once the treatment is on, work it into the black spots with a stiff-bristled outdoor brush, then leave it to dwell. Exact dwell times vary by product, so check the label, but it’s commonly a couple of hours rather than a quick five-minute wipe. If the patio starts drying out in the sun while the treatment is working, a light mist from a hose helps keep it active rather than letting it dry to a residue. You may notice some fizzing or foaming as the chemical breaks down the organic growth, which is a normal sign it’s working rather than a cause for concern.
Step 4: Rinse thoroughly and repeat on stubborn patches
Once the spots have visibly broken down or faded, rinse the whole area thoroughly with plenty of clean water, on a hose or a low-pressure setting, rather than a small token rinse. This matters for two reasons: it clears the dead organic matter and chemical residue off the stone, and it dilutes any runoff before it reaches nearby plants, a pond, or a drain, rather than sending a stronger dose of chemical their way. For any patches that haven’t fully cleared, treat that specific spot again rather than reapplying chemical treatment across the whole patio a second time.
Trying a milder home remedy first
If you’d rather avoid a strong chemical treatment, or the spots are light and fairly fresh, a homemade paste of white vinegar and baking soda, or even a biological washing powder solution, can work as a gentler first attempt. Mix roughly equal parts white vinegar and baking soda into a paste, apply it to the spots, leave it to sit for at least fifteen minutes, then scrub with a stiff hand brush and rinse well.
It’s worth setting honest expectations here: these milder methods depend on scrubbing effort rather than chemical strength, and cleaning professionals have pointed out that repeated heavy scrubbing gradually wears down the top layer of the stone itself. They tend to work reasonably well on light, recently established spots, but rarely shift lichen that’s had months or years to root in, which is when a dedicated chemical treatment becomes the more practical option.
How to stop black spots coming back

Black spots are far more likely to return on a patio that stays damp and shaded than one that dries out and gets some sun, so improving drainage and cutting back overhanging branches where you can will reduce how quickly they re-establish. This matters more in the UK than in a drier climate, since even a well-drained patio rarely gets a long enough dry stretch across an average autumn or winter to fully discourage regrowth on its own. Sealing the patio once it’s clean and fully dry is the other major factor, particularly for porous natural stone like Indian sandstone, since a sealed surface gives lichen spores far fewer pores to root into in the first place. Treating the patio again at the first sign of new spots, rather than waiting until they’re widespread, is also far less work than starting from scratch each time, and it’s worth building that check into a normal spring and autumn garden tidy-up rather than only noticing once the patio’s noticeably discoloured.
FAQs
What causes black spots on patio slabs?
Black spots are generally lichen, sometimes alongside mould or mildew spores, that blow in from nearby trees and plants and root into the small pores of the stone rather than sitting on the surface. Porous natural stone such as Indian sandstone is more prone to it than porcelain or dense concrete, and damp, shaded areas are usually affected first.
Does vinegar remove black spots on patio slabs?
White vinegar, usually mixed with baking soda into a paste, can shift light or recently established black spots with enough scrubbing, but it’s a milder approach than a dedicated chemical treatment and tends to struggle with lichen that’s had a long time to root into the stone.
Does bleach remove black spots on patio slabs?
Bleach-based products, generally a form of sodium hypochlorite, are the active ingredient in most dedicated commercial black spot removers and are effective against established lichen. The caveat is that stronger bleach-based products can etch or discolour some natural stone surfaces, so always patch-test first and follow the specific product’s dilution instructions rather than using undiluted household bleach.
What’s the active ingredient in patio black spot remover?
Most commercial patio black spot removers are built around a strong biocide, commonly a form of sodium hypochlorite, which breaks down the lichen at a chemical level rather than just scrubbing it off the surface. Always check the specific product’s label, since concentration and exact formulation vary between brands.
Does washing powder remove black spots on a patio?
A biological washing powder solution can help lift light black spots in a similar way to a vinegar and baking soda paste, through scrubbing and mild chemical action rather than a strong biocide. It’s a reasonable first attempt on fresh, minor spots, but isn’t a substitute for a dedicated treatment on anything well established.
Why do black spots come back after jet washing?
Aiming a high-pressure jet directly at black spots can drive the lichen’s spores deeper into the stone’s pores rather than removing them, which is a common reason spots reappear, sometimes worse, not long after a jet wash. A pressure washer is better used on a low or wide setting for general cleaning, with the spots themselves treated chemically rather than blasted.
Are black spots on patio slabs harmful, or just cosmetic?
For most households, black spots are a cosmetic problem rather than a safety one, though lichen-covered stone can become slightly more slippery when wet. The bigger practical issue is that established lichen gradually roots deeper into porous stone over time, which is why treating it earlier rather than later makes the job easier.
Is Indian sandstone more prone to black spots than other patio materials?
Yes. Indian sandstone’s porous surface gives lichen far more places to root into than a dense material like porcelain or well-sealed concrete, which is why it’s the material most commonly associated with this problem. The same applies to other porous materials such as clay or concrete block paving and brick, just to a lesser degree, so sealing after cleaning is worth doing on any of these, not just sandstone.
In summary
Black spots on a patio are a rooted, living problem rather than surface dirt, which is why a quick jet wash on its own rarely gets rid of them for good and can sometimes make things worse by driving spores deeper into the stone. Treat them properly with either a dedicated chemical black spot remover or a milder vinegar-based paste for lighter spots, always with the right safety gear and a patch test on natural stone first, then rinse thoroughly and seal the patio once it’s dry.
Browse Tile Mountain’s LTP Black Spot & Algae Remover and paving sealers to treat existing spots and make the patio a much harder place for them to come back to.

Here at Tile Mountain, we not only have a huge range of tiles to suit every purpose, we also have a wealth of tiling knowledge gained from over 30 years in the tile industry, (which we’ll do or best to share with you across these very pages).
Whether you’re looking for the perfect tiles for your next home improvement project, are searching for some style inspiration, or simply need a bit of help and advice, you’re in the right place.