If you’re desperate for that classic Victorian hallway look, but looking to DIY it for less, look no further than our help and advice on how to lay mosaic tiles for a Victorian style hallway. We’ve enlisted the help of our resident tiling expert Craig Phillips to show you how its done! Using our Victoria Red & Black Chequer Mosaics, Craig tells you everything you need to know about getting that traditional look.
What you’ll need:
- Mosaic tiles of choice
- Boarder mosaics and corner mosaics
- Rapid set adhesive
- Grout
- Sealant
- Grouting float
- Sponge
- Trowel
- Notch trowel
- Tape measure
- Trimming knife
- Bucket for mixing
- Appropriate PPE
- Spirit level
- Tile cutter
1 – Preparing your floor and tiles
Begin by preparing the floor you’ll be laying your tiles on. Ensure its clean from any dust and debris, and check the surface is level using your spirit level. If you find your floor is not level, you may need to use a self levelling compound to correct this.

We’re laying our tiles onto a wooden floor, so have laid insulation boards to begin tiling on top. Begin to dry lay your tiles (with no adhesive) on your floor while they’re still packaged, with your boarder and corner tiles around the edge. If you find pre cut boarder tiles don’t make it all the way to the edge of your walls, you can either cut one strip from the main mosaic tiles to implement around the whole outside edge of your space, or measure how much of an additional boarder tile you’d need to make up the space.

Mosaics make this whole process easier, as they come on a mesh backing that is simple to cut. When you decide you’re happy with the amount of tiles you have, unpackage them and dry lay them again, just to double check, cutting pieces away if necessary.
2 – Mix your adhesive and begin laying your tiles
To lay our tiles we used a rapid set flexible adhesive (Keraquick Grey Fast Setting Adhesive to be exact!). It comes as a powder that needs to be mixed with cold, clean water and a mixing paddle, or whatever the instructions on your packet tell you to use. Spread this mix across your surface with a flat edge trowel, and then using a notch trowel, comb through the adhesive to ensure it’s even. Begin placing your first few boarder tiles and corner tiles around the edge of the room, pressing gently into the adhesive. Check this is level with your spirit level. If you’re using a quick dry adhesive like we are, ensure you work in small areas to maintain a level of flexibility throughout.

Place your full tiles in the centre, applying gentle pressure throughout. Make sure you leave a small gap in between your full mosaics, to replicate the pre-measured grout lines on the mosaic. Continue to check throughout your tiles are level with your spirit level.

If you notice any adhesive that has made its way onto the surface of your tiles, use cold clean water and a sponge to gently wipe away before it dries, ensuring you don’t move any of your tiles about while you’re doing this.

3 – Finishing the tiles
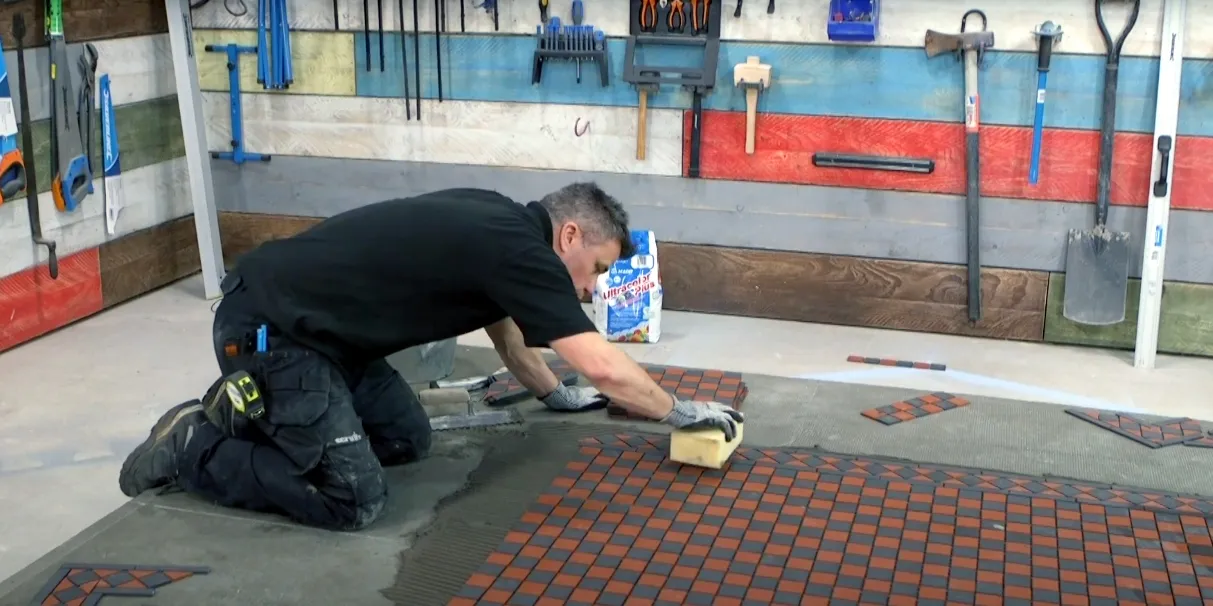
Once all your tiles are laid, grab a damp sponge again and ensure there is no left over adhesive on the surface of your tiles. Before grouting, ensure you use a sealant to protect your tiles, following the instructions on the package. To grout our tiles we used a powder grout and mixed it with cold, clean water. Using a grout float, apply the grout over the surface of the tiles, pushing the product into any and all gaps.

Once you’ve covered about 1sqm, take a bucket of cold, clean water and a sponge and start to wipe off the excess grout. Don’t press too hard when doing this, as it may remove some of the grout from between the tiles.

Repeat this process across the rest of your floor. Come back every 10-15 minutes to repeat this process until your tiles are nice and clean!
There you have our help and advice on how to lay mosaic tiles to give you that perfectly Victorian style hallway! Be sure to tag us in the results of your project on Instagram, @Tilemountainuk, to show off your DIY skills! Subscribe to our YouTube channel too, to ensure you never miss out on our video content!
Here at Tile Mountain, we not only have a huge range of tiles to suit every purpose, we also have a wealth of tiling knowledge gained from over 30 years in the tile industry, (which we’ll do or best to share with you across these very pages).
Whether you’re looking for the perfect tiles for your next home improvement project, are searching for some style inspiration, or simply need a bit of help and advice, you’re in the right place.