When it comes to refreshing a kitchen, it’s highly likely that tiles – particularly of the wall variety – will feature quite prominently thanks to their abundant aesthetic and functional properties. They look the business, they do the business (in that they’re easy to look after once installed) but for many people, the business of actually installing them gives them the fear. If that sounds like you then firstly take a look at our ultra-handy Complete Guide To Wall Tiling feature, then, come back here as we’re about to highlight five of the most common mistakes made when installing kitchen wall tiles and tell you how to avoid them…

Failing To Prepare Surfaces
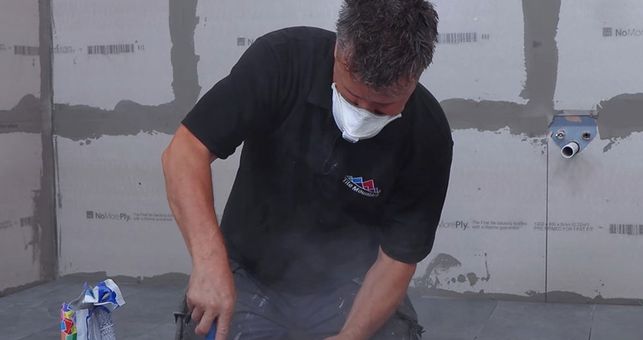
Perhaps the most common mistake that anyone makes when embarking upon a tiling project is failing to adequately prepare the surface being tiled onto. Surfaces should be level, free from dents and deficiencies, and free from debris. Before even attempting to lay tiles you should take care to remove any protruding obstacles such as screws, repair defective plaster and if necessary, level the surface with a specialist levelling product. Once you’ve done all that you should sand down the surface so that any adhesive can bond and make sure that it’s also free of dust, dirt and grease.
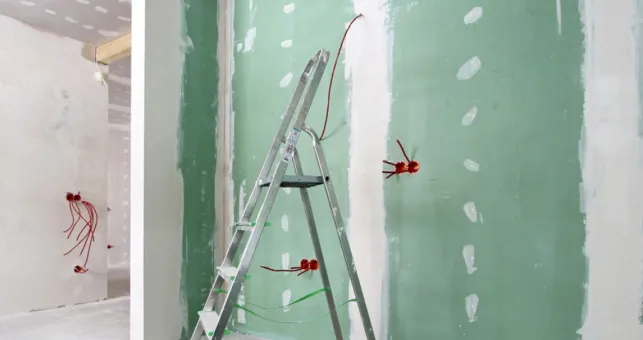
It’s also worth remembering that different surfaces need to be prepared in different ways. Drywall for example generally requires around 4 weeks to dry properly whereas wood and timber would require a coat of polyurethane paint before tiling directly on to it. If you’re not sure about how to prep a particular type of surface then ask your tiler or contact our customer services team on 01782 223822. Alternatively, you could opt to use backer boards to ensure a perfectly primed surface to tile onto.

Avoiding The Use Of Battens
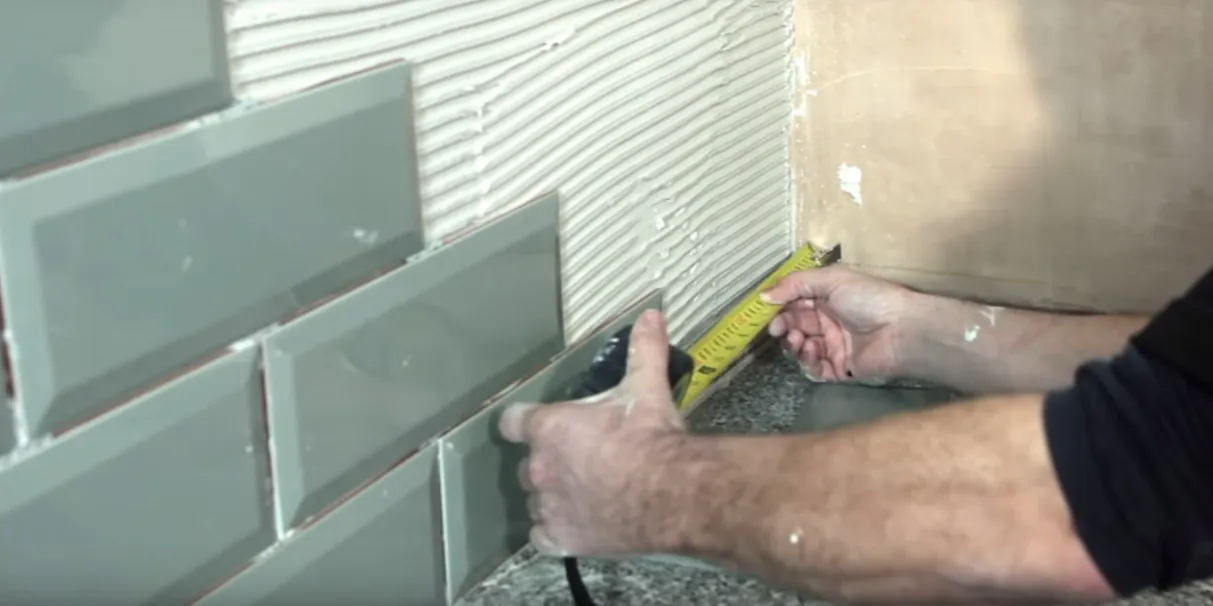
If you want your tiles to be laid in straight lines, both vertically and horizontally, then avoid using battens at your peril! Despite what your eyes may tell you, most walls and floors are not perfectly straight, meaning that if you start to tile from the floor up (possibly using the skirting as a starting point) then you might be in for a nasty surprise once you reach the top of the wall as you could be left with wonky rows. For this reason, we always recommend using a wooden batten when tiling walls.
Once you have done your prep, finalised your design, and plotted how the tiles will be laid starting at the centre of the wall and working outwards, then the next step is to create and secure a wooden batten to the surface being tiled onto to act as a guide. A simple piece of 1×2 timber will suffice – line it up, make sure it’s straight using a spirit level, then attach securely to your wall using screws. The use of a batten will not only ensure that vertical and horizontal rows are laid accurately but they will also help prevent slippage whilst your adhesive sets.

Grouting Too Fast
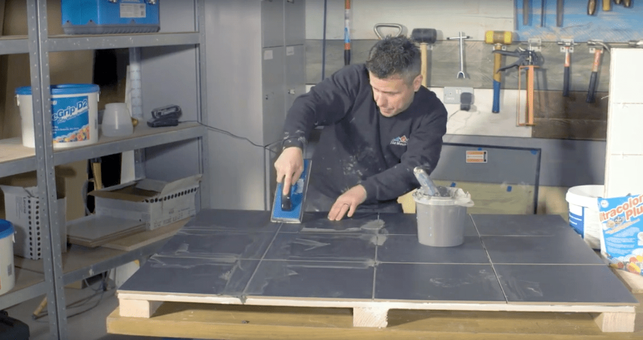
Everyone wants to get the job done as quickly and efficiently as possible don’t they? However, be too hasty and you could end up spending more time (and money!) further on down the line correcting errors resulting from grouting too fast and unevenly. Grouting should be done slowly and surely, ideally with the use of a grout float to ensure that your grout is evenly spread and that the gaps between the tiles are fully filled with grout. You should also ensure that your adhesive is fully set before grouting or you risk sealing the moisture in and this can affect structural integrity of the installation.
Grout too fast though and you risk leaving voids and, if you’re grouting a very large area, not being able to install the tiles in the entire area without the grout applied to further flung tiles drying. Wiping excess grout from the tiles before it has set can result in gouges and unevenness. If you’ve inadvertently wiped too quickly, pick up a very small amount of grout with your grout float and apply another layer to the area you were working on to smooth out any bumps or ridges. Don’t apply too much though or the first coat of grout will take too long to cure, resulting in a weakened finish.

Using The Wrong Type of Adhesive
Choosing the correct tile adhesive for your project is imperative as if you plump for the wrong kind then you’re opening yourself up to a whole world of pain when it comes to rectifying your mistakes. It may sound glaringly obvious but you’d be amazed at how many people fail to use waterproof adhesive for tiles installed around baths, showers, splashbacks and in wetrooms! Picking the right adhesive for your project might seem like a bit of a minefield, but as long as you adhere (see what we did there?) to a couple of simple rules then it’s really not that difficult…
If tiling a wall that is subject to movement (i.e. you’re tiling onto backer boards) then you’ll require a flexible adhesive. Tiling in areas that are exposed to direct water? Then you’ll need a waterproof adhesive such as Mapei Keraquick or Mapeker Rapidset Flex if your tiles are constructed from slate or natural stone. If you’re looking to fix ceramic wall tiles only then you could opt for a time-saving ready mixed adhesive such as Mapei Mapestick, or Mapei Mapegrip D2 if the ceramic tiles are being installed in a shower of anywhere they’re going to get wet. Check out our Adhesives Quick Guide feature for a full rundown of which adhesive to use and when.

‘Dotting & Dabbing’ The Adhesive
Please don’t do this. Just don’t, ok? For the uninitiated, ‘Dot & Dab’ refers to a way of applying adhesive to the back of tiles that involves dotting a dollop of adhesive in each corner of the tile and fixing to the wall or floor as opposed to evenly applying the adhesive to your substrate and then fixing the tiles to that. In dotting and dabbing you might think that you’re saving time or even believe that you’re somehow making the corner joints stronger but you’re doing nothing of the sort and are in fact almost guaranteeing a shoddy job.
The ‘Dot & Dab’ method results in the back of the tiles not being evenly covered in adhesive meaning there will be gaps where the tile is not secured by any form of mortar. This can cause many short and long term problems with moisture damage being one of the most common (and most costly to correct). Even waterproof adhesive cannot account for the gaps left between the tile and the underlying surface, meaning that water can get in behind and eventually cause your tiles to pop off the walls.
If you’re about to embark upon a wall tiling project then please don’t make the mistakes we’ve covered here – they’re fairly easy to avoid and in taking this advice you’ll save yourself a lot of heartache and money in the long run! For more information about all aspects of tiling including preparation and installation advice then head over to our Help Centre section.
And if you’re planning a full kitchen makeover, why not take a look at our range of kitchen floor tiles to complete the look and create a seamless finish between your walls and floors?
You might also like these posts on the Tile Mountain blog…
Here at Tile Mountain, we not only have a huge range of tiles to suit every purpose, we also have a wealth of tiling knowledge gained from over 30 years in the tile industry, (which we’ll do or best to share with you across these very pages).
Whether you’re looking for the perfect tiles for your next home improvement project, are searching for some style inspiration, or simply need a bit of help and advice, you’re in the right place.