The best kitchen splashback tiles are metro, patterned, marble-effect, mosaic, geometric, colour-block and large-format tiles. A splashback sits behind the hob and worktop, at a standard height of 450mm to 600mm, and protects the wall from grease, steam and heat. Tile choice depends on kitchen size, cabinet colour and hob type. Gas hobs need stronger heat resistance than induction hobs.
Porcelain gives the strongest overall performance for a splashback wall. Low porosity keeps porcelain resistant to heat, stains and moisture, ahead of ceramic, glass and natural stone. Marble-effect metro tiles, herringbone layouts and sage green tones lead 2026’s top trends, alongside full-height tiling from worktop to ceiling. Cabinet colour sets the tile colour direction. White cabinets suit navy or terracotta. Grey cabinets suit white or black. Dark cabinets suit pale or marble-effect tiles.
Layout changes the finish as much as the tile choice itself. Brick bond gives the simplest, most forgiving layout. Herringbone and chevron patterns add 30% to 40% more labour time, due to the precision cutting each angle requires. Small kitchens suit smaller formats, such as mini metro tiles at 150mm x 75mm. Large kitchens suit large-format tiles at 600mm x 1200mm or above, for fewer grout lines and a cleaner finish.
A UK kitchen splashback costs £150 to £500 for a typical 1 to 3 square metre area, tiles and fitting included. Ceramic costs £80 to £120 per square metre. Porcelain costs £90 to £140. Natural stone costs £120 to £180 or more. A brick-bond layout suits confident DIY installation. Herringbone, chevron and large-format layouts suit a professional tiler, due to the precision each pattern demands.
Correct measurement and the right adhesive prevent the most common splashback tiling mistakes. Heat-rated adhesive behind the hob, a level datum line, and accurate socket cut-outs stop crooked rows and cracked grout. Daily cleaning with a mild, non-abrasive cleaner, plus an annual grout reseal, keeps a tiled splashback stain-free and hygienic for years.
What Are the Best Kitchen Splashback Tile Ideas?

The best kitchen splashback tile ideas are metro tiles, patterned tiles, marble-effect tiles, mosaic tiles, geometric tiles, colour-block tiles and large-format tiles. A splashback sits behind the hob and worktop at a standard height of 450mm to 600mm. Grease, steam and water splashes stop at this wall zone. Kitchen size decides the best tile choice. Small kitchens suit light, reflective tiles. Large kitchens suit darker shades and bolder patterns.
Metro Tiles

Metro tiles are rectangular tiles laid in a brick-bond pattern. Standard size measures 200mm x 100mm. Smaller 150mm x 75mm and longer 300mm x 100mm formats suit different wall proportions. Fitters set a 1.5mm gap between metro tiles. A single colour gives a plain, classic finish. Two colours stacked together add contrast and depth.
Patterned Tiles

Patterned tiles are decorative tiles printed with Moroccan, Victorian or encaustic-style designs. A patterned strip behind the hob creates a feature zone without covering the full wall. Plain cabinets and neutral worktops let the pattern hold visual weight. Busy cabinetry competes with the pattern and reduces its impact.
Marble-Effect Tiles

Marble-effect tiles are porcelain tiles printed to copy the veining of natural marble. Cost runs around 40% below natural marble on average. Porcelain resists stains and scratches better than natural stone. Natural marble carries higher porosity and needs regular sealing, while porcelain needs neither.
Mosaic Tiles

Mosaic tiles are small glass, stone or ceramic pieces joined together on one sheet. Sheet format speeds up installation, since one sheet covers a set wall area in a single placement. Curved walls and awkward corners suit mosaic tiles best. Small individual pieces bend around uneven surfaces where larger tiles cannot sit flush.
Geometric Tiles

Geometric tiles are shaped tiles cut into hexagons, triangles or chevrons. Sharp angles add visual movement across a flat wall. Open-plan kitchens gain the strongest effect from geometric patterns. Wider rooms carry the eye across the shape sequence more effectively than a single small wall does.
Colour-Block Tiles
Colour-block tiles are tiles laid in one bold, uniform shade across the full splashback. Neutral cabinets and worktops let a single strong colour become the room’s focal point. No secondary pattern gets added, since the colour block carries the visual weight alone.
Large-Format Tiles

Large-format tiles are oversized panels that reduce the number of grout lines on a wall. Standard installation uses a 2mm spacer, wider than the 1.5mm gap used for metro tiles. Fewer grout joints create a smoother, more seamless wall surface. Minimalist kitchens benefit most from this reduced-joint finish.
Which Kitchen Splashback Tile Ideas Are Trending?

Trending kitchen splashback tile ideas are marble-effect metro tiles, herringbone layouts, sage green tiles, monochrome printed tiles and terrazzo-effect tiles. Full-height tiling is also trending, running tiles from the worktop to the ceiling instead of stopping under the wall cabinets. This creates a feature wall effect, especially in kitchens without upper units.
Marble-Effect Metro Tiles
Marble-effect metro tiles are porcelain tiles with a honed matt finish and grey veining, one of 2026’s leading splashback trends. These tiles offer a realistic mimic of natural stone, with Carrara-style designs bringing an opulent look through matt printing and grey veining. Porcelain construction keeps maintenance low compared to real marble, since porcelain resists staining and heat better than natural stone.
Herringbone Layouts
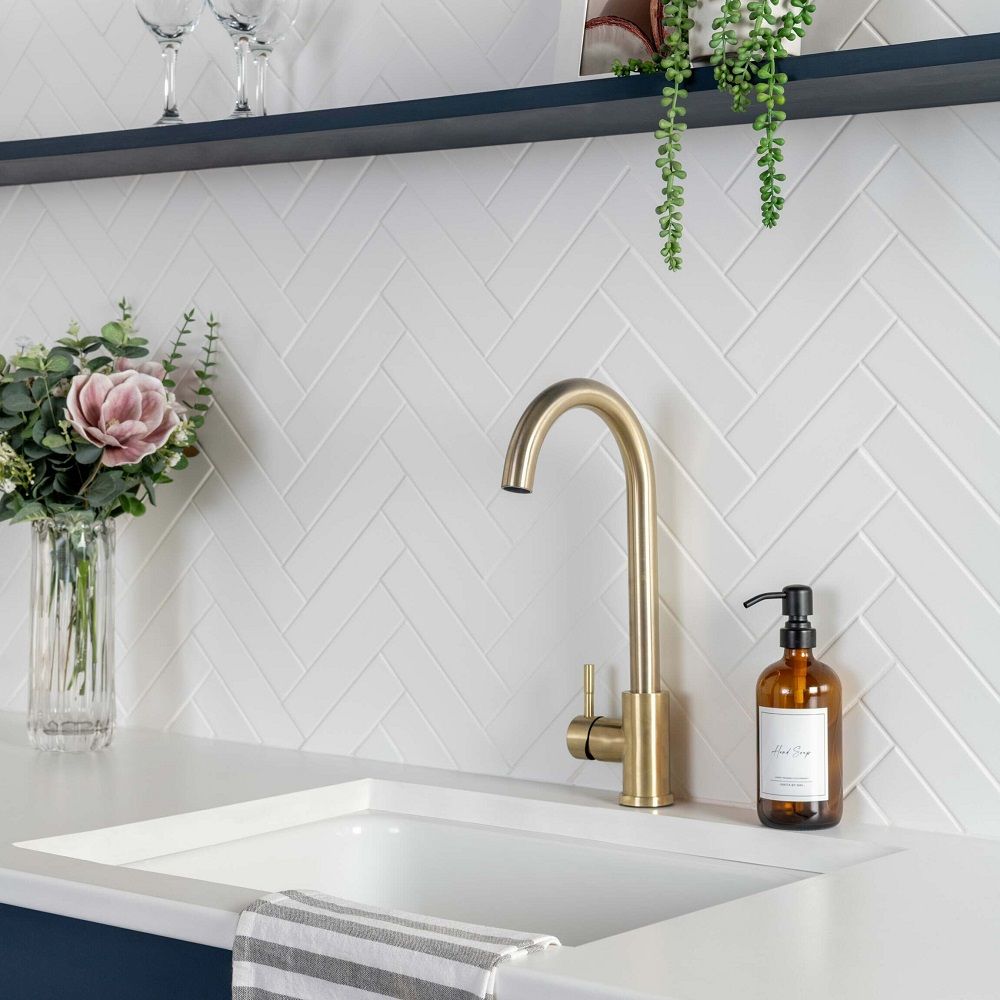
A herringbone stack is an angled tile layout that updates the standard metro brick-bond pattern for 2026 kitchens. Angled placement adds texture and depth to a plain white splashback. This layout suits a feature zone behind the hob, since diagonal lines create visual interest without changing the tile colour.
Sage Green Tiles
Sage green tiles are muted green-toned tiles ranking among 2026’s most popular splashback colours. Bold colour choices are replacing the traditional all-white splashback in many UK kitchens. Copper and metallic finishes are also gaining ground as a feature-splashback trend, adding warmth alongside this shift toward colour.
Monochrome Printed Tiles
Monochrome printed tiles are single-colour patterned tiles that bring design detail to a splashback without overwhelming the room. These tiles stay muted and versatile enough to pair with almost any kitchen design, unlike bolder multi-coloured patterns. A 200mm x 200mm format suits smaller feature areas, such as a strip behind the hob or sink.
Terrazzo-Effect Tiles
Terrazzo-effect tiles are speckled-pattern tiles trending for their ability to hide everyday splashes and marks. The speckled surface disguises small splattered dots that show up clearly on plain, single-colour splashbacks. This makes terrazzo-effect tiles a practical choice for busy kitchens used every day.
What Colour Splashback Tiles Suit Your Kitchen?

White cabinets suit navy, sage green or terracotta splashback tiles, grey cabinets suit white, black or navy tiles, and dark cabinets suit pale or marble-effect tiles. Cabinet colour sets the starting point for this decision. Countertop colour narrows the choice further, since the splashback sits between both surfaces and needs to balance each one.
White Cabinets
Navy blue, sage green and terracotta are the strongest splashback colours for white cabinets. Deep navy blue tile behind white cabinets creates a dramatic, classic combination that works in traditional and contemporary kitchens. Terracotta and warm orange tile paired with white cabinets delivers a vibrant, Mediterranean feel. Restrained countertops and hardware keep focus on the splashback colour, since a busy kitchen weakens a bold splashback statement.
Grey Cabinets
White, black, navy blue and matching grey are the top splashback colours for grey cabinets. White creates a bright, clean contrast, black or charcoal adds drama, and navy blue brings colour without overwhelming the space. A grey-on-grey pairing works too, since a glossy finish adds depth while keeping the whole palette tonal.
Cream and Wood Cabinets
Warm cream, beige and wood-effect tiles suit cream and natural wood cabinets best. Natural stone tones in warm shades add texture without breaking a neutral palette. This pairing suits farmhouse and country-style kitchens, since warm tones echo the wood grain already present in the units.
Dark Cabinets
White, light grey and pale marble-effect tiles create the strongest contrast against dark cabinets. A pale splashback lifts a dark kitchen and stops the room from feeling heavy. Metallic accents in copper or brass also work well against dark cabinetry, since a reflective finish bounces available light back into the room.
Which Tile Material Is Best for a Kitchen Splashback?

Porcelain is the best material for a kitchen splashback. It handles heat, stains and moisture better than ceramic, glass or natural stone, thanks to its low porosity. Ceramic comes a close second and costs less. Glass gives you a seamless, grout-free finish. Natural stone looks stunning but needs more upkeep.
Porcelain Tiles
Porcelain tiles resists heat and stains better than any other splashback material. Its dense, low-porosity surface stops grease and moisture soaking in, so marks wipe off easily. That’s why it’s the safest bet for the wall directly behind a hob.
Glazed Ceramic Tiles

Glazed ceramic tiles are a cheaper alternative to porcelain with almost the same practicality. The glaze repels grease and moisture, so a quick wipe with a mild cleaner keeps things looking sharp. Ceramic works well anywhere on the splashback that isn’t taking direct heat from the hob.
Glass Splashback Tiles
Glass gives you a single, smooth panel with no grout lines at all. Nothing to scrub, nowhere for grease to hide. Toughened glass also copes fine with heat, so it’s safe to fit behind any hob, including gas.
Natural Stone Tiles

Natural stone, like marble or granite, gives your kitchen a one-of-a-kind look. It’s more porous than porcelain though, so it needs sealing now and then to keep stains out. That extra bit of care makes stone a better fit away from the hottest spot behind the hob.
What Kitchen Splashback Tile Styles Can You Choose?

You can choose from brick bond, herringbone, chevron, basket weave, vertical stack and grid layouts for a kitchen splashback. Each style changes how the same tile looks on the wall, since it’s the layout, not just the tile shape, that shapes the final effect. Simple layouts suit busy kitchens. Detailed layouts suit a single feature wall.
Brick Bond
Brick bond lays each tile offset by half a tile length, just like real brickwork. It’s the classic metro tile look and works in almost any kitchen. This layout hides small wall imperfections well, since the staggered joints don’t line up in a single row.
Herringbone
Herringbone lays rectangular tiles at a 90-degree angle to each other, forming a V-shaped zigzag. It takes more cutting and planning than brick bond. The result adds real texture and movement, so it works best as a feature strip behind the hob rather than across a whole wall.
Chevron
Chevron uses tiles pre-cut at an angle so the zigzag lines meet in a perfect point. It’s a sharper, cleaner look than herringbone, since there’s no small offset where the tiles meet. This style needs precise cutting and is best left to an experienced tiler.
Basket Weave
Basket weave alternates pairs of tiles in a criss-cross pattern that looks woven. It suits a statement splashback rather than a full wall, since the pattern is quite busy. Plain cabinets and worktops help this style stand out without clashing.
Vertical Stack
Vertical stack turns standard metro tiles 90 degrees and lines them up in tall columns. This draws the eye upward and makes a kitchen feel taller. It’s an easy way to make an ordinary tile look more contemporary, without changing the tile itself.
Grid
Grid lines up square tiles directly on top of one another in even rows and columns. It gives the cleanest, most minimal look of all the layouts. This style suits large-format tiles especially well, since fewer joints keep the grid lines sharp and simple.
I’ll go with what’s already confirmed from the earlier research (splashback height, metro and large-format sizing) rather than force a search that isn’t available right now.
What Size Tiles Should You Choose for a Splashback?

Small kitchens suit smaller tiles like metro or mosaic, while large kitchens suit large-format tiles for a cleaner finish. A standard splashback runs 450mm to 600mm high, from the worktop to the underside of the wall cabinets. Tile size changes how busy or calm that strip of wall looks, since smaller tiles create more grout lines and larger tiles create fewer.
Small and Mini Metro Tiles
Mini metro tiles measure around 150mm x 75mm, smaller than the standard metro size. They suit narrow splashback strips and tight spaces, such as the wall beside a window or between two units. More grout lines appear across the same area compared with a standard or large tile.
Standard Metro Tiles
Standard metro tiles measure 200mm x 100mm and suit most kitchen sizes. This size balances detail and simplicity, since the brick-bond pattern stays visible without overwhelming a small wall. It works equally well in a compact galley kitchen and a larger open-plan space.
Mosaic Tiles
Mosaic sheets typically measure 300mm x 300mm, made up of small individual pieces. This size suits compact splashback areas and awkward corners, since the small pieces bend around uneven surfaces. A mosaic sheet also works well as a single feature strip behind a sink.
Large-Format Tiles
Large-format tiles measure 600mm x 1200mm or larger, cutting down the number of grout lines. Fewer joints create a smoother, more open look, which suits a large kitchen wall best. Big kitchens carry this scale better than small kitchens, since a large tile can look out of proportion on a narrow wall.
What Kitchen Splashback Tile Ideas Work for Different Kitchen Sizes?

Small kitchens work best with light metro or mosaic tiles, medium kitchens work well with patterned or marble-effect tiles, and large kitchens suit large-format or geometric tiles. Wall size and natural light both affect which tile style reads well, since a busy pattern can crowd a small room while a plain tile can look empty on a large wall.
Small Kitchens
Light-coloured metro or mosaic tiles work best in a small kitchen, roughly under 8 square metres of floor space. A pale, reflective surface bounces available light around the room, so the space feels more open. Standard metro tiles at 200mm x 100mm, or mini metro at 150mm x 75mm, keep the wall simple without cramming in too many grout lines. A 300mm x 300mm mosaic sheet adds detail without taking up visual space.
Medium Kitchens
Patterned or marble-effect tiles suit a medium-sized kitchen, roughly 8 to 15 square metres of floor space. A splashback wall of 1.5 to 3 metres gives a pattern enough room to read clearly without overwhelming the space. Marble-effect tiles, usually sized 300mm x 600mm, add a premium finish here too, since the wall is large enough to show the veining detail properly.
Large Kitchens
Large-format or geometric tiles suit a large kitchen, roughly 15 square metres or above. A splashback wall of 3 metres or more carries fewer, larger panels well, since large-format tiles at 600mm x 1200mm or above need space to show their clean, seamless effect. Geometric tiles, typically 150mm to 200mm per hexagon or triangle edge, also work strongly here, as an open-plan layout gives the shape pattern room to carry the eye across the full wall.
How Much Do Kitchen Splashback Tiles Cost in the UK?

A kitchen splashback costs £150 to £500 in the UK, including tiles and fitting, for a typical 1 to 3 square metre area. Ceramic tiles keep costs low, while metro tiles, glass mosaics or natural stone push the price toward the upper end. Labour alone runs £25 to £60 per square metre for wall tiling, though most tilers apply a minimum half-day charge regardless of area, since a splashback involves cutting around sockets and the hob rather than covering open wall space.
Ceramic Tile Costs
Ceramic tiles cost around £80 to £120 per square metre, supplied and fitted. They’re relatively easy to cut and handle, which keeps labour time down and makes them a good fit for kitchen splashbacks and budget-friendly bathroom walls. This makes ceramic the cheapest standard option for a splashback wall.
Porcelain Tile Costs
Porcelain tiles cost around £90 to £140 per square metre, supplied and fitted. The material is harder and denser than ceramic, so it needs a better blade and more time to cut cleanly, which pushes the price above standard ceramic. The higher cost reflects porcelain’s stronger heat and stain resistance.
Natural Stone Tile Costs
Natural stone tiles cost around £120 to £180 or more per square metre, supplied and fitted. Each stone tile is unique and heavy, and needs sealing and careful handling from a specialist, which explains the jump in price above porcelain. This puts natural stone at the premium end of splashback tile costs.
Pattern and Layout Costs
A herringbone layout adds around 30% to 40% more labour cost than a standard brick-bond layout. A 2 square metre herringbone splashback in Staffordshire runs roughly £159 to £368 total, covering both materials and the pattern labour multiplier. The extra cost comes from the additional cutting a herringbone or chevron pattern needs compared with a simple brick-bond or grid layout.
Should You Install a Kitchen Splashback Yourself or Hire a Tiler?

DIY installation suits a small splashback with a simple brick-bond or stacked layout, while a professional tiler suits herringbone, chevron or large-format installations. Small splashbacks are DIY-friendly when the layout stays simple, such as a stacked or brick pattern followed with a tutorial. A patterned layout raises both the skill needed and the cost of getting it wrong, since mistakes in a visible feature wall are harder to fix than on a floor.
When DIY Works Best
A simple brick-bond metro splashback suits a confident DIY installer. Standard tile sizes and a basic layout need fewer precise cuts, which keeps the risk of error low. A small area, typically 1 to 3 square metres, also limits the cost of any tiles wasted through a mistake.
When to Hire a Tiler
Herringbone, chevron and large-format layouts suit a professional tiler rather than a DIY attempt. A herringbone pattern typically adds 30% to 40% more labour time for a skilled tiler, due to the higher number of precise angled cuts required. Large-format tiles need accurate levelling across a bigger panel, since a single mistake shows across the whole tile rather than a small section.
Cost Difference Between DIY and Professional Fitting
Hiring a tiler for a standard splashback costs £150 to £500 including materials, while DIY installation removes most of the labour portion of that cost. Labour typically runs £25 to £60 per square metre on top of the tile price, so a DIY approach mainly saves this portion. Tile wastage and tool costs reduce this saving somewhat, since a first-time installer typically orders 10% to 15% extra tiles to allow for cutting errors.
What Are the Most Common Mistakes People Make Tiling a Splashback?

The most common splashback tiling mistakes are using the wrong adhesive near the hob, skipping a level datum line, ignoring socket cut-outs, using the wrong spacer size and grouting before the adhesive cures. Each mistake shows up clearly on a splashback, since the wall sits at eye level and every uneven line or gap draws attention immediately.
Using the Wrong Adhesive
Standard adhesive fails behind a hob, where heat-resistant adhesive is required instead. A heat-rated adhesive, typically D2TE class, holds tiles firmly in the zone directly behind a gas or electric hob. Standard flexible adhesive works fine everywhere else on the splashback, away from direct heat exposure.
Skipping the Level Line
Starting without a level horizontal line causes the whole splashback to run crooked. A spirit level marked across the wall before any tiles go up keeps every row straight from the first tile onward. This single step prevents a slow drift that only becomes obvious once several rows are already fixed in place.
Ignoring Socket Cut-Outs
Poor planning around sockets leads to awkward, uneven cuts across the splashback. Setting tiles from the centre of the wall outward balances the cuts at both ends, including around sockets, so no single tile ends up too thin to sit securely. This step matters most on a splashback, since sockets sit directly within the tiled area rather than at its edge.
Using the Wrong Spacer Size
The wrong spacer size throws off the proportion of grout lines across the wall. Metro tiles typically use a 1.5mm spacer, while large-format tiles need a wider 2mm gap. A mismatched spacer size makes grout lines look uneven or out of scale with the tile size chosen.
Grouting Before the Adhesive Cures
Grouting too early weakens the whole splashback and risks tiles shifting out of place. Adhesive needs a minimum of 24 hours to cure fully before grout goes on. Skipping this wait time is one of the most common causes of cracked grout lines and loose tiles within the first few months.
What Do You Need to Consider Before Buying Splashback Tiles?

Hob type, tile material, splashback height, tile size and budget are the main factors to consider before buying splashback tiles. Each factor narrows the choice differently, since a gas hob needs stronger heat resistance than an induction hob, and a small kitchen needs a different tile size than a large one.
Hob Type
Hob type decides how much heat resistance the splashback tile needs. A gas hob produces direct open flame, so the zone behind it needs a heat-rated adhesive and a tile material like porcelain or toughened glass. Induction and electric hobs generate less direct heat, which gives more flexibility in tile material choice.
Tile Material
Porcelain offers the strongest all-round performance for a splashback, ahead of ceramic, glass and natural stone. Low porosity keeps porcelain resistant to heat, grease and staining, while natural stone needs regular sealing to reach a similar standard. Budget and desired look both affect this choice, since porcelain and ceramic cost less than natural stone.
Splashback Height and Wall Size
A standard splashback runs 450mm to 600mm high, from the worktop to the underside of the wall cabinets. Full-height splashbacks extend beyond this, running from the worktop to the ceiling for a feature-wall effect. Measuring the exact wall area, including the width, prevents ordering too few or too many tiles.
Tile Size
Tile size should match the size of the kitchen and the splashback wall. Small kitchens suit smaller formats like metro or mosaic tiles, while large kitchens suit large-format tiles for a cleaner, seamless look. A mismatched tile size, such as a large-format tile on a narrow wall, can look out of proportion.
Budget
Budget affects both the tile material and the layout pattern chosen. Ceramic tiles cost around £80 to £120 per square metre supplied and fitted, porcelain costs £90 to £140, and natural stone runs £120 to £180 or more. A patterned layout like herringbone adds 30% to 40% more labour cost on top of the material price, so layout choice matters alongside material choice when setting a budget.
How Do You Measure for Kitchen Splashback Tiles?
Measure the width and height of the wall between the worktop and the underside of the wall cabinets, then add 10% to 15% extra for cutting wastage. A standard splashback height runs 450mm to 600mm, so this range gives a useful starting point before taking exact measurements on site. Getting this measurement right prevents ordering too few or too many tiles for the job.
Measuring the Width
Measure the full width of the wall area from edge to edge, including any gaps between units. If the splashback sits between two cabinets or appliances, measure the exact gap rather than the wall’s total width. This figure sets the horizontal coverage needed for the tile order.
Measuring the Height
Measure from the worktop surface up to the underside of the wall units, or to the ceiling for a full-height splashback. A standard gap of 450mm to 600mm applies where wall cabinets sit above the worktop. A kitchen without wall cabinets allows a taller splashback, since the wall runs further before hitting any obstruction.
Calculating Total Area
Multiply the width by the height to get the total square metre area, then add 10% to 15% for wastage. This wastage allowance covers cuts around sockets, corners and the edges of the wall, since these cuts often can’t reuse the offcut elsewhere. Ceramic and metro tiles need less wastage allowance than patterned layouts like herringbone or chevron, since angled cuts create more unusable offcuts.
Accounting for Sockets and Fittings
Measure the position and size of every socket and switch within the splashback area before finalising the order. Marking these positions on a simple sketch helps a tiler or DIY installer plan cuts from the centre of the wall outward, keeping the cuts at each end balanced. Missing a socket measurement is one of the most common reasons for reordering tiles mid-project.
How Many Kitchen Splashback Tiles Do You Need?

Divide the total splashback area in square metres by the coverage of a single tile, then add 10% to 15% extra for cutting wastage. This calculation gives an accurate tile count for any format, from metro to large-format. Getting the count right before ordering avoids a second, smaller order at a higher unit cost.
Calculating Tile Count by Size
Standard metro tiles at 200mm x 100mm cover 0.02 square metres each, giving around 50 tiles per square metre. A mosaic sheet at 300mm x 300mm covers 0.09 square metres, so roughly 11 sheets cover one square metre. Large-format tiles at 600mm x 1200mm cover 0.72 square metres each, so under 2 tiles cover the same area.
Adding Wastage Allowance
A 10% to 15% wastage allowance covers cuts around sockets, corners and wall edges. A simple brick-bond or grid layout needs closer to 10%, since fewer angled cuts go to waste. A herringbone or chevron layout needs closer to 15%, since angled cuts produce more unusable offcuts.
Example Calculation
A 2.5 square metre splashback needs roughly 138 standard metro tiles once wastage is added. This figure comes from 125 tiles for the base area, plus 10% extra for cuts. The same 2.5 square metre area needs only 4 large-format tiles at 600mm x 1200mm, plus one extra tile to cover wastage.
Ordering Extra for Future Repairs
Keeping 2 to 3 spare tiles beyond the wastage allowance covers any future repairs. A cracked or chipped tile becomes harder to replace once a specific batch or dye lot sells out. Storing spares from the original order guarantees a colour match if a repair is ever needed.
How Do You Care for and Maintain a Tiled Splashback?

Wipe a tiled splashback daily with a mild, non-abrasive cleaner and reseal grout lines once a year to keep the surface hygienic and stain-free. Regular cleaning stops grease and food splashes from building up on the tile surface, since dried grease becomes harder to remove the longer it sits. A consistent routine keeps both the tiles and the grout lines looking new for longer.
Daily and Weekly Cleaning
A soft cloth and mild, non-abrasive cleaner remove daily grease and food splashes from a tiled splashback. Glazed ceramic and porcelain both resist staining, so a quick wipe after cooking prevents marks from setting into the surface. Abrasive scourers and harsh chemicals scratch the glaze over time, which then makes the tile more likely to hold future stains.
Caring for Grout Lines
Grout needs resealing roughly once a year to stay water-resistant and stain-free. Unsealed grout absorbs grease and moisture faster than the tile itself, since grout carries a more porous surface than a glazed tile. A yearly reseal keeps grout lines looking clean and prevents mould or discolouration from building up between tiles.
Maintaining Natural Stone Splashbacks
Natural stone tiles need resealing more frequently than ceramic or porcelain, due to their higher porosity. A stone splashback benefits from a sealant check every 6 to 12 months, since porous stone absorbs stains faster without this protective layer. Skipping this step raises the risk of permanent staining from oil, sauce or wine splashes.
Dealing with Heat Behind the Hob
The zone directly behind the hob needs a heat-resistant tile and adhesive combination to avoid long-term damage. Porcelain and toughened glass both handle direct heat well, so cracking or discolouration is less likely in this zone over time. Checking this area periodically for hairline cracks catches early heat damage before it spreads across the tile.

Here at Tile Mountain, we not only have a huge range of tiles to suit every purpose, we also have a wealth of tiling knowledge gained from over 30 years in the tile industry, (which we’ll do or best to share with you across these very pages).
Whether you’re looking for the perfect tiles for your next home improvement project, are searching for some style inspiration, or simply need a bit of help and advice, you’re in the right place.